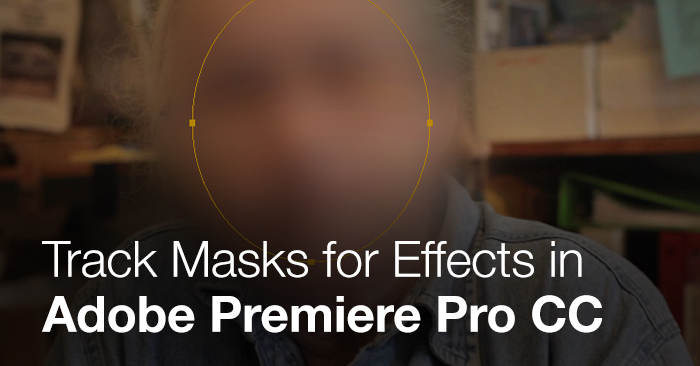
Hide a Face in Premiere Pro: New Feature

The next update of Premiere Pro that Adobe has some major new time saving features, with one of the biggest additions being the ability to quickly track effects.

Check out the Premiere Pro Blog and Adobe TV for an overview of all the new Premiere Pro CC features.
The ability to track effects is a common request, as you often need to be able to blur or otherwise obscure someones face/product because of permission/copyrights. You can also use this on a color correction effect to relight part of the frame. This is huge in that you can now do more of your work in Premiere Pro without switching to After Effects.
Lets jump in and look at how you set this up…
1. Apply an effect in Premiere Pro. You can apply a mask to any effect in Premiere Pro CC. This will also work on third party effects that are installed. At the end of this post I have an example where I used Red Giant Colorista to brighten the talents face.
In my example I used fast blur. You can adjust the settings in the effect controls panel.

2. Click the Create Ellipse Mask icon. You will see options for Mask Path, Mask Feather, Mask Opacity, and Mask Expansion. These options are the same that you have in After Effects when working with masks.


3. Click on Mask in the Effect Controls. Mine is called Mask 1 (if you have multiple masks a number will added to each one).
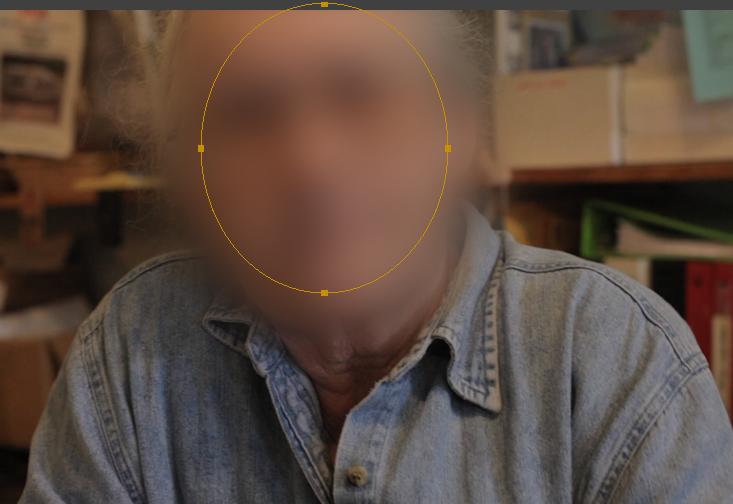
This allows you to move the mask in the Program Monitor so it is covering the person’s face. You can adjust the mask shape by clicking on the squares on the mask and dragging them so they fit your subject.
Adjust the feather to soften the edge of the mask, and increase the mask expansion so you don’t see the person’s face. You can also rotate the mask by moving your cursor outside of the mask and dragging.
Check the “Repeat Edge Pixels” box so you don’t a fringe/halo on the edges of the frame.
4. Make sure you are on the first or last frame, then click either “track selected mask forwards or backwards” button.
The default track type is Position, Rotation, and Scale. This is accessed from the wrench icon. You can also pick position or position and rotation.
![]()
You can adjust and keyframe the feather/expansion, amount of blur and the blur dimensions after you apply the track…handy if your mask needs some adjusting.
Let’s take a look at a few examples using different effects in Premiere:
Tracked blur in Premiere Pro:
Tracked mosaic in Premiere Pro:
Tracked Colorista in Premiere Pro: