How to Edit a Session With Tons of Camera Angles in Premiere Pro

What do you do when you have so many camera angles that the multi-camera monitor is no longer a viable option? Make sure you’re always choosing the best shot possible with this unconventional workaround in Premiere Pro.
When working with projects such as single-camera music videos with performance footage and a narrative element, it’s easy to suddenly be dealing with something like thirty camera angles. At that point using the traditional multi-camera monitor may not be a viable solution, either because your computer can’t handle that many streams without the need of very low-resolution proxies or simply because keeping track of that many thumbnails is very difficult. The process explained in the video below could be the solution you’re looking for. (If you’re following the step-by-step walkthrough below the video, click on the images to enlarge them in a new tab.)
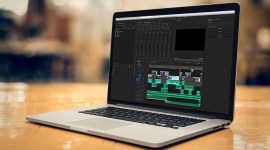
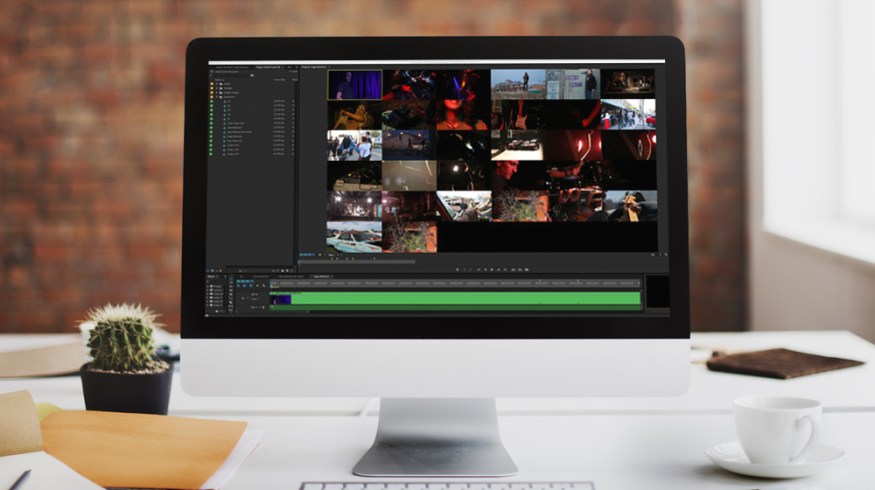
1. Synchronize your footage in a new sequence with a separate track for each angle in the video.

Whether it’s performance footage or a narrative storyline, the first step is very similar to a common approach to creating a traditional multi-camera workflow. As you can see in the image above, there’s a huge number of angles to deal with in this particular example.
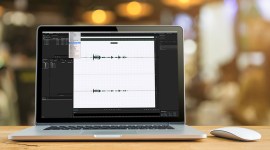
2. Color code groups of tracks that relate to each other so it will be easy to identify them later in the process.

Right-click on each clip in the timeline and select Label to change its color. See the image above for an example.
3. Use the Target Track feature to use this particular approach.

Turn off the V1 Target Track by clicking the highlighted V1 to the left of Video Track 1. Create a new track at the top of all of your clips and name it Print Track. To target this track, make sure that you click on the V32 (or whatever number coincides with your number of tracks).
This means that anything you paste or insert will go directly to this track. Since your Print Track is at the top of the order in your timeline, anything that appears on that track will be seen in the Program window.
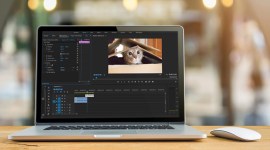
4. Use the Toggle Track buttons to the left of each clip to temporarily make a track viewable in the Program Monitor.

Remember that whatever track is highest in the stack of tracks in your timeline will be viewable as long as the Track Output is enabled. So to see Video Track 1, for example, you would need to turn off each Track Output above it.
5. Now that you’ve targeted the Print Track, anything you paste will appear anywhere the playhead is located.

By using the razor blade (Quick Key: C), arrow (Quick Key: V), and the rolling edit tool (Quick Key: N) in conjunction with the copy and paste commands (Quick Keys: Command+C and Command+V), you can now begin selecting segments from any of your tracks.
Additionally, you can use the up and down arrows to quickly snap the playhead to the beginning or ending of any clip located on the Print Track. This will be very useful when you can’t see the Print Track when choosing content from the lower tracks in your sequence. Pushing the up-arrow key moves backwards in time while the down-arrow key moves you forward in time.
6. Choose your opening shot and let it play until you’re ready to switch to a different angle.

Once the shot is complete, make a cut using the razor blade tool, switch to the arrow tool to select the clip, and hit the up arrow to return to the start of the sequence. (If your clip has empty space between it and 00:00:00:00, then position the playhead at the clip start for this first clip.) Next, hit Command +C to copy and Command +V to paste.
You should now see a copy of the clip in the same point in time on the targeted Print Track. Continue in this manner until you’ve completed your edit.
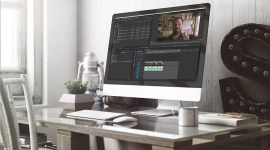
Results: Everything on the Print Track will now reflect your edits and will play back with ease even on a modest system.
This method is time-consuming, but it can be a great solution once you’re able to use the quick-key commands without thinking. I’ve used this method in several scenarios:
1. When there wasn’t disk space or time to make proxies of a very large project.
2. When there were too many camera angles, and flipping between multiple pages in the multi-camera monitor was affecting my edit decisions.
3. When my clients try to edit content for themselves on very modest systems that require so much compression in the proxies that they can no longer tell if the shot is in focus or generally useable.
How do you go about editing multi-angle projects? Share your tips in the comments below!