

Using Screen Blending Mode in After Effects & Premiere

Create complex looks by using Blending Modes in Adobe After Effects & Premiere Pro.
Blending modes let you combine videos in a more complex way than just adjusting opacity. In this post, we take a look at how you can use the ‘screen’ blending mode in your video editing work. The following examples are done in After Effects, but these techniques will also work in Premiere Pro and Final Cut Pro, as each of these applications allows you to apply a blending mode to your video clips.
Click image for larger view:

Using Modes to Composite a Film Flash
Film flashes and light leaks are often used to add a burst of color and style to video footage. With a quick search online you can find light leaks and flashes for your projects as standalone video clips (*see the link below for free downloads). Several commercial film flash and light leaks come with an alpha channel (transparency) already keyed out. Typically these files are videos rendered in the Animation or ProRes 4444 codecs. However, many isolated light leaks have a solid background and no alpha channel (maybe just a solid black background). Here’s a way to blend them together with your video footage.
*Check out this roundup to download a bunch of free light leaks and flashes to use in your video editing projects.
Blend modes (also called blending modes or composite modes) are broken into categories. In After Effects click on “Normal” under Mode and you will see the whole list of available blending modes:
- Anything in the “Darken” category” drops out the brighter part of the image.
- Anything in the “Add” category” drops out the darker part of the image.
- Anything in the “Overlay” category” adds contrast and tends to look like a gradient overlaid on top.
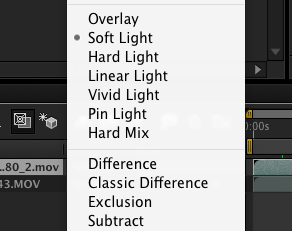
Now, put the film flash in a track above your video footage. Change the blend mode for the film flash from “Normal” to Screen” (see After Effects screenshot below). This will drop out the darker part of the film flash and leave the brighter areas.

Video and Light Flash Elements Separated

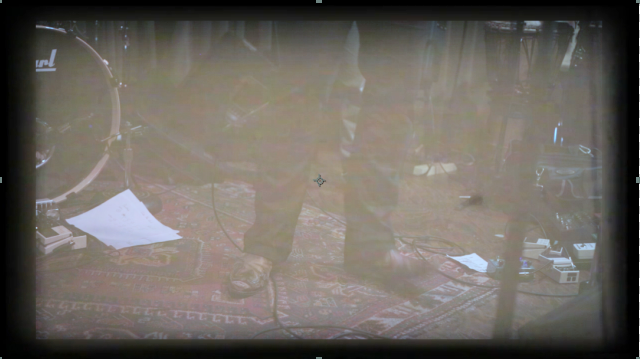
Video and Light Flash Elements Combined in AE

For a different look, change the After Effects blending mode for the film flash from “Normal” to Multiply”. This will drop out the brighter part of the film flash and leave the darker areas.

There may be times when you completely want to strip out the black background behind a light leak or other light effect. For example, stock footage of explosions, gunfire, smoke, fireworks, etc. is often laid on top of black. In the following example I used the screen blending mode to remove the black background behind a shot of smoke.

Got footage of isolated film grain? Lay this over your footage and again use “Screen Mode“. Now, you’re footage looks like it was straight out of an old 8mm camera! With the screen mode applied to a light flash or film grain clips you can experiment with the opacity to dial the effect up or down.
In After Effects you can cycle through each of the blend modes by selecting a layer and holding down shift while tapping + or – (note: this only works on a regular keyboard, not the number pad).
Blending modes provide an excellent way to stylize your footage with unique looks and effects – with screen mode being particularly helpful for instantly “keying” out your black background. Try blending modes with still to give your videos a cool layered or textured effect. Don’t be afraid to experiment and have fun with them!


