
Cinematography Tip: How to Create Soft Diffused Light

Soft light is a fantastic resource for any filmmaker. Let’s take a look at ten ways to create soft, diffused light on a film set.
Every great cinematographer has a deep understanding of the way light works. Unfortunately, many indie filmmakers focus way too heavily on the gear and not the actual image they’re shooting — especially when it comes to light. Let’s take a closer look at lighting and discover a few ways to create a soft, cinematic look.
Hard vs. Soft Lighting

This lighting would be considered hard lighting because of the harsh shadows.
In film, video, and photography, there are two big categories of light: hard light and soft light. You can easily figure out if your light source is hard or soft depending on the shadows. Hard lights will have shadows with very sharp edges, whereas soft light will have shadows with soft edges or no defined edges at all.

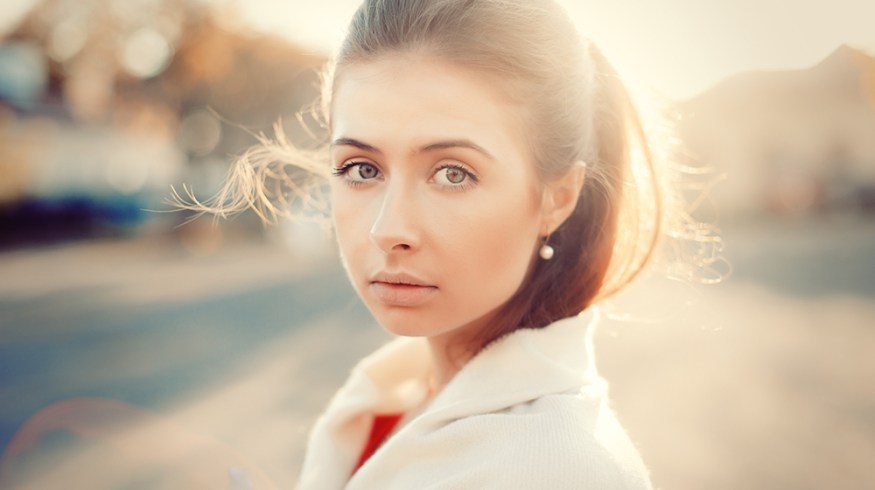
This is an example of soft lighting. Notice how the shadows are barely visible.
The thing that makes a light either soft or hard is the relative size of the light source. A small source will be much harsher than a larger source. The best example of this is the sky. On a bright and sunny day your shadows will be incredibly sharp because the light source that hits you is (relatively) very small in the sky.
Now contrast a sunny day with an overcast day. On an overcast day, you no longer have a strong single point in the sky hitting your subject, rather the light is diffused across the entire sky. The result is incredibly soft shadows.

Why Soft Lighting Rules
One type of light source is not better than the other. Both hard and soft lights have their own storytelling purposes in both film and photography. That being said, soft light is much easier to work with than hard light. This is for a number of reasons.
First, soft light doesn’t draw attention to shadows as much as hard light. By nature, our eyes are drawn to points of high contrast. If you’re using hard lights, your viewer’s eyes may be focusing on other points in the frame other than your subject. Soft light helps make your subject look as good as possible by minimizing wrinkles and blemishes, which is incredibly important for commercials and corporate videos.
When shooting with hard light, it’s not uncommon to have to have your subject stay in a very particular place. But when shooting on soft lighting, you typically have more freedom for your subject to move around the frame.
Diffusion Techniques
In a nutshell, diffusion changes the relative size of a light source. For example, if we were to place a white sheet between your subject and a floodlight, we would get much softer shadows than if we simply hit the subject directly with the floodlight.
It’s important to emphasize the word relative size here. While a softbox may produce soft shadows on a human when 5 ft away, it will likely produce sharp shadows on a car. In ideal soft lighting scenarios there’s a direct relationship between the size of your subject and the recommended size of your source light. As your subject gets bigger, so should the size of your light source (if you want soft shadows).
Let’s break down a few ways to get softer light on set.
1. Diffusion Paper

Diffusion paper is a great option if you want to soften your lighting up just a bit. The “paper” is usually clamped to the barn doors of a light. The result isn’t dramatic, but it is subtle enough if you’re trying to soften up the overall look. Some people use wax paper instead of diffusion paper to get the same effect. While this may work with LED lights, you shouldn’t use wax paper on a tungsten light as the paper can catch fire.
Price: $12
Diffusion Paper Tutorial
This cinematography tutorial by Tom Antos shows us how he uses diffusion paper when lighting a scene.
2. Softboxes

A softbox is incredibly versatile on set, making it a great key, fill, or back light for your subject. The softness of the light produced from a softbox depends on the size of the face. In general, larger softboxes will produce softer light than smaller softboxes.
Be careful when looking for softboxes online. There are a lot of really terrible softbox brands out there that target indie filmmakers. These lights break easily and have horrible color casts. I recommend using a simple Lowel softbox kit if you’re just starting out.
Price: $200+
Softbox Tutorial
In this tutorial from DiCasaFilm, we take a look at how to do a basic three point light setup using only softboxes. Notice in the tutorial how the distance of the light source determines the intensity of the light hitting the subject. This is because of a phenomenon called the inverse square law. For more info on this subject, check out the article Inverse-Square Law: The Nerdy Term Every Photographer & Filmmaker Should Know here on PremiumBeat.
3. Umbrellas

Umbrellas are similar to softboxes in that they are usually attached to a light source. Depending on the type of umbrella you are using, you can either shoot through the umbrella or bounce light off the umbrella onto your subject.

Some umbrellas are made up of a white cloth and others are made up of a metallic material. Both are good and both can produce soft light depending on the material and the distance from the subject.
Price: $20
Umbrella Tutorial
This tutorial from Chan Ting Lin shows us a few techniques for using umbrellas to create soft diffused light. One technique mentioned in the tutorial is to use a gold umbrella if you are wanting to warm up the skin tones in your scene. The tutorial also compares reflectors, softboxes, and barn doors, so it’s a really good watch if you have time.
4. China Balls

If you’re looking for incredibly even lighting to add to your scene, a china ball is a great place to start. They’re incredibly cheap and the light they produce is just the right kind of soft. The only downside to working with china balls is the fact that they are hard to mount. But if you’re willing to work with them, they can give you nice soft light for very little money.
Price: $2
China Ball Tutorial
This video tutorial from Film Riot shows us how to use China Balls with a dimmer to get dynamic lighting on-set.
5. Silks/Scrims

A silk is typically placed on a separate stand between your subject and your light source. Silks can be large (up to 20 ft. x 20 ft.) or small. On a film set you will normally hear silks referred to by the size of the metal frame around them. Common sizes include 4×4, 6×6, 8×8, and 12×12.

Image via LightingIntensive
If you’re on an indie budget, you don’t necessarily have to buy a “professional” silk to get a similar light effect. Most of the time you can get away with just suspending a white sheet or shower curtain between your subject and the light source. Be sure to bring lots of sandbags when using silks. If the wind catches your silk just right, it might fall and hurt somebody!
Price: $20+
Silk/Scrim Tutorial
In this super helpful tutorial from Sea & Sky Films we take a look at how to use silks/scrims to create incredibly soft lighting when outside.
https://vimeo.com/55774497
6. 5-in-1 Reflector Diffusion Screen

If you don’t already have a 5-in-1 reflector, stop reading this article and go buy one. There is no lighting tool more essential to indie cinematographers than a 5-in-1 reflector. The inside of a 5-in-1 is made up of a light diffusion fabric that can be used to cut light from a bright light source. They can be mounted to a c-stand or held when you’re in a pinch. I often use these diffusion screens when outside in direct sunlight.
Price: $17
Reflector Tutorial
In this tutorial from the good people at Videomaker, we take a look at the light differences between reflector, diffuser, and white board light.
7. Bounce Light Off the Ceiling or Wall

If you’re working in a boring office space or home (or if you’ve simply forgotten your softbox) you can always bounce light off of the ceiling. This technique essentially turns the entire wall into one big soft light. I typically use this technique if I want to light an entire room evenly. Just keep in mind you’ll need a powerful light if your room has tall ceilings.
Price: Free (If you have a light)
Bouncing Light Tutorial
While this tutorial is about bouncing light using a speedlight, the same concepts can be applied to film lighting. Notice in the tutorial how the light changes depending on the angle in which the light hits the wall.
8. Shade

If you’re shooting outdoors and looking for soft light, try to find some shade. Instead of diffusing the light, shade will completely cut off the main light source. Instead of being lit from the sun, your subject will be lit by light bouncing off of objects from all around you.
One thing to look for when shooting in the shade is blown-out backgrounds. Because your subject will be out of direct sunlight, there’s a really good chance that your background will be incredibly bright. Just keep this in mind when framing up your shot. There’s also the chance that your lighting may change while shooting in the shade, so it’s best to shoot in the shade if you’re shooting a short scene.
Price: Free
9. Windows

Another option for getting soft light is to put your subject near a window. Windows produce incredibly bright and soft light and it’s not uncommon for photographers to use this light to their advantage. Filmmakers are a little more limited when it comes to window light, as light could possibly change as the day progresses. But if you need soft light quick, a window is a quick and easy way to do it.
One thing to consider when shooting near a window is color casts. Lights in your home are typically tungsten balanced (orange) while sunlight coming through a window is typically daylight balanced (blue). In order to avoid shooting in mixed lighting, you may want to invest in a CTO daylight conversion filter to place over your window.
Price: Free
10. Book Lighting

Image from Hurlbut Visuals
There’s another popular lighting technique that’s been making its way through the filmmaking world called book lighting. Book lighting is essentially a double diffusion technique that always uses at least 1 silk. The trick with book lighting is to not have the physical light source pointed at your subject. Instead your light will bounce from one source then hit a silk. The result is a very soft glow. Book lighting should be used if you want the softest light possible. Keep in mind: setting this up can take a while.
Price: Silk + Bounce + Light = $100+
This tutorial from Shane Hurlbut shows us how to create indoor book lighting using a softbox and a silk.
Have any tips for creating soft light? Share in the comments below.


