
The Basics of Color Grading with Curves
When your color grading needs subtle adjustments, working with curves gives you the control you need.
Top image via Shutterstock.
I spent many nights as a teenager messing around with curves in Adobe After Effects 7.0 and then CS4. I devoted hours and hours to mastering the “film look.” To some extent, I grew as a creative as After Effects evolved as a compositor, but one thing that didn’t change for many years was using curves for color grading. At 17, I tried DaVinci Resolve, and quickly closed the application, thinking I would never be able to master it. Until only a few years ago, I relied on these basic color grading tools before advancing into Resolve.
If you’ve been working with color balance controls, or if you’d like to learn color grading from the ground up, working with curves allows you to adjust individual color channels. This is an important skill to master if you ever need to tweak the color balance controls that alter all channels simultaneously.
So, let’s have a look at the basics of using curves.
Luma Curves
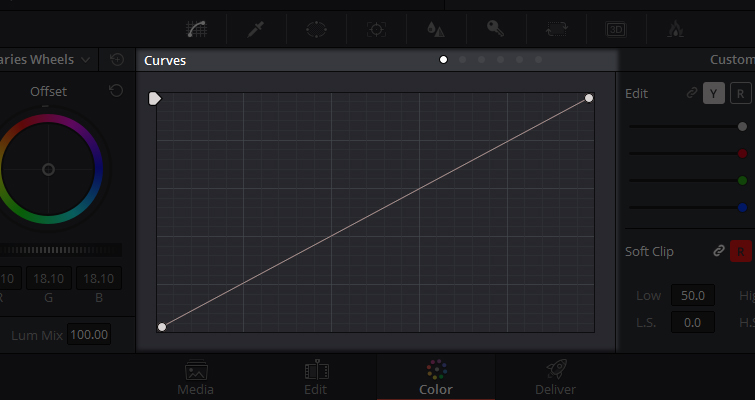
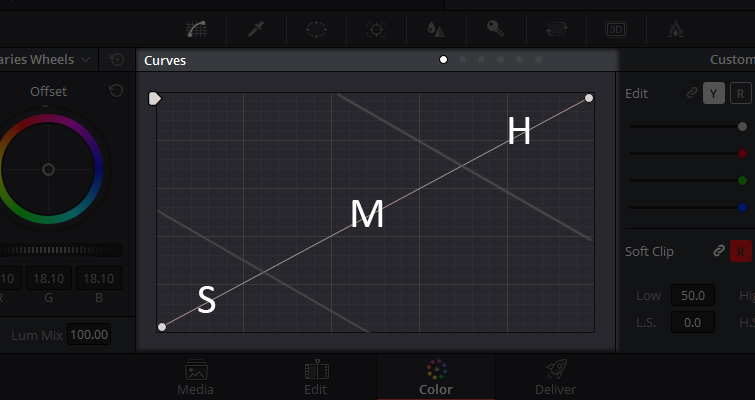
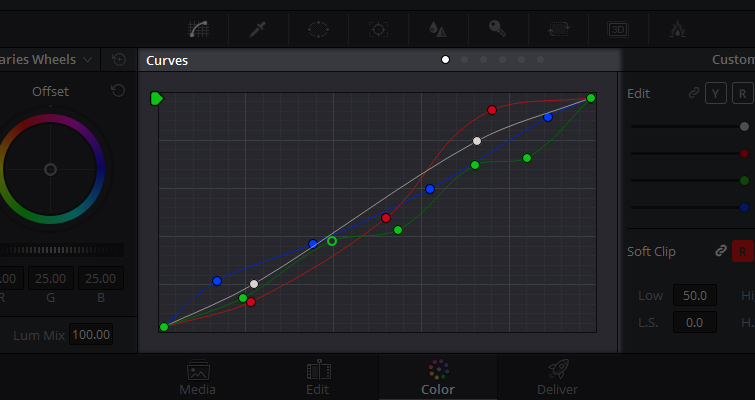
This is how a curve box looks in most applications. It’s a two-dimensional graph, most often a square but sometimes a rectangle. The graph will have a straight line that runs from the bottom left to the top right corner. This line — even though it’s straight — is called the curve. Each curve will let you adjust a region of the image based on the tonality, which is the zones of lightness or darkness (or the individual color channels). The bottom of the graph represents the shadows; the top represents the highlights, and the midtones are in-between.
See the breakdown below for a visual representation.
No matter which application you’re using, curve controls will always work the same way. You click on the source curve to create a control point, and then you make your adjustment by dragging that control point in the desired direction. You can add as many control points as necessary.
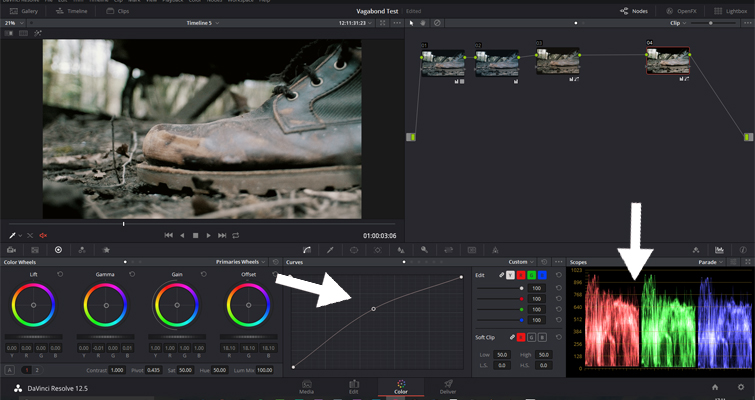
Here, I’ve added a control point to the center (the midtones region). If I push the control point up, it creates a curve that lightens the entire image because there are no other control points to halt the curve movement; both the shadows and the highlights increase.
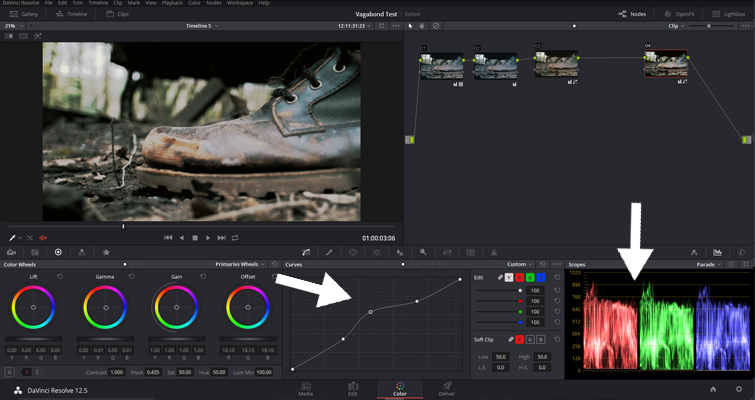
If we want to affect only the midtone region, we would create two control points on either side. Now, when we increase midtones, it doesn’t affect the darkest and lightest values of the image.
You can typically remove a control point by right-clicking and selecting “remove” or dragging that curve to the top of the graph. Once that control point is gone, the curve will base its shape on the remaining control points.
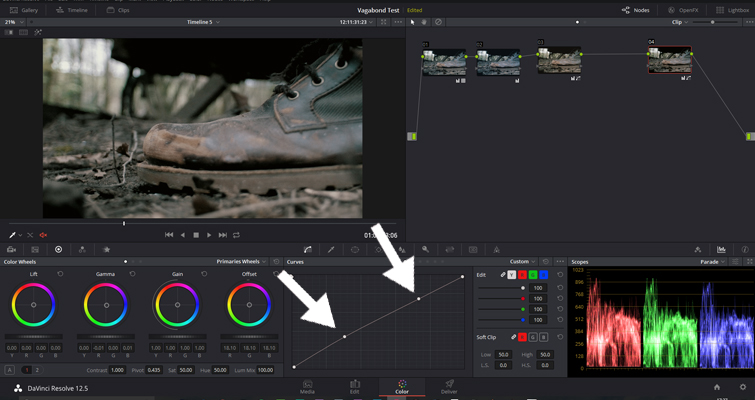
You can also move the two anchor points. Here, you can expand and compress the black point and the white point, which is similar to increasing or decreasing the lift and gain.
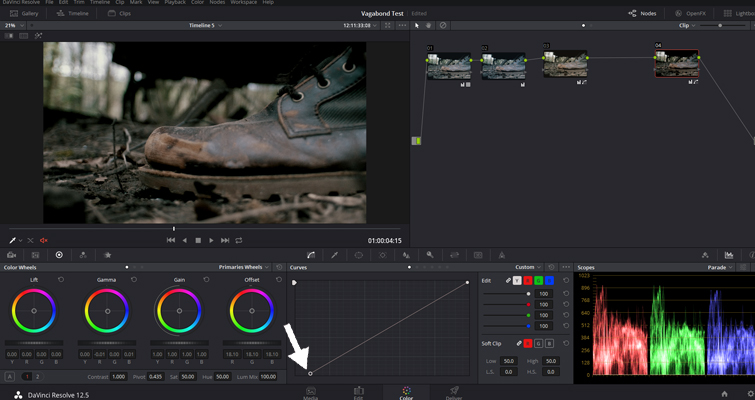
The image below is the same effect as above but with the lift controls adjusted.
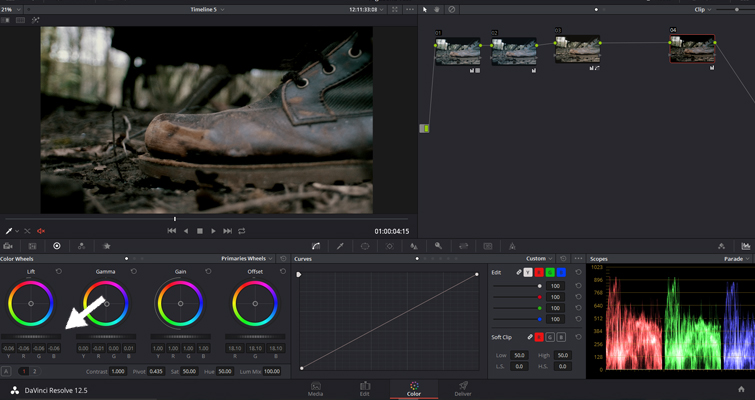
The initial luma curve box will be your control center for the luma controls. You can adjust the highlights, you can crush the blacks, and you can increase contrast with the famous S-curve.
RGB Curves
Most applications also include an RGB color adjustment curve. It’s usually next to the luma curve or tucked away in a drop-down menu.
RGB stands for the red, green, and blue color channels. Each of these color curves will control the intensity of the respective color component in the image.
Much like the luma curve, you can adjust the primary color channels by creating a control point on the individual color curve. If you want a red tint that affects the entire picture, simply create a control point in the center and raise the curve up. However, this sort of adjustment is typically only for extremely creative uses. Let’s have a look at more a more practical adjustment of the RGB curves.
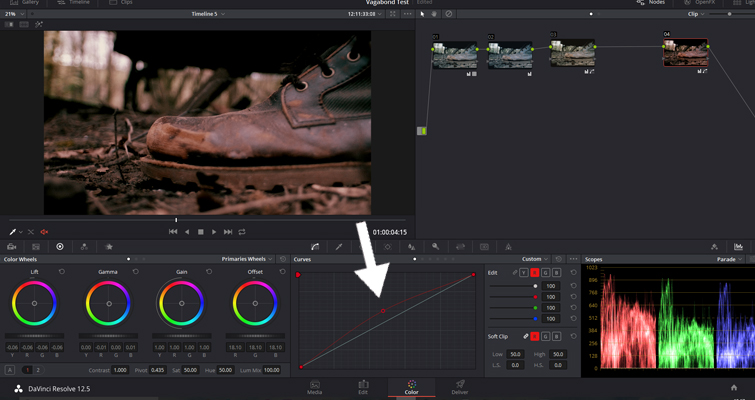
I’ve finished my initial grade of the shot below, I love how it looks, and the colors are working well, but I feel like there’s a little too much blue overall, and it’s making it feel cold when it should be a beautiful, warm summer evening.
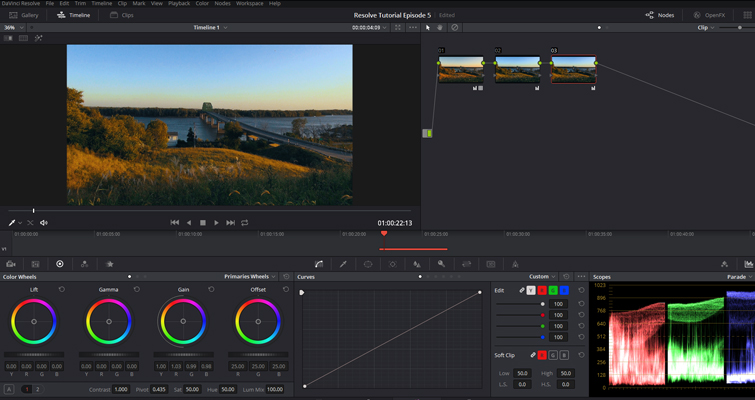
We could just add a touch of red to the gain controls as you can see below; however, this has also given the grass a reddish tint, which I don’t want. To correct this, I’d have to either use the color qualifier or apply a parallel node to push the greens back in — two extra steps we can avoid by using the curve control.
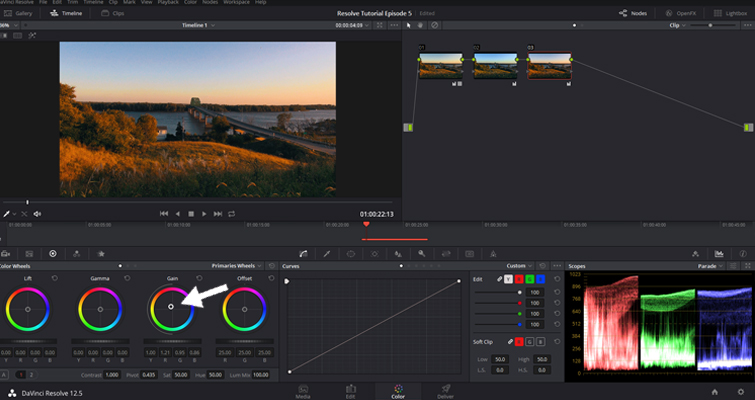
To remove those extra steps, we’re going to open the red channel control in the curves panel and create a point in the highlights region and drag the red up, which will add a warm glow to the sky.
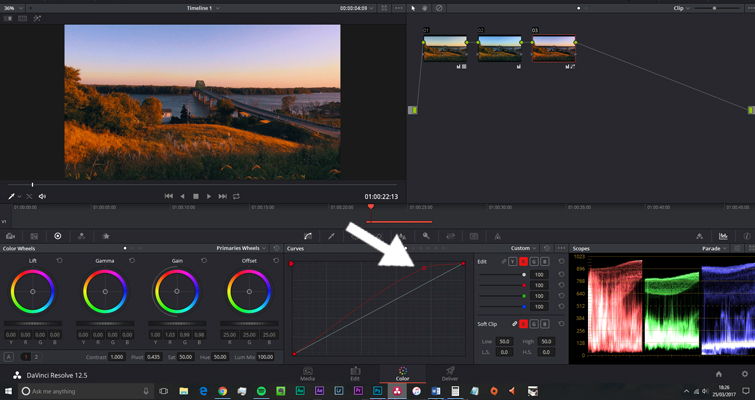
The problem is that it has created the same issue that we had with the gain control: we now have red creeping into the midtones of the grass. To correct this, we simply need to add a control where the midtone region starts and lower the curve back down to its default position.
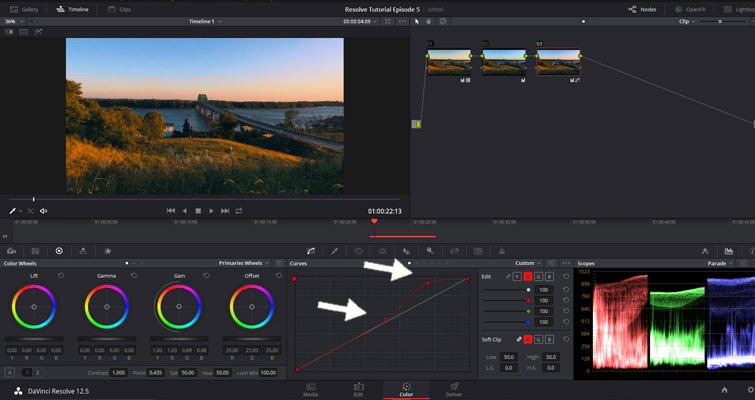
Now the highlights in our sky have a nice, warm glow, and the color of the grass remains faithful to the scene’s neutral palette. When trying to remove a particular color cast or highlight an individual issue with your image, it’s best to keep the RGB parade active alongside your curves. The parade directly mirrors the RGB curves and will give you an instant guide to work with.
Hopefully, you now understand how curves work and how useful they can be. The changes you can make range from the full scope of color data to the narrowest adjustment.
Do you have tips for working with curves? Let us know in the comments.


