

Create a Whip-Pan Using Built-In Effects in Premiere Pro

Add energy to your video editing project with a whip-pan transition in Premiere Pro.
If you need to quickly transition from one piece of footage to another than why not try a whip-pan? A whip-pan, or swish-pam, is a quick blurry transition that’s meant to emulate a camera quickly panning from side to side. The result is a very fluid transition that can add energy to your project – but use it in moderation! When overused it can begin to look gimmicky.
There are no whip-pan transitions in Premiere but the following video tutorial created by Ann Bens Tutorials demonstrates how how to simulate the effect using built-in tools.
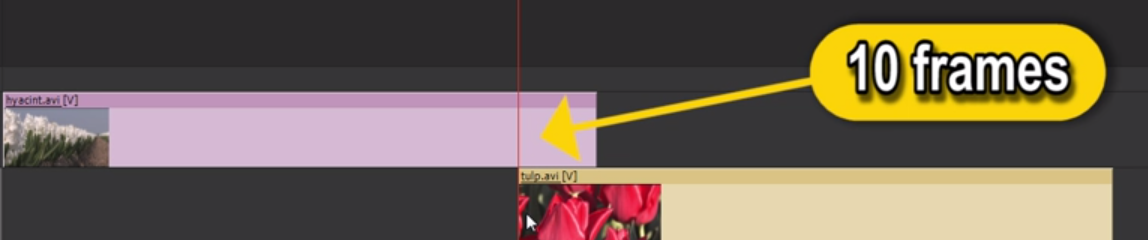
1. Overlap your footage in the timeline
Overlap your footage by the amount you want the whip pan to be. The video recommends 10 frames.
2. Cut the parts that overlap
Slice up the overlapping clips on only the parts that overlap.

3. Nest the overlapping parts
Select the overlapping clips, right click, and select ‘nest’.

4. Set Position position keyframes to simulate a wipe
Using the x position in the effect editor set your keyframes so that the entire transition features one clip moving in and one clip moving out.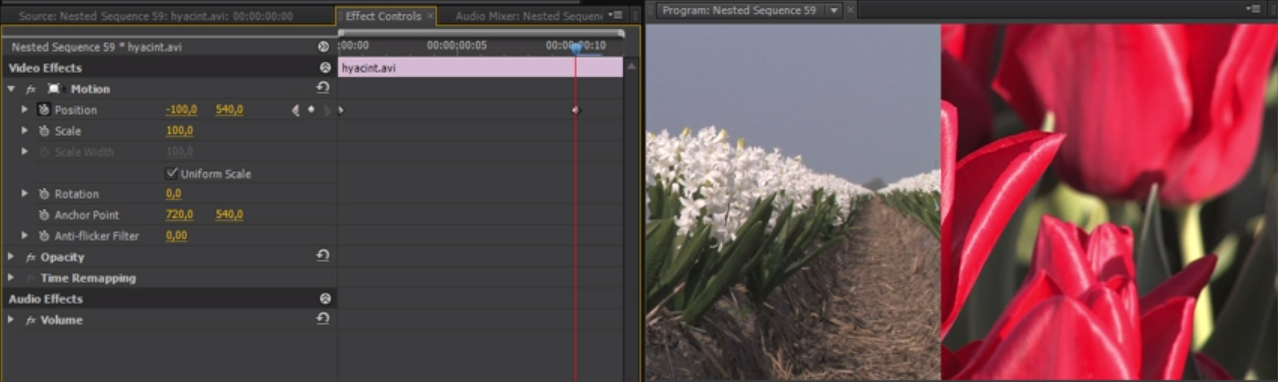
5. Add a directional blur
Add a directional blur from the effects browser. Set the directional blur to your desired amount along the x-axis.

6. Color correct for edge blackness
The directional blur will make your transition a little more dark than it needs to be. To fix this problem add the ‘Levels’ effect and adjust your black, white, and gamma point until it looks natural.

This video was first shared on the Ann BensTutorials Vimeo page. Thanks for sharing!
If you don’t want to make the whip-pan yourself there’s a free swish plugin on Toolfarm’s website.
Have any tips for creating a swish pan in Premiere? Share in the comments below.


