Create Master Text Styles in Premiere Pro’s Essential Graphics Panel
The Essential Graphics panel in Adobe Premiere Pro offers a drastically different workflow from the original Title Tool panel. See how easy it is to create repeating titles and graphics.
Top image via Shutterstock.
Working with text in Adobe Premiere Pro has always been a bit clunky, so I was happy when the latest update introduced the new Essential Graphics panel — an entirely new panel dedicated to working with graphics. Adobe is clearly trying to make the interface of Premiere similar to Photoshop and After Effects, which I love. You now have a Type tool, and you can layer graphics — you can even create master text styles and motion graphic templates. I want to take a closer look at using the master text style feature.
Let’s say I’m working on a travel series, and I’m making a video every few weeks. Naturally, I want these videos to have the same look from episode to episode. I want to use the same style of graphics for each episode, which consists of two different text styles. I’m going to show you how, in three simple steps, you can create a text style that you can reuse throughout your project, significantly reducing your editing time.
Let’s get started.
Step 1 — Create and Design the Text
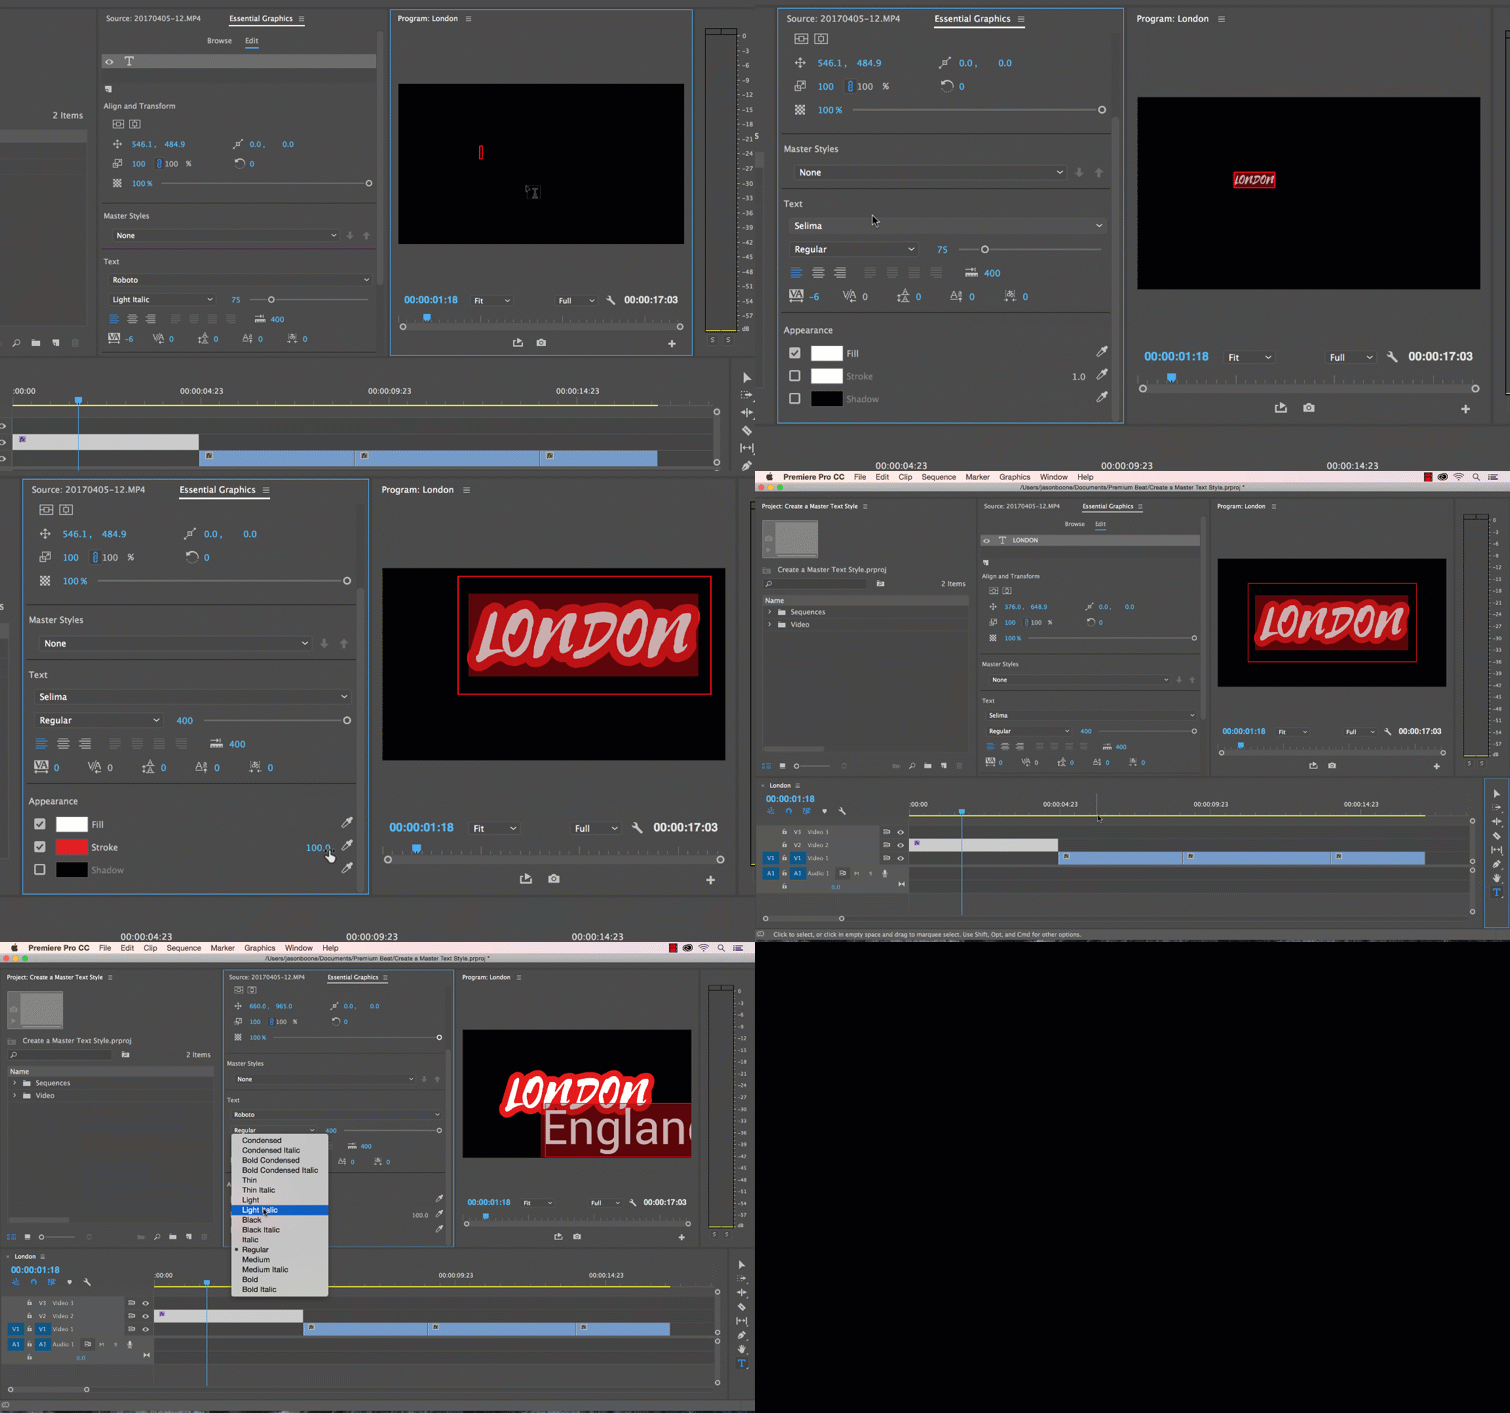
For the first step, I’ll use the Type tool to create a new text layer. I’ve opened Premiere’s new Essential Graphics panel so I will have all of the new text properties available. I want LONDON to be the main part of my graphic, with ENGLAND as a smaller subtitle. After I type LONDON, you’ll notice that a new text layer appears. If I select the text layer, I can make adjustments to properties in the panel. For this title, I’ll scale it up, change the font, and add a stroke. Next, I’ll click the New Layer button in the Essential Graphics panel to add my ENGLAND subtitle. I want ENGLAND to be small and simple. Next, I’ll save it out as a master style.
Step 2 — Create a Master Text Style
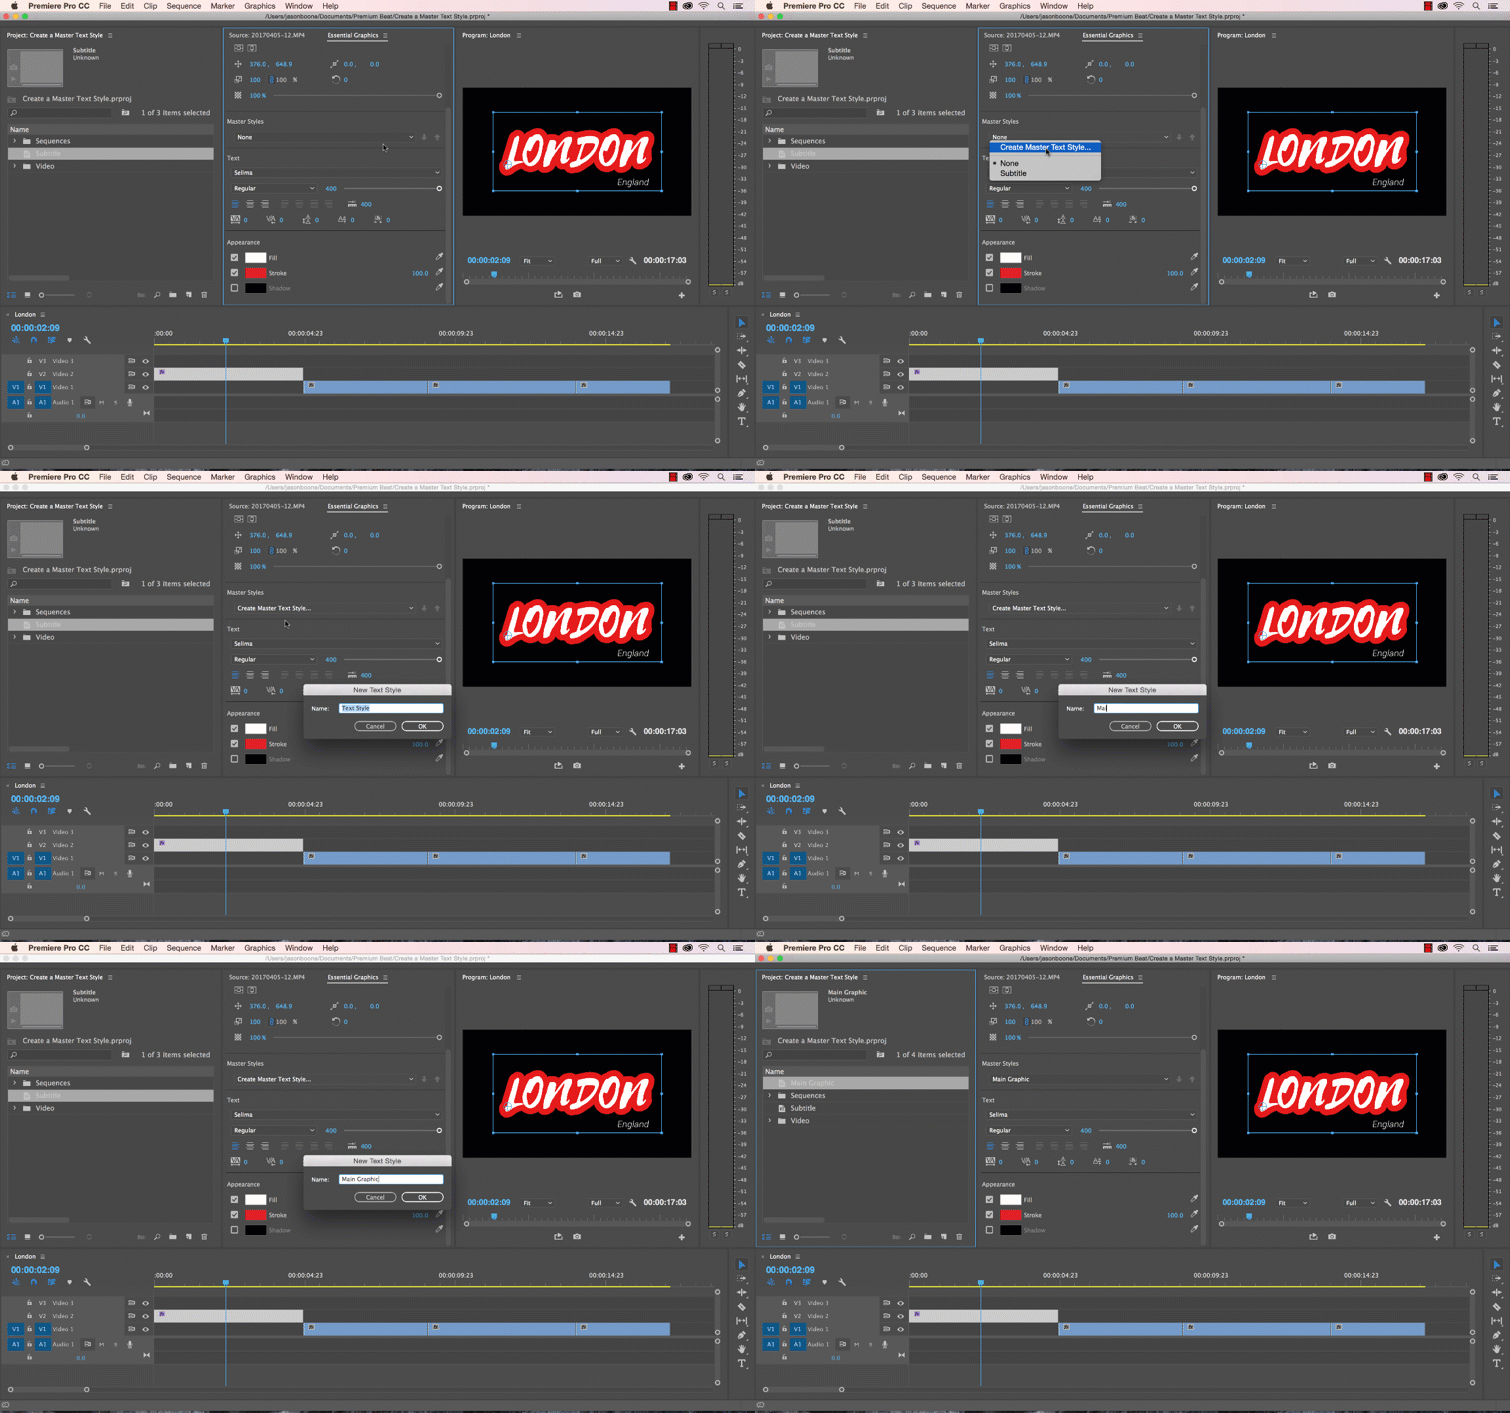
As I stated earlier, if I’m working on a weekly series, I will want the same look for the graphics in each episode. This is where the master text style comes into play. To save a text style for future use, I first need to select a text layer. With my LONDON layer selected, I can now go over to the master style drop-down menu and select Create New Master Text Style. I’ll name the new style MAIN. When you create a new style, the program saves all of the properties under the Text and Appearance sections of the Essential Graphics panel. For my final step, I’ll apply the style to additional text in the project.
Step 3 — Apply the Master Text Style
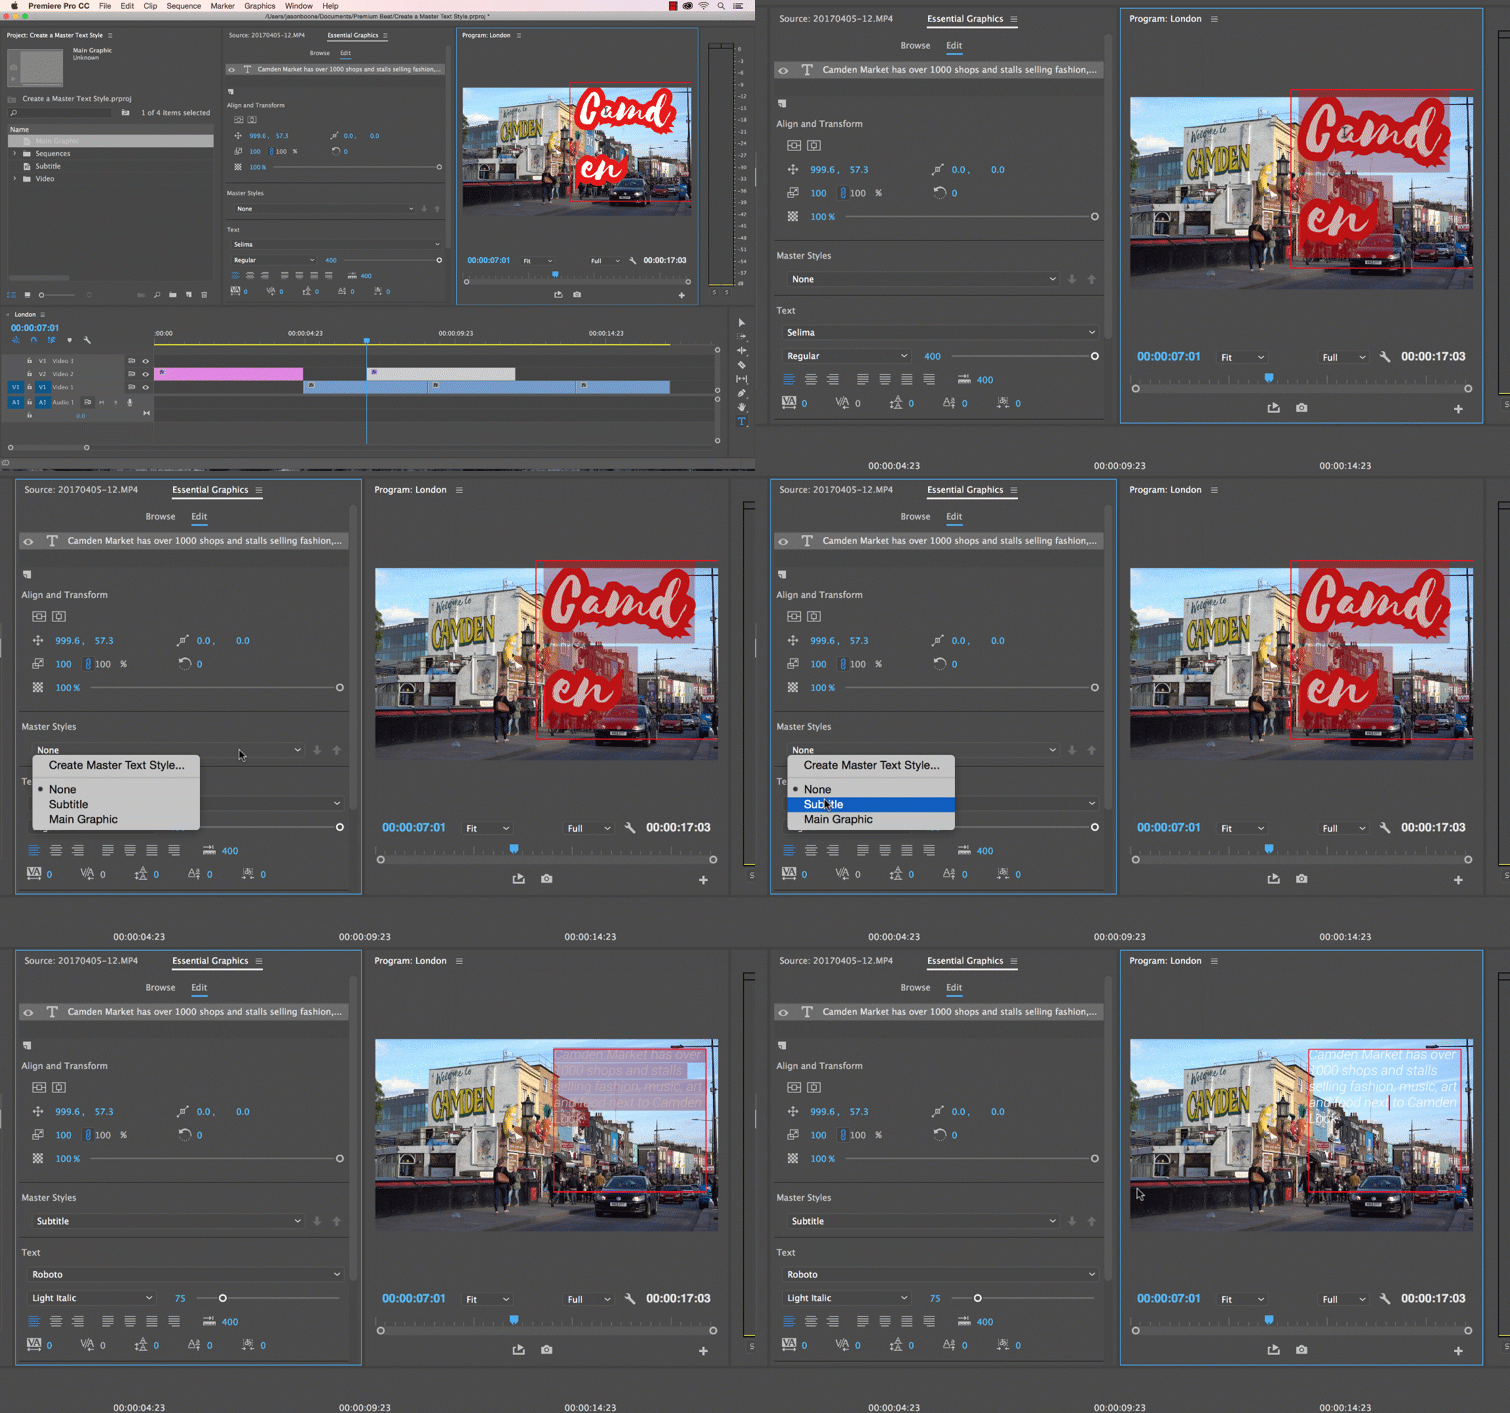
Now that I’ve created a new master text style, I will apply it to other graphics. I’ve created additional text in my project, and I want this text to have the same look as ENGLAND. I can use the Type tool to select a region of the screen where I want to place a paragraph. After typing in my text, I will apply the subtitle master style. To apply, select the text layer and then choose the corresponding style in the master style’s drop-down menu.
Do you have tips for working with the Essential Graphics panel? Let us know in the comments.


