

Check Out The Newest Audio Features in Resolve’s Edit Page

DaVinci Resolve’s new Fairlight Audio Page includes some great new features. But if you still need to control audio on the edit page, here’s how.
The Fairlight Audio page is undoubtedly one of the most exciting new features in the latest version of Resolve. However, the audio controls on the edit page itself have also seen changes with a handful of new features. Let’s get up to speed so you can jump into the new version without confusion.
New Mixer
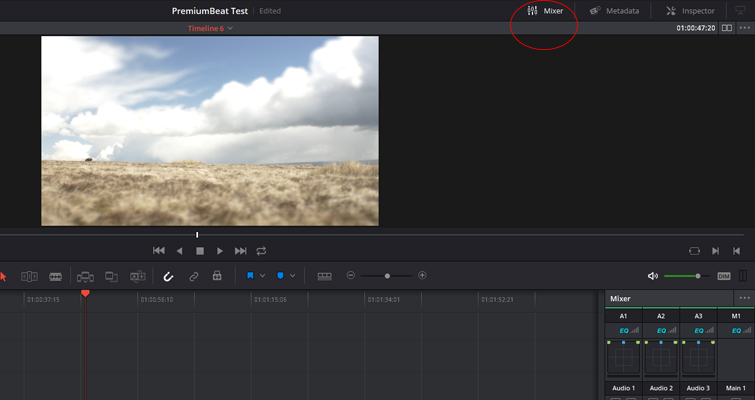
For those who have previously worked with Resolve’s edit page, you may remember that to open the clip or track mixer, you had to click this button above the timeline.

In Resolve 14, this button is now above the viewer, next to the metadata button. For what reason? I’m not too sure. If you ever need to open the mixer panel, it’s more than likely going to be from working on the timeline and not the viewer, so now there’s extra mouse movement to open the panel. Further, there are still audio buttons above the timeline, so it’s not as if the designers of the UI were looking to conserve space. Anyway, you open the mixer by clicking this button.
However, unlike 12.5, we now have a new mixer panel to work with. There’s no longer an option to mix clips in the panel — tracks only.

If adjusting the individual clips is important to you, you can do this very easily by modifying the level bar on the audio clip, or by opening the Inspector panel for a more precise adjustment.
The mixer is simpler in comparison with 12.5. This is because the pro audio editing tools are now on the Fairlight page. For example, you’ll find that the automation features are completely gone from the mixing panel. However, this is not to say that the Resolve engineers have taken away all the cool toys. With the mixing panel fully extended, you’ll see that instead of a simple pan knob, we now have a pop-up pan control (you get here by double-clicking on the simplified version in the mixing panel).

These controls lets you pan a Mono audio track from left to right, invert a stereo channel’s audio, or work on basic surround mixing.
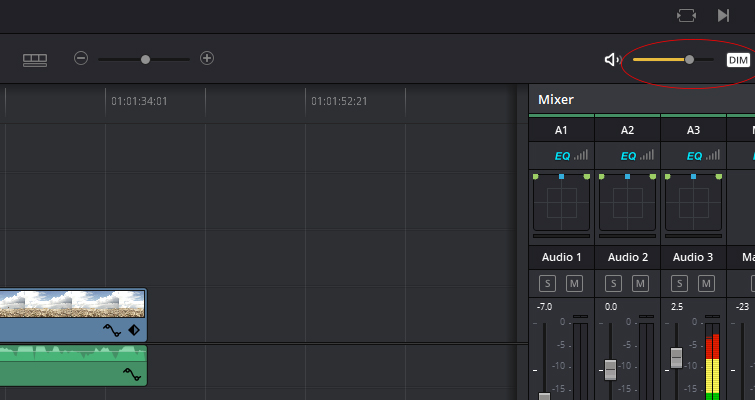
Dim Button
Above the timeline, in place of the mixing button in 12.5, there are now three audio monitoring controls that enable you to control the volume output of your edit. The keyword is monitoring. This means that although these controls will adjust the volume that you hear from your edit, they will not adjust the levels of the actual audio tracks — like changing the slider of the main channel would. There is a visible representation of this: if you decrease the slider to 0, and then press play, you can still see the audio levels moving within the mixing panel. Whereas if we mute audio track A1 by pressing the mute track button, we no longer see audio channel A1 corresponding to the track during playback. It’s an important distinction.

Next to the volume slider is the DIM button, and this is one of my favorite additions to Resolve 14.
There may come a time when you have a client watching the edit with you, and they are giving notes, or perhaps they want to ask a question. There is no longer a need to pause playback or turn the master volume down. The DIM button will simply lower the volume of the main channel, allowing those in the room to speak clearly — and for the edit to remain untouched. You can visually see the dim function is active when the volume slider changes from green to yellow. This is an essential change, as it will stop editors from accidentally increasing the master volume if they forget that the DIM mode is active.
Equalizer
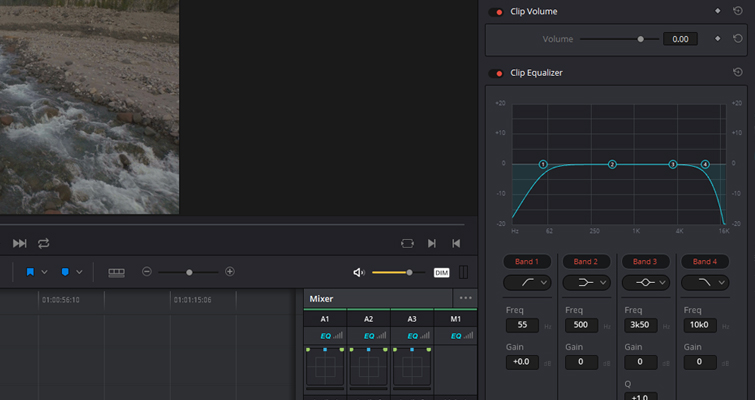
Finally, the EQ. In 12.5, upon opening the Inspector with an audio clip selected, you would see two control settings to adjust: the volume and the pan (the pan is no longer in the inspector in 14). In addition to a clip’s volume controls, we now also have a dedicated four-band clip equalizer.
Within the Edit Page, you can still perform all of the previous audio edits that were available in 12.5, such as fading clips in using the clip handles, applying audio transitions, editing the audio properties, and so forth. But ultimately, a lot of the intricate audio editing, such as automation, is now on the Fairlight page.
Lewis McGregor is a certified BlackMagic Design DaVinci Resolve Trainer.


