Speed Change Techniques In DaVinci Resolve
Learn how to change the speed of your video projects in DaVinci Resolve — and more.
Top image via Shutterstock.
There are several different ways to change the speed of a video file in DaVinci Resolve 12.5 — just as there are several ways to change how Resolve interprets the preceding frame when slowed down.
For example, you could decrease the speed of an entire clip and set the frame interpolation to “Nearest,” which duplicates the frames. Alternatively, you could reduce the speed of a clip for only a portion of its duration and choose “Optical Flow.” This will generate new frames based on the information of the previous and following frames to create a realistic slow-motion effect — as if the original shot was filmed at a high frame rate.
The Simple Stuff
Let’s have a look at creating simple speed change effects, including increases and decreases in speed, as well as freezing a clip altogether.
There are two methods of doing this:
- Select a clip in the menu bar and choose “change clip speed.”
- Right-click a clip in the timeline and select “change clip speed.”
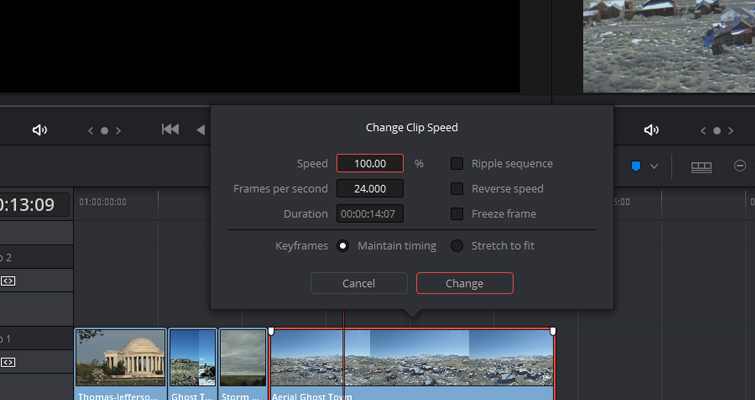
Both methods will bring up the following pop-up box.
Here, we can increase or decrease our speed by percentage. Additionally, if your footage is currently locked in at 120fps and you haven’t yet converted it down to 24fps, you can change the fps setting if necessary.
One feature that I do miss dearly in Adobe Premiere Pro is the camera still button. The button saves a still to the desktop, which I found incredibly useful when I was working on software videos, and I needed the screen capture to pause while I continued explaining something. The freeze frame function in Resolve’s pop-up box is a good alternative. Unlike the snapshot option in Premiere, which creates a separate still file, the freeze frame function will freeze the entire selected clip, displaying the still where the play head currently is. Therefore, you will need to create a cut where you want to freeze the frame.
If checked, the ripple sequence will push or pull all of the preceding clips to accommodate the change in the clip duration due to the speed change. These are all very basic speed change effects, but you have a lot of control with an efficient display to achieve your desired effect. If you have worked with Premiere Pro, you’ll likely be familiar with the layout of the pop-up box.
Advanced Speed Changes
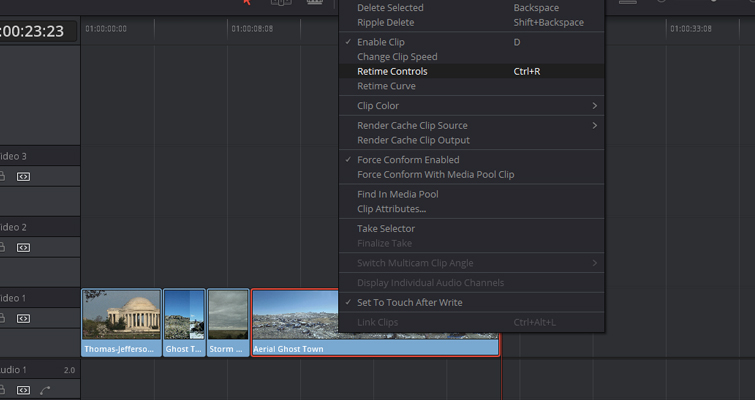
You can also create quite complex speed changes within the Resolve edit interface by using the retime control. For example, you could increase a clip’s speed by 200 percent, then reverse it and then play forward at 50 percent — all within the same clip, with only one effect applied. You can activate the retime control by selecting a clip and choosing Retime Clip. Alternatively, keyboard shortcut aficionados can select the clip and hit CMD-R/CTRL-R.
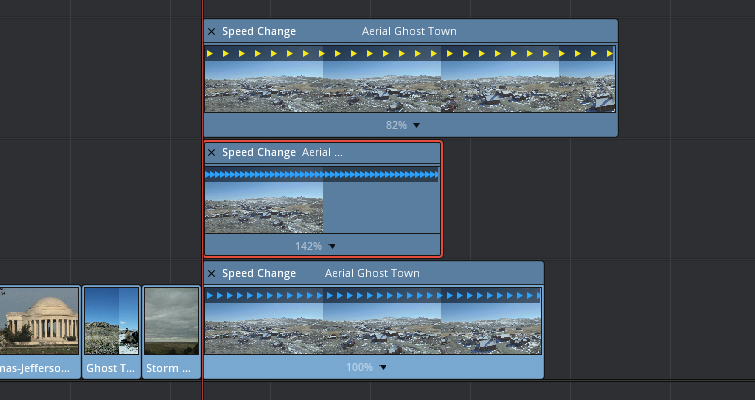
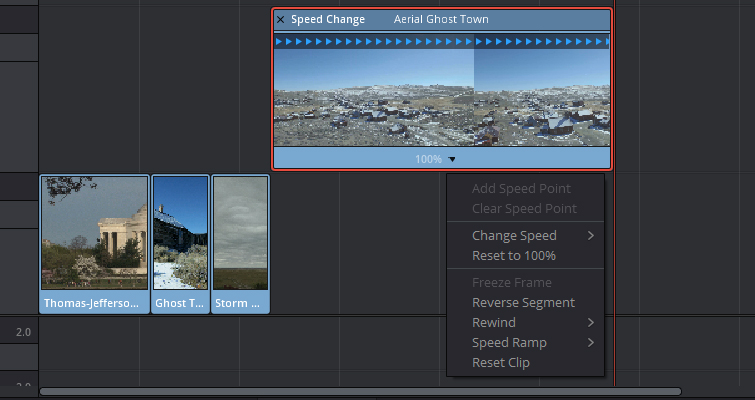
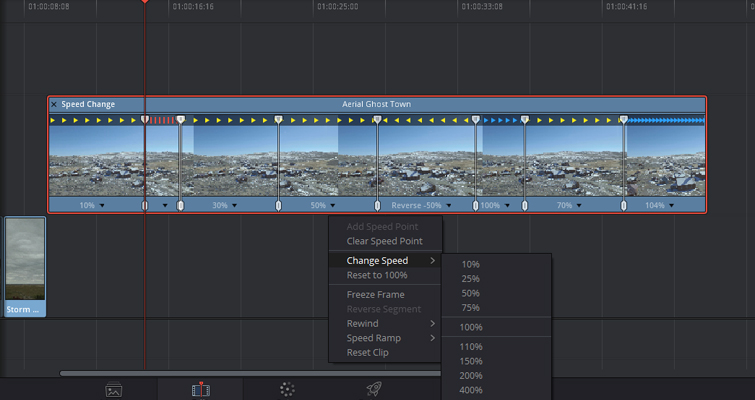
Here, you will see one of the visual differences between Premiere and Resolve — the visualization of the speed change on the clip itself. You can see that arrows appear on the top of the clip when you have entered retime. The yellow arrows indicate that the clip has been slowed down, and the compact blue arrows suggest that the clip has been sped up. You also see the degree of increase or decrease to the clip’s speed. However, I find that if you have many layers with hundreds of different clips, the visualization of the speed change can help find you the clip more easily.
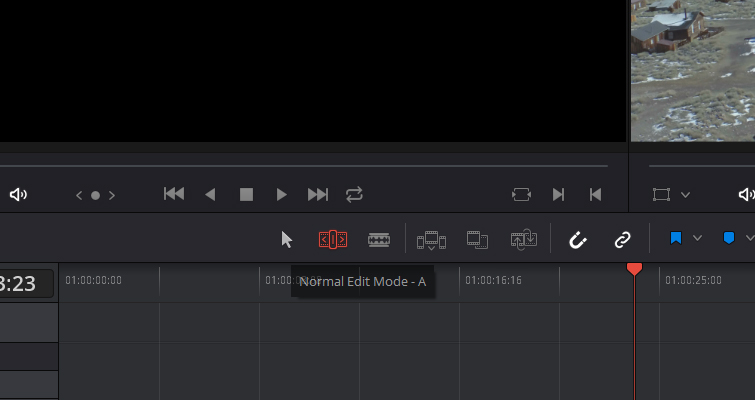
Like the rate stretch tool in Premiere Pro, you can now expand the clip manually by simply moving your cursor over the clip in the retime bar (where it says Speed Change). If you try to rate stretch your clip by dragging the sides, it will just expand or decrease the clip’s natural duration. It is important to note that if you are in Normal Edit Mode (Keyboard shortcut A), you will trim the neighboring media if your speed duration increases your clip size. If you are in Trim Edit Mode (T on the keyboard), you will ripple the timeline.
At the bottom of the clip, you can also find a small, black drop-down triangle. By clicking on this, you open the retime speed menu. Here, you see the same options from the clip speed menu, plus some extra features. The difference here is that the operations act differently. They operate in an advanced fashion, which isn’t as simple as just changing the entire clip speed to 150 percent.
For example, if we choose Freeze Frame, which would freeze the entire clip when using the standard speed change settings, we get a section of the clip that we can now freeze for a specific amount of time. This, in essence, is closer to the still function in Premiere. Remember that using the Selection Tool or Trim Tool will completely change how the preceding clips react to the frozen frame’s extended duration.
The retime overlay also allows you to create a speed ramp effect. By selecting the dropdown menu and choosing speed ramp (up from 0% or down to 0%), you divide the clip into several different sections, all of which have different speeds (increasing or decreasing), and all of which you can completely customize. You can change the speed of each segment, increase the section, or remove it entirely by clicking reset to 100%. You can modify the speed quite quickly by dragging the slider of the individual segment.
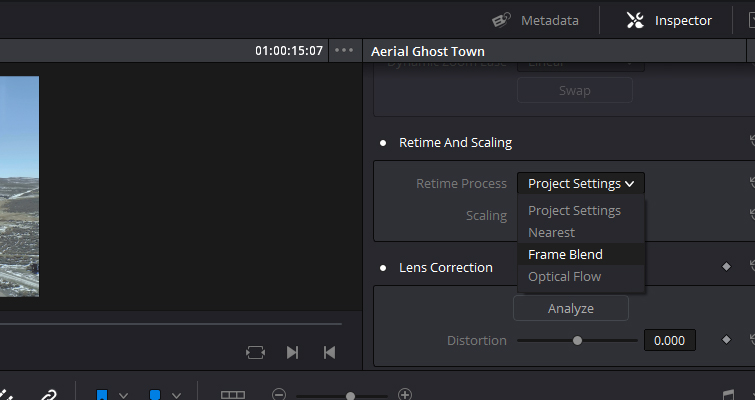
Earlier, I touched on different frame interpolation settings that you can apply to a time-remapped clip. To adjust this setting to your preferred choice for the clip, simply select your clip in the timeline, open the inspector, and scroll down to retime and scaling. From the Retime Process menu, you can then choose three options: nearest, frame blend, and optical flow. The frame blend option is essentially a blend of the nearest and optical flow processes. Neighboring frames dissolve together to smooth the increase or decrease in speed.
This is pretty much Resolve Speed Effects in a nutshell. On the surface, it looks just about the same as any other NLE. As soon as you open the retime effect overlay, you can easily change the speed of a clip.
A few years back, if you wanted to convert a 24fps shot into smooth slow-motion, you had to buy a very expensive plug-in such as Twixitor. It’s very cool to see that many NLEs and compositors have integrated this into the basic software operation. Here’s a clip that was shot at 24fps and then slowed down to 25% using nearest frame. The comparison uses optical flow.
Bonus tip: If you prefer working with curves for a more precise control over the position of the time change, you can right-click and select show retime curves to bring up the control box.
Do you have editing tips for DaVinci Resolve? Let us know in the comments.


