

10 Creative Cloud Tips for Video Editors

Want to optimize your video editing workflow? In this post we share 10 tips to work more efficiently using the apps in Adobe’s Creative Cloud!

If you’re a Premiere Pro editor that’s looking to take advantage of the other tools in Adobe’s Creative Cloud then you will definitely want to check out the tips below.
The Creative Cloud monthly membership gives you access to Adobe applications that you may not have previous experience using. Optimize your video production workflow by utilizing these Adobe apps in your post production pipeline – giving you access to more tools and features, while speeding up your video editing work.
1. Adobe Story as a Pre-Production Tool
Adobe Story can be an integral part of any pre-production planning and setup. Some tools you may not be using:
- Import scripts from other scriptwriting software (Movie Magic, Final Draft, Word) or create shooting scripts inside of Adobe Story.
- Connect scripts to Premiere Pro using speech analysis (in-depth tutorial on using that feature here).
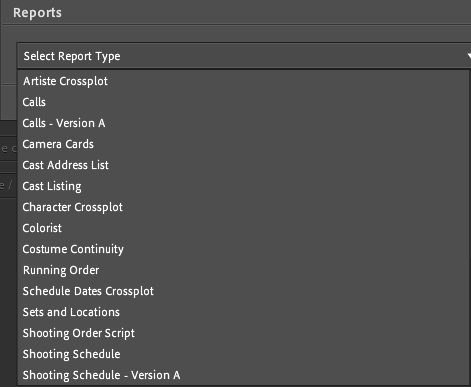
- Create pre-production documents like call sheets and shooting schedules
- Use the mobile version to make changes to your documents and get updates or changes made by your team.
2. Start Bridge at Login/Add to Favorites
You’ll gain some beneficial file organization tools when you start Adobe Bridge during system login. To set this up go into your Bridge Preferences (Preferences > Advanced) and check Start Bridge at Login.

A few tips for digital asset management in Adobe Bridge:
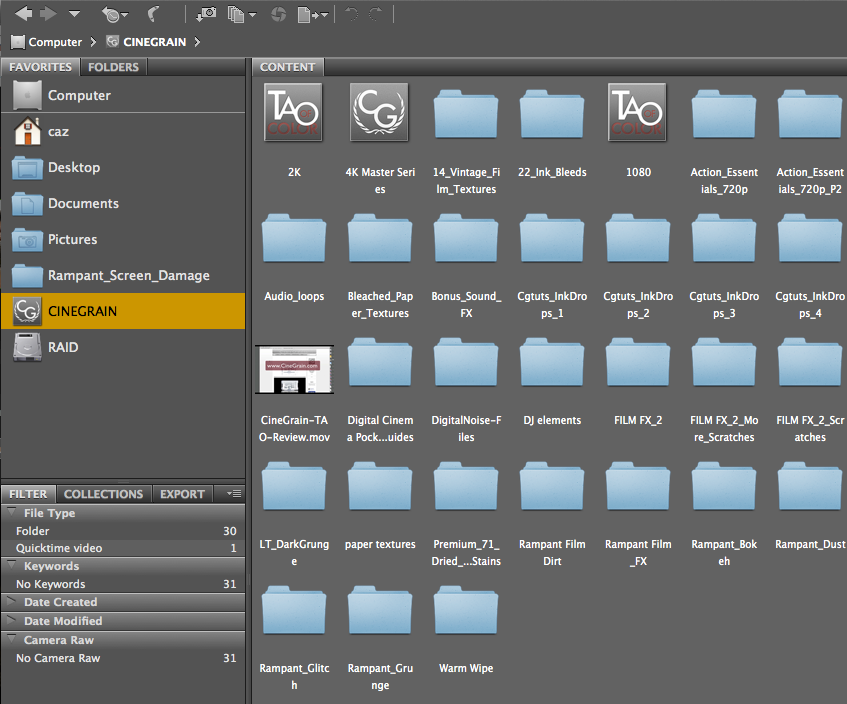
- “Add to Favorites’ lets you quickly navigate to often used hard drives/folders. This is similar to adding Favorites in the Finder in OS X.
- I have a hard drive full of elements I often use for editing/motion graphics (light leaks, grain, textures). I will add folders and hard drives that I often use as a Favorite in Bridge. To do this, select the item, right click and choose “Add to Favorites”.
- Having your media files in Bridge allows you to keep them well organized with metadata, as well as take advantage of some of the tools within Bridge (we’ll cover a few below).
3. Batch Rename in Bridge
Batch rename is handy when you have footage from multiple media cards and you want your clips to have unique names.
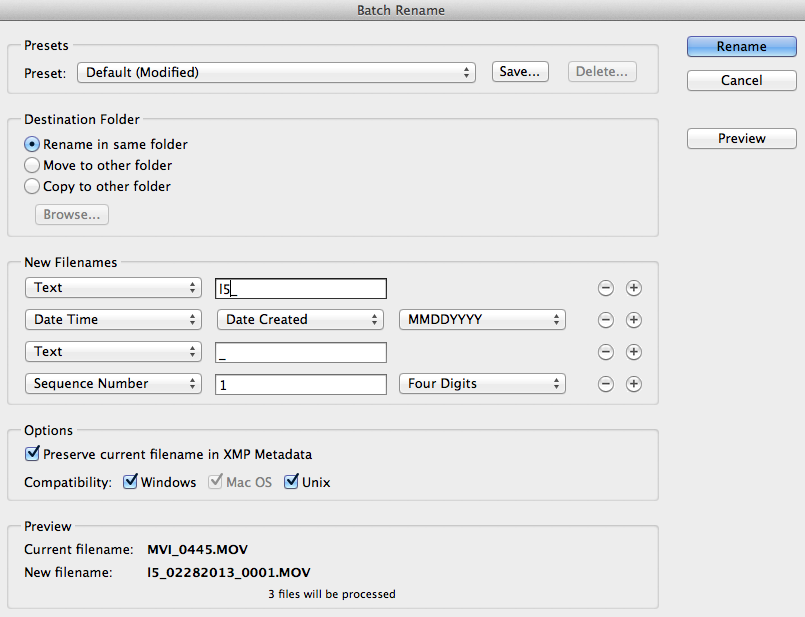
In Bridge, select the clips, right click and select “Batch Rename”. Click the + under “New Filenames” to add text and date and time. Check “Preserve current filename in XMP Metadata”. This will allow you to better organize your media.
4. Adobe Bridge: Open in Encore
From Adobe Bridge you can send your media files to Encore (Adobe’s DVD authoring application).
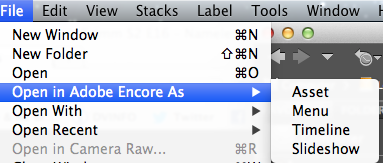
Navigate to the clips and stills in Bridge that you want to use in Encore. With them selected, go to File > Open in Encore as > Asset, Menu, Timeline or Slideshow.
This is a quick and very visual way to add files to Encore – especially useful for making a quick Encore slideshow.
5. Create a Photoshop File in Premiere Pro
Often times video editors will bring Photoshop files into their editing application, but how about the other way around? You can actually send a file from Premiere Pro to Photoshop for editing. Here’s how:
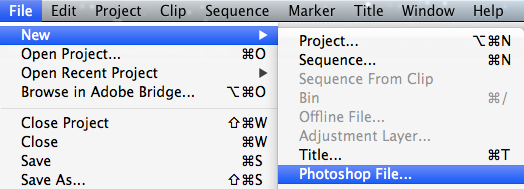
With the media selected choose File > New > Adobe Photoshop File. This will create a new Photoshop file the same size as the selected sequence in Premiere Pro.
Now, when you make changes to the file Photoshop and save it, the changes will automatically update in Premiere Pro.
If you already have a Photoshop file in your Premiere Pro project, there’s a quick way to open it in Photoshop for further editing. If Photoshop is closed, select the Photoshop file in Premiere Pro, press Command + E (on Mac) or Control + E (on PC). This will open Photoshop and allow you to make changes to the file. Once the changes are made they will also be updated in Premiere. Note, this also works when sending files to Photoshop from Adobe After Effects.
6. Media Usage in Premiere Pro
Working on a big project and can’t remember if you’ve already used a clip in your timeline? There’s a quick way in Adobe Premiere Pro to see if a file has already been used in your project.
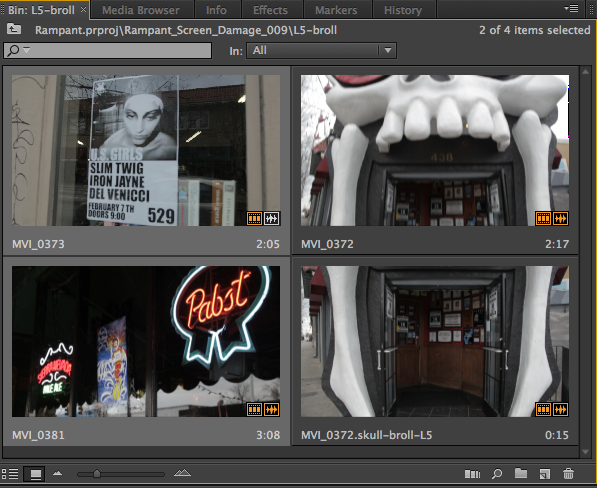
In Icon view in the Project, yellow video/audio icons indicate that clips have been used in a sequence.
Put your cursor over one to see how many times the clip has been used in a sequence.
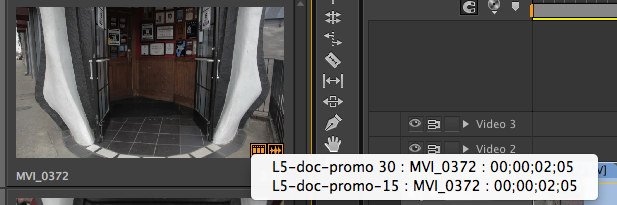
Want more info? If you click on the icon a popup will appear showing you the sequence(s) the clip is used in. Select the desired sequence and it will open with the playhead (CTI) on the clip. This is a great video editing timesaver!
7. 32 Bit for Bright Looks in After Effects
32 bits per channel works in floating point, which allows brightness values over 1 to create interesting looks in After Effects
Hold Option (MAC) or Alt (PC) and click on 8bpc in the Project (marked in red below) to change to 16bpc. Click again to change to 32bpc.

I added exposure & fast blur effects to an adjustment layer to create a bright, neon look. See these 32 & 8 bpc screenshots for comparison.

8. After Effects Presets (AE & Bridge)
The most visual way to pick animation presets in After Effects is actually to view them in Bridge.
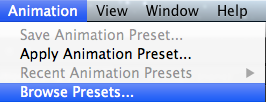
To do this, first select your layer in After Effects. Then go to Animation > Browse Presets.

Click on the various presets to audition them (they will play in the Preview panel). Double clicking a Preset applies it and takes you back to After Effects.
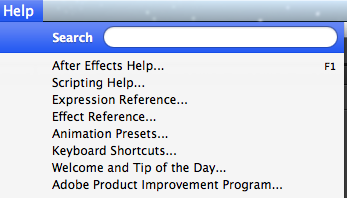
9. After Effects Help Menu
In the After Effects Help Menu you have access to several handy reference guides (scripting, expressions, effects), as well as keyboard shortcuts and Tip of the Day.
I recommend using Tip of the Day, as you can search for specific subjects – great for taking your After Effects knowledge to the next level.
10. Audio Cleanup Workspace in Audition
If you often use Adobe Audition to clean up and edit your audio from Premiere Pro (if not, you should be!) I suggest creating a custom workspace.
Under the Window Menu select Diagnostics & Frequency Analysis. Diagnostics allows you to remove clicks and clipping, while Frequency Analysis allows you to see the frequencies used in real time (handy when using EQ).
Diagnostics will automatically be added as a panel besides “Properties”. Manually add Frequency Analysis and save this as a new workspace.


