
Premiere Pro CC: Working with Audio

Premiere Pro CC adds additional functionality for audio editing! In this post, we’ll cover the new audio changes and how they can improve your video editing projects!

Lets look at some essential tips for working with audio in Adobe Premiere Pro, as all of them aren’t obvious.
Premiere Pro Audio Preferences
A few features have been added to the audio portion panel in the Premiere Pro Preferences. Let’s dig in…
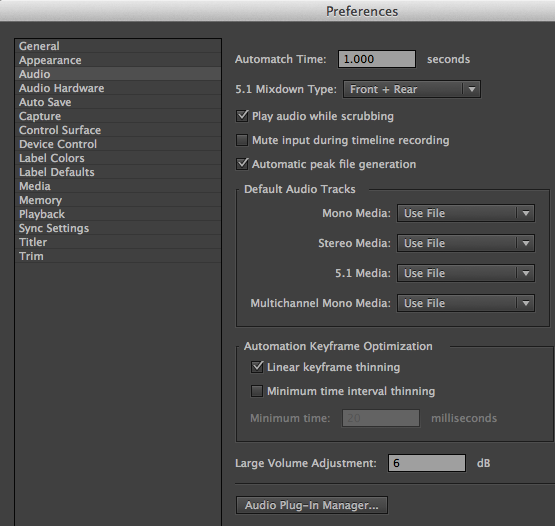
Play Audio While Scrubbing – Leave this unchecked in Premiere Pro preferences if you don’t want to hear audio while scrubbing.
You scrub by dragging the playhead, using the left/right arrows, and using shortcuts JK and L. For more flexibility you can toggle scrubbing on/off with Shift + S.
Mute Input During Timeline Recording – This will prevent feedback when recording audio.
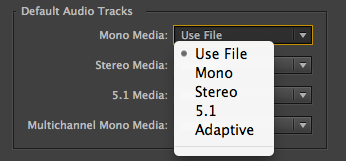
Default Audio Tracks – You can change the default track settings by clicking “Use File”. This reveals a flyout where you choose the behavior of tracks.
Minimum Interval Time Thinning – This is the number of keyframes that are recorded when using audio automation modes. Check this and play with times of more milliseconds if you want to later manually adjust your keyframes (otherwise you will have a bunch of keyframes). This is similar to using peak keyframes in FCP 7.
Default Thinning:

400 Milliseconds Thinning:
Increase Volume Many – Premiere Pro CC adds shortcuts to increase the volume of a selected clip(s).
This preference lets you set the dB increase when using “Increase Clip Volume Many”


Audio Plugin Manager – Lets you manage third party audio plugins. Previously talked about here.
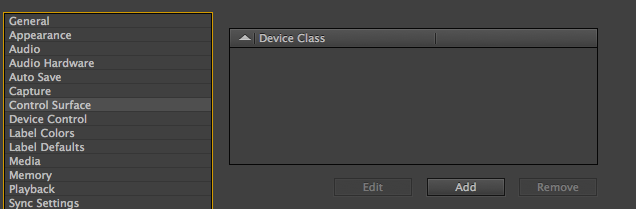
Control Surface is a separate preference, but lets you work with audio via a virtual or hardware Control Surface. Previously discussed here:
Premiere Pro Timeline & Audio Updates
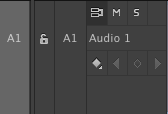
Right-click in the audio header of the Premiere Pro timeline to get audio options.
Note: I’m focusing on audio in this post, but right-clicking on the video header also gives you options.
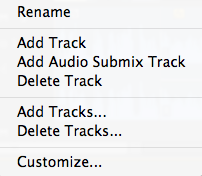
Rename – Allows you to rename to your track, and a handy way to keep up with what is on each track (you can also rename tracks in the Audio Track Mixer).
Add/Delete Tracks – Delete will delete the current track. The track will be deleted even if the track is locked, so be careful with delete track. Add track will add an audio track to the bottom of the stack . If you are on track 1 and you had 3 audio tracks, clicking new track would create audio 4
Add Audio Submix – You can now add an audio submix from the Timeline. If I had multiple tracks that I wanted to apply the same filter(s) to, I would create a submix. (like compressing all the interview tracks)
You will still need to route the tracks to the submix in the Track Audio Mixer
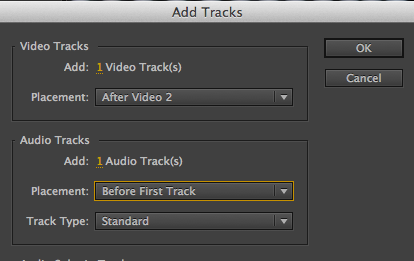
Add/Delete Tracks – Lets you delete all empty video or audio tracks or specify a track to delete. Add tracks also has the option of adding a track before the first track, which I find very handy.

Customize – This allows you to change what options appear in the Track Header. This brings up the Button Editor, where you can drag options to the header. ( You also have a Button Editor for the transport controls in the Source & Program Monitors)
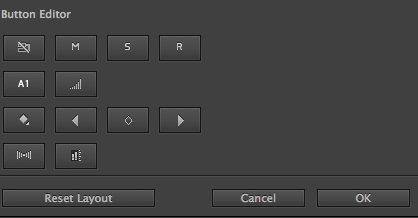
I like to add Record, Track Level, and Track Meters:
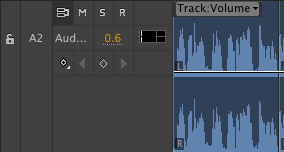
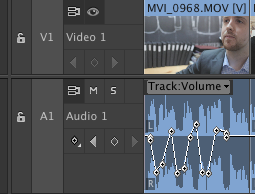
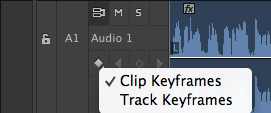
You will need to switch from clip to “track keyframes” to see changes you make to the volume (the default is for the yellow line to show clip volume). You do this by clicking on the “show keyframes icon” and selecting “track keyframes”:
Clip vs Track Audio
I previously wrote about clip and track audio in Premiere Pro CS6 here.
Premiere Pro CC adds an Audio Clip Mixer. If you want to work with Audio on a per clip level, you should be using the Audio Clip Mixer. If you want to work with Audio on a track level, use the Audio Track Mixer (both of these are under the “Window” menu). Remember that the default in a Premiere Pro timeline is to see “Clip Keyframes”. Click “Show Keyframes” to change to “Track Keyframes”.
For more info on working with Audio in Premiere CC, check out the Adobe help file.


