
Smoke ConnectFX: Damage and Deform Nodes

Damage and Deform nodes in Autodesk Smoke! In this post we continue our exploration of the ConnectFX nodes with two that were created specifically for video effects.

Autodesk Smoke provides a unique post production toolset for the video compositor and effects artist. The following Smoke ConnectFX nodes can be modified to create unique effects in your video projects, from the destructive results of the damage node to the ripples and warps of deform.
Smoke’s Damage Node:
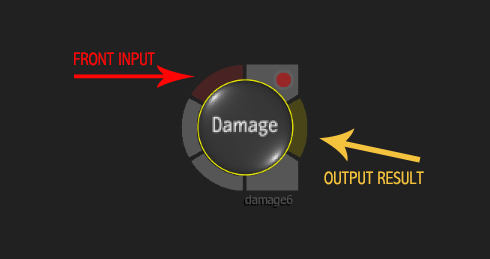
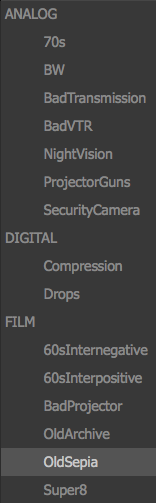
Who hasn’t wanted to turn the their nicely shot video into old film or create that bad TV effect! For the Smoke user, the Damage Node can help you achieve this look, as it has many settings and is quite flexible. There are 3 effect styles to choose from: Film, Analogue, and Digital.
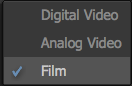
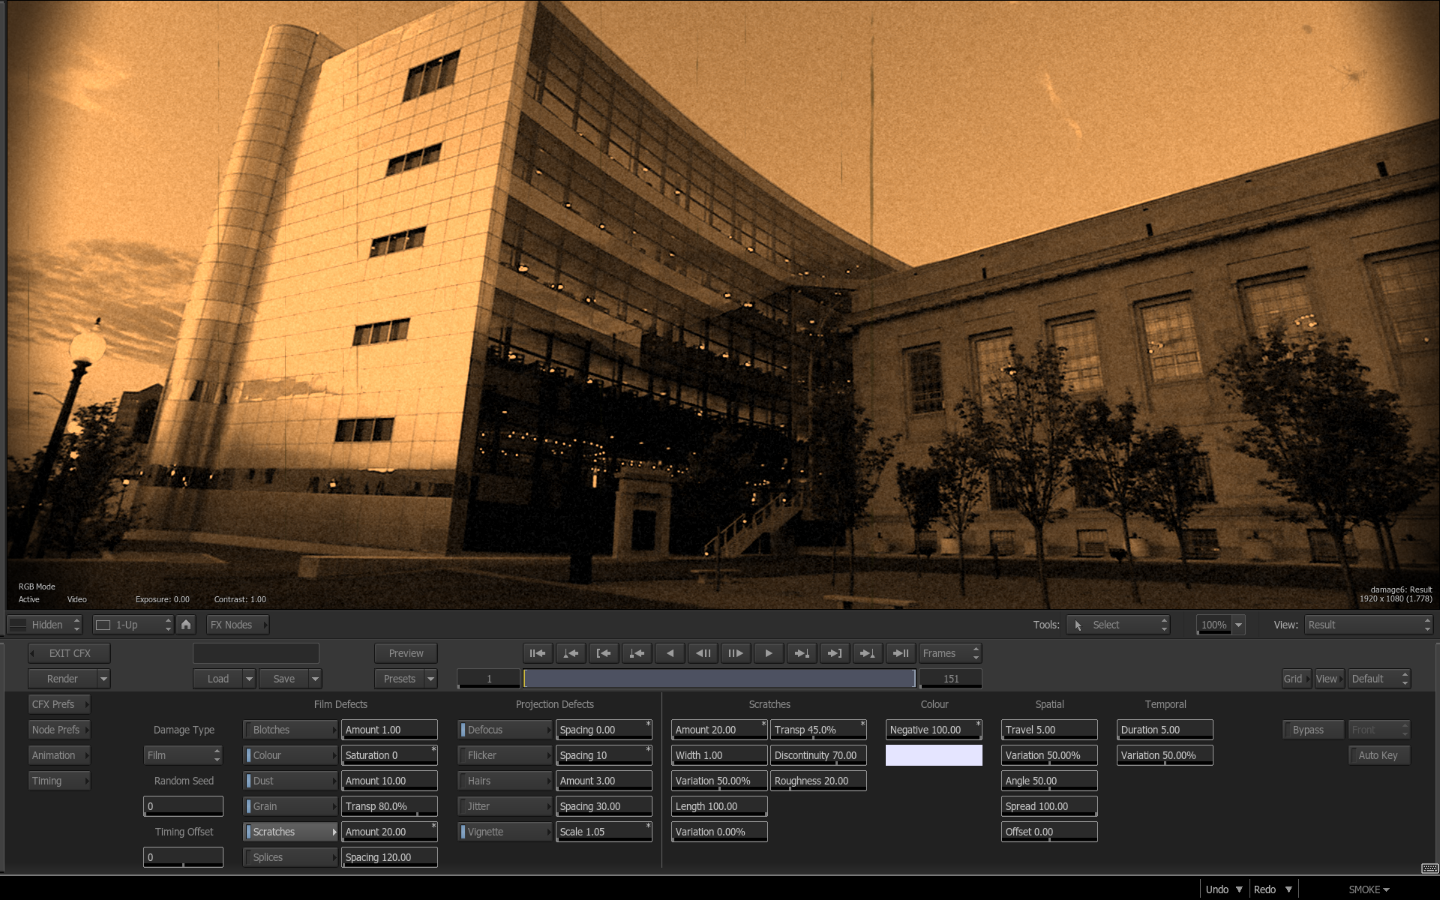
When you choose one of the 3 effect styles the sub menus change to bring up adjustable options that pertain to the effects for each style. Let’s look at the Film Effect to see how you can use these settings.
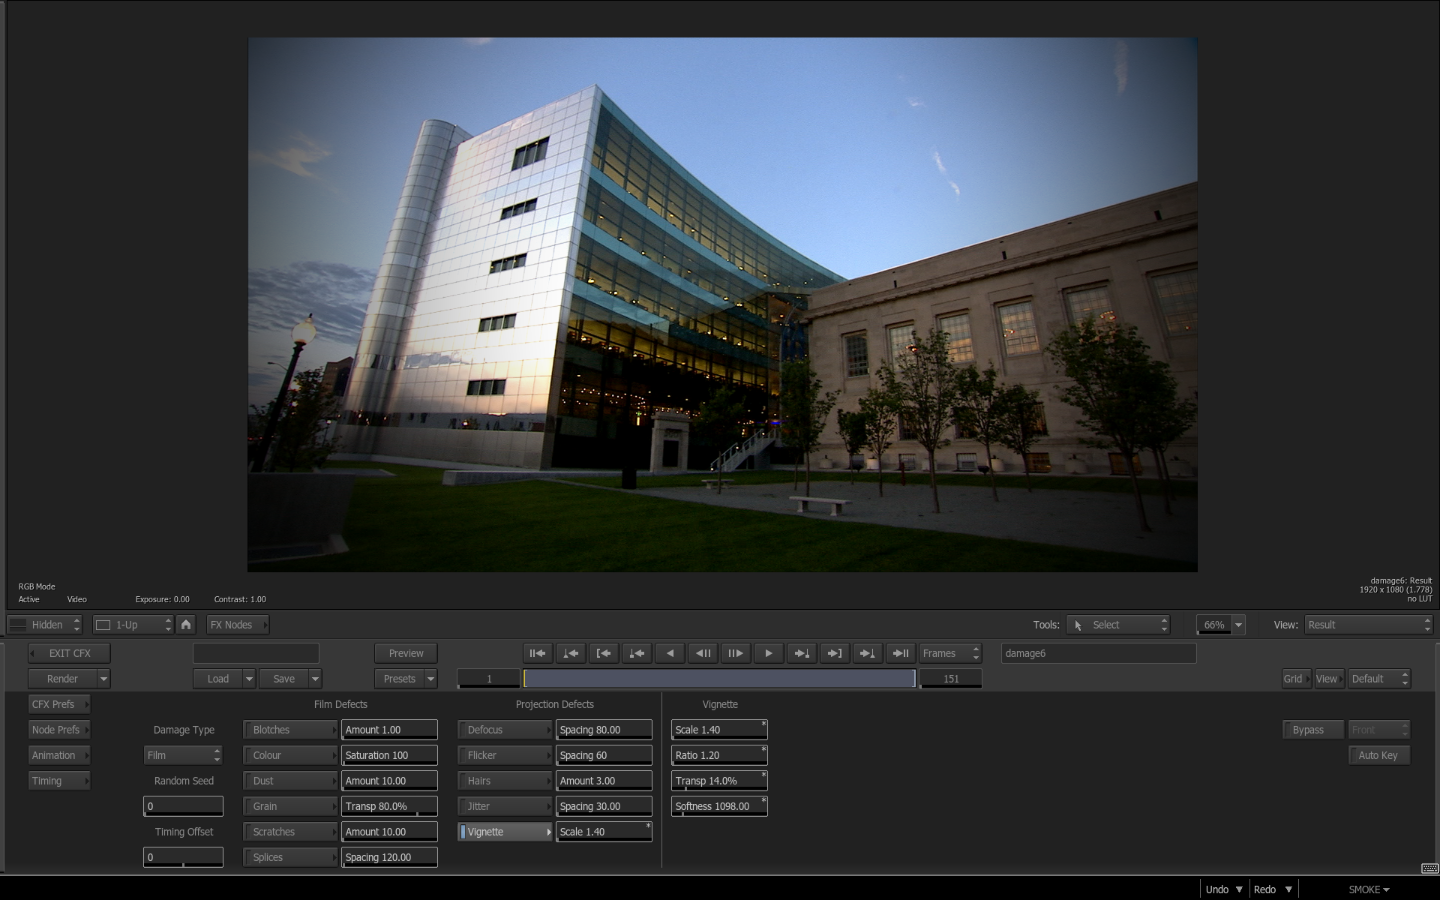
The Film Effect divides the look settings into 2 areas, Film Defects and Projection Defects.
[Click for larger image]
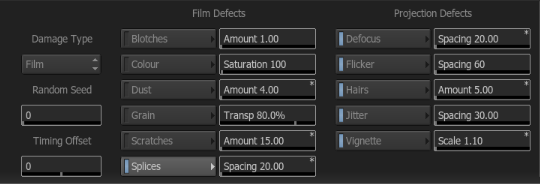
The effect settings are pretty self explanatory based on their names. In order to use a setting you need to activate it by pressing the blue LED next to the setting name. You can then click the setting button which will open up an expanded menu to further tweak the look. The numeric slider next to the setting name will quickly adjust the most obvious parameter. For example, Scratches will adjust the amount of scratches. So you can make quick adjustments without having to expand every menu. However, to really customize your looks, you will want to explore each of these settings.
[Click for larger image]

A few notable options for the film effect is the Splice Menu. When you set the Splice to Manual, the Create Splice and Delete Splice options are available. With this option you can create a “splice” effect at a specific frame. The default is an automatic setting which will create the splice based on the seed value and other related duration settings. But obviously, being able to manually set a splice damage effect at a specific point can really increase the impact of the effect in relation to your edit.
[Click for larger image]
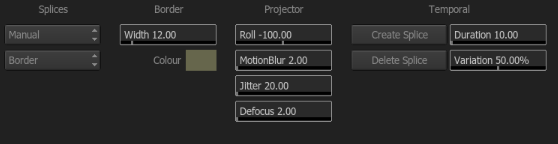
The Damage Film effect also contains a quick vignette option, so you can generate a simple darkening vignette, with setting for softness, and falloff.
[Click for larger image]
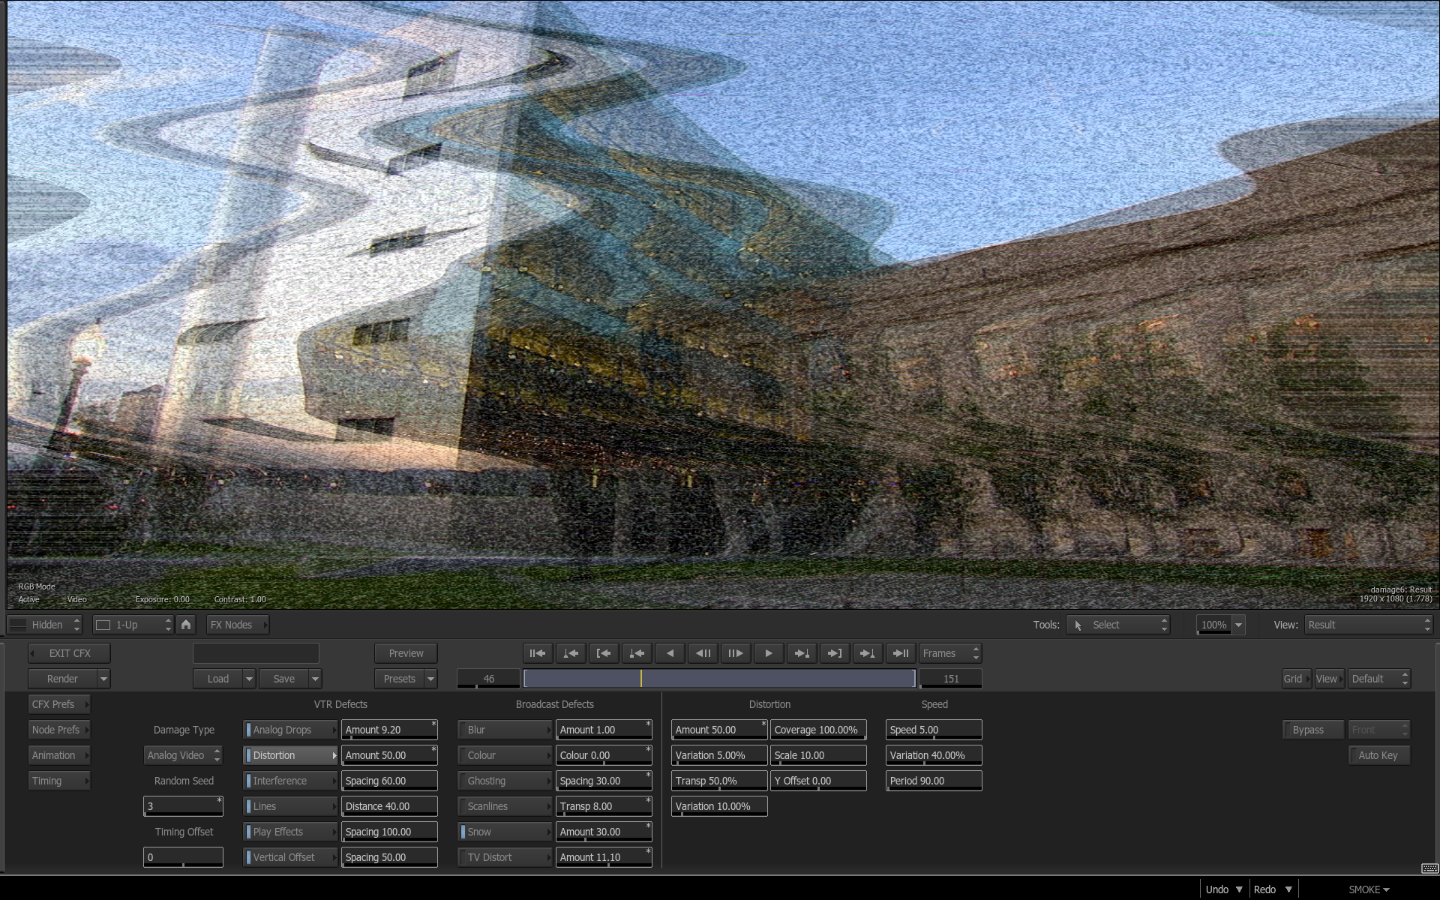
The Analogue Effect help you create that bad TV effect in Smoke (seen prior to 2009 with the DTV switch in the United States). Analogue uses Static, Interference, Ghosting, and Scanline effects to create that unique TV look. The look settings are broken down into VTR effects and Broadcast.
[Click for larger image]
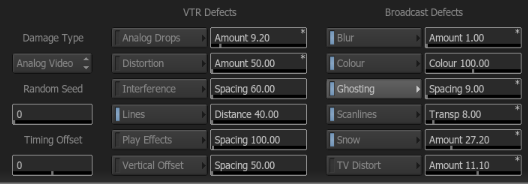
The activation and menu settings work like they did for film. You can activate and then expand the menus to adjust the settings in more detail.
Under the Broadcast Color settings, you can adjust the weight and X-Y positions of the individual RGB channels. This is similar to the same type of color separation that was found in the Blur Node.
[Click for larger image]
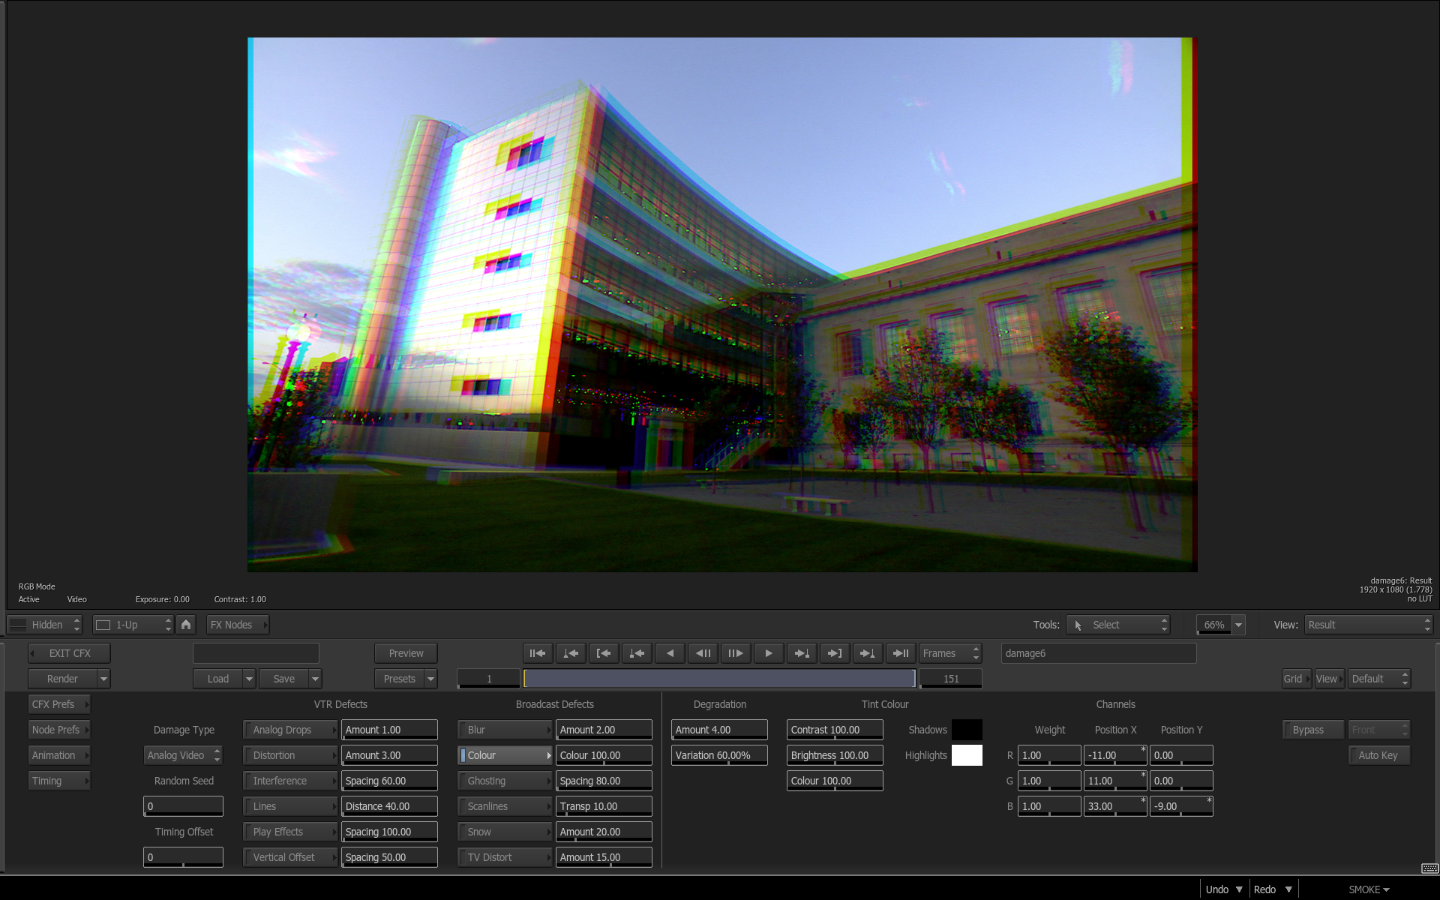
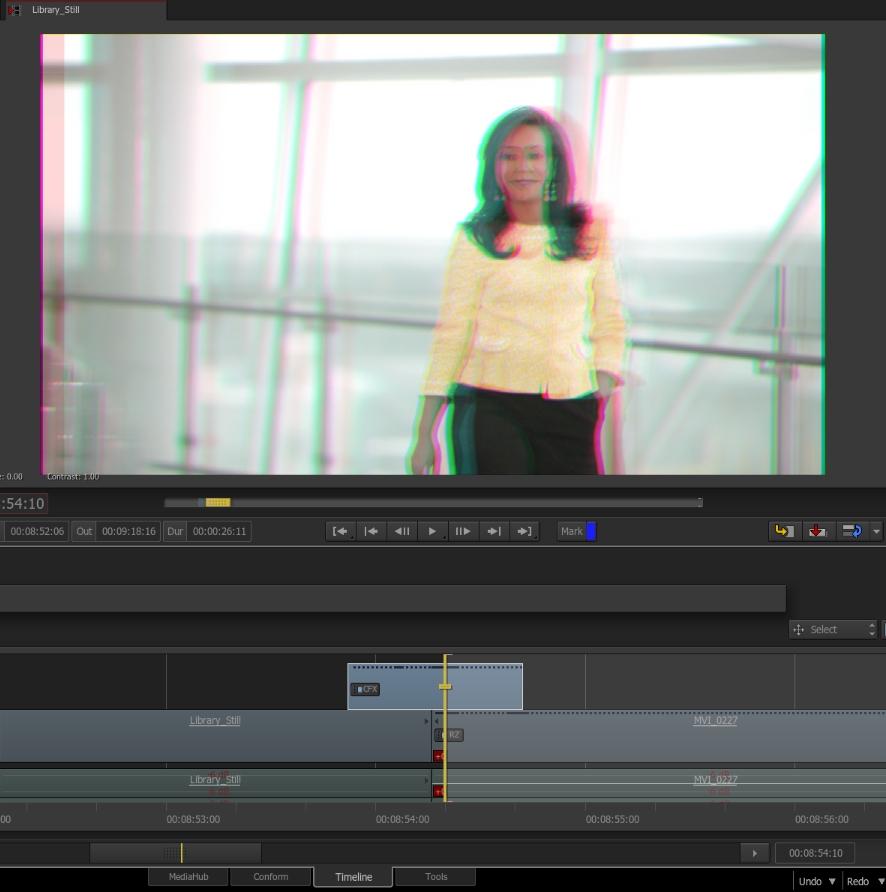
By keyframing the amount of ghosting or TV Distort you can ramp up and ramp down the effect to create a Bad TV or Videotape distortion transition if you use the Damage node as a GAP CFX clip on the timeline as an adjustment layer.
[Click for larger image]
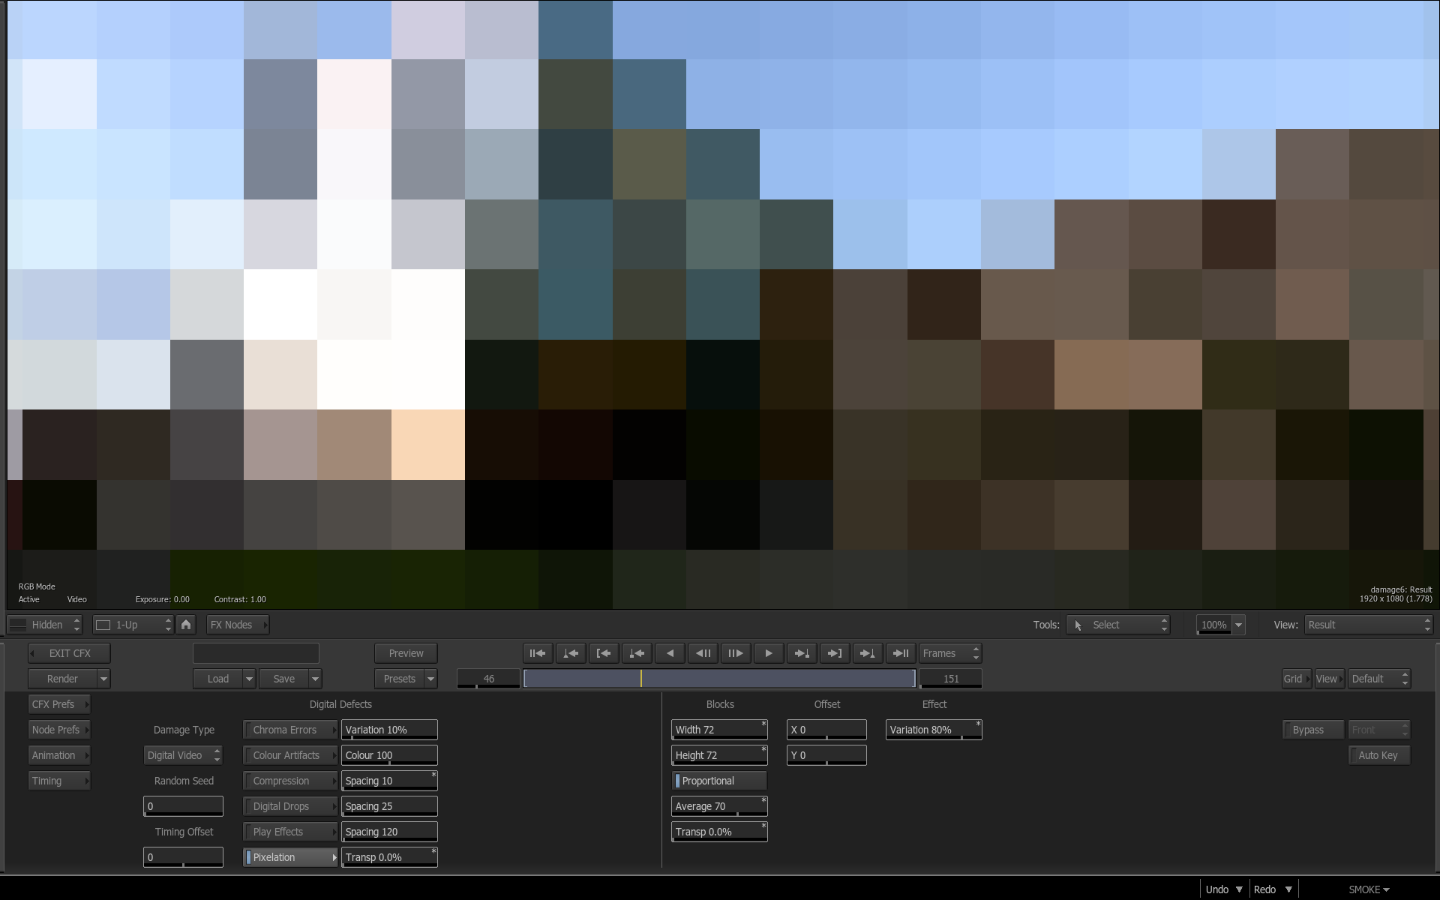
The Digital Effect brings us to the here and now and gives you the ability to take you clean digital files and artifact them on purpose. Digital gives you Compression, Chroma, and Temporal effects to distort your clips.
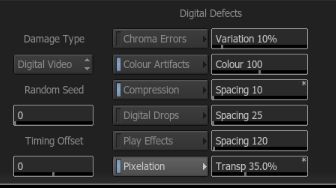
By using just the Pixelation setting, you can use it has a way to add a mosaic effect to your clip, unrelated to the look of damaging it.
[Click for larger image]
There are 2 global settings that affect the Film, Analogue, and Digital damage looks. Under the effect chooser, is a numeric slider for Random Seed and Timing Offset. The Random Seed value will, as the name implies, create random variations in the effects. If you don’t like the way the film scratches are scratching, then adjust the random seed value.
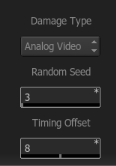
The effects when played are always constant and repeatable. But that repeatability is defined by the seed value. So even the variation adjustments in the controls will always vary the same amount based on the percentage set in relation to the seed number. The Timing offset will offset or slide the points at which effects like blur or ghosting occur.
Smoke’s Damage Node has several presets to get you started. You can start with those, and then turn off portions by deselecting the blue LED to see how the preset is built.
[Click for larger image]
There is a lot you can do with the Damage Node in Smoke. It works great as an adjustment layer on the timeline and can be used for many creative effects within ConnectFX.
Smoke’s Deform Node:

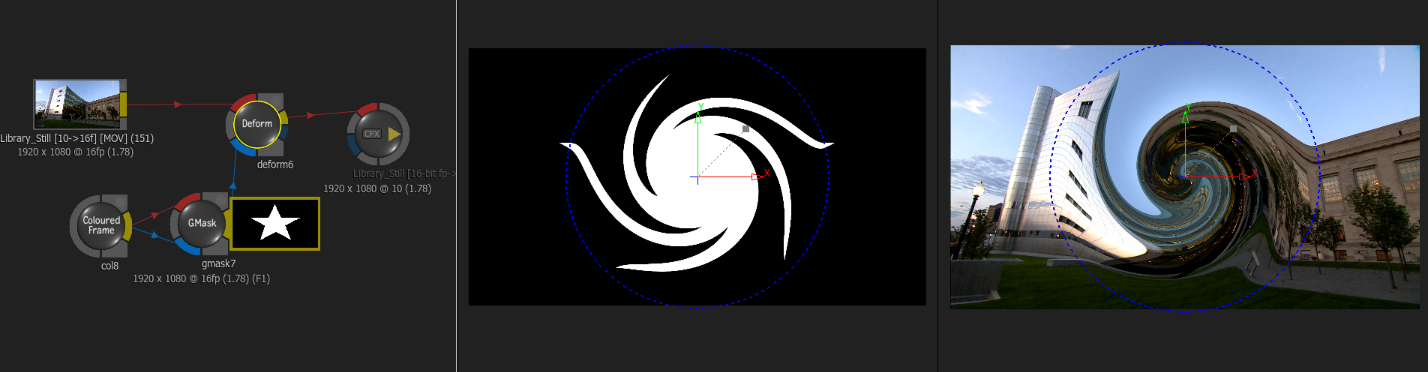
If you have the need to warp, ripple or wave your video clip, then one option might be to use Smoke’s Deform Node. There are other ways to warp and bend clips inside of Smoke – Displacement Maps, Bicubics, and Pixel Spread. However, the Deform Node gives you the “classic” ripples and warps, with some very nice distortion effects like Crumple.
[Click for larger image]
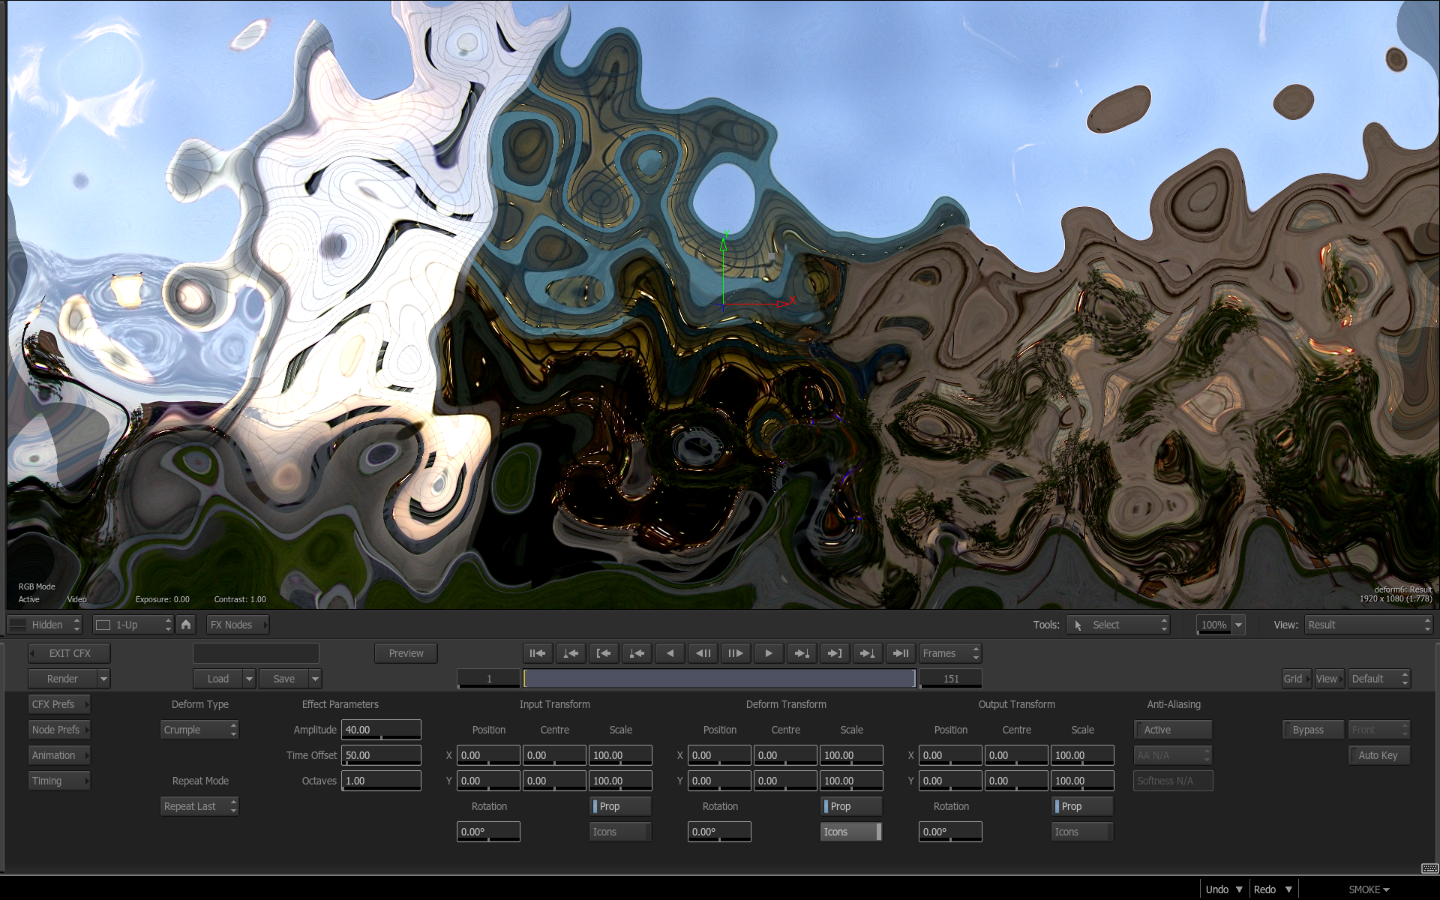
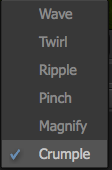
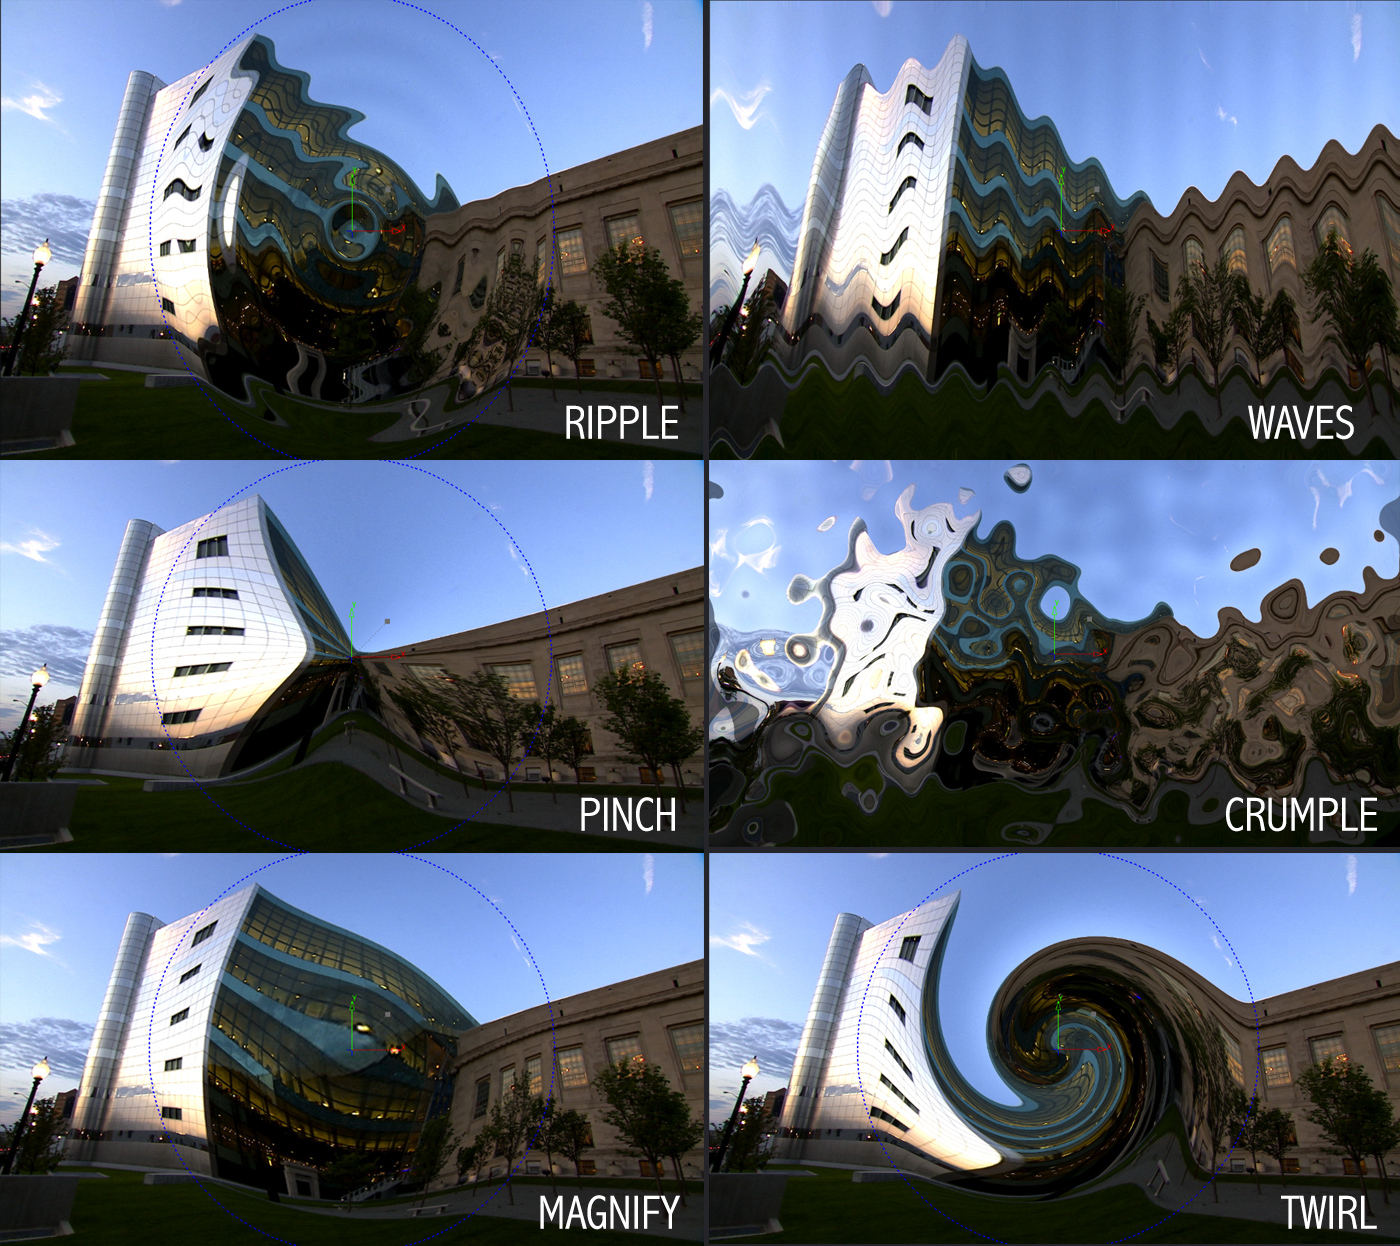
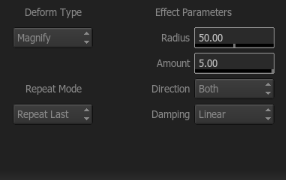
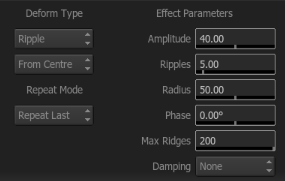
Each of the deform styles will alter the menu settings slightly to customize the look of the warp.
The transform options in the Deform Node, are unique. You can transform the position of the deform effect over the clip, as well as transform the clip through the distortion. Moving the clip through the distortion provides a slightly different feel than transforming the distortion itself, especially when using Scale. The third transform option is the ability to move the clip along with the distortion as a whole. This is something to play with when working with motion graphics, as you can create some interesting effects.
[Click for larger image]
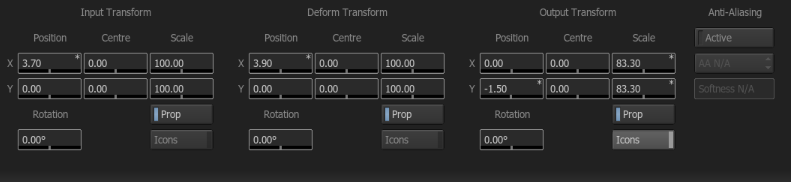
Depending on the amount of warping and bending, you might need to add some extra Anti-Aliasing to smooth the edges of the warp. When you active the AA you can then set the sample amounts and any additional softness. This AA is software anti-aliasing and is not processed via the GPU. CFX does have hardware anti-aliasing in the CFX setups menu.
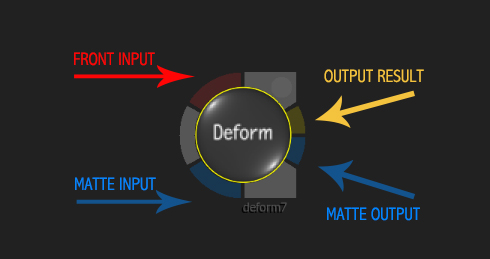
One thing to note about the Matte input: in other nodes like the Color Warper or Blur, the Matte input would act as a mask. This would restrict the effect to the mask shape. Deform’s Matte input doesn’t do that. The effect is applied to the entire image, but the matte is affected by the deform as well and then passed on to the output. So you can feed a Front and a Matte Source and deform both channels simultaneously.
[Click for larger image]
The Deform Node can also be used as a CFX Adjustment Layer on the timeline. You can place the effect over 2 clips and setup an effect to create a quick warp transition.
[Click for larger image]
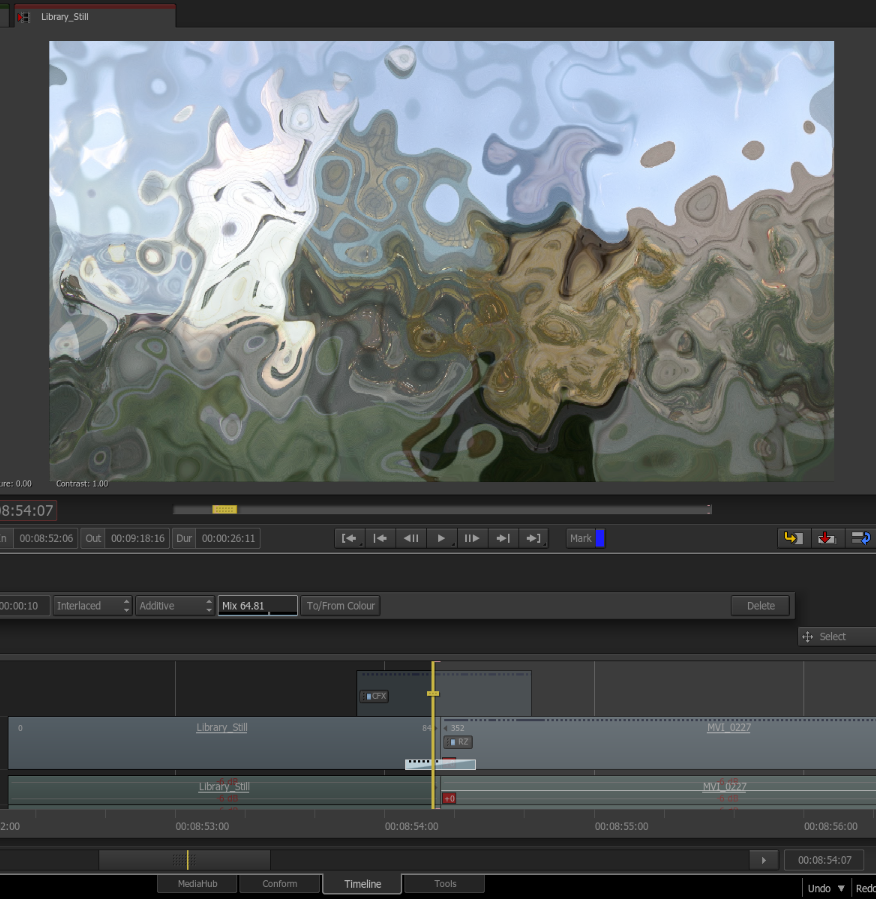
The Deform node in Smoke is a great tool when used with other nodes like Blur and Glow. You can create some very unique transitions and effects for video or text.
If you have an questions or comments about the Smoke ConnectFX Nodes covered in this blog series, I’d love to hear from you in the comments!


