What You Need to Build a Video Editing PC in 2020
The best video editing PC is the one you build yourself. Check out 3 PC builds for all budgets and experience levels.
To get the most out of your computer, it’s better if you build it yourself. Computer parts are more affordable than ever, and there are many guides, tutorials, and PC help forums to walk you through any question or issue.
You’ll probably spend more money than you wanted to, but you’ll be proud of something that was built instead of bought. I built my PC a year ago, and, although I’ve had my fair share of issues, I love the performance, look, and knowing that I put it together.
Apple’s Mac Pro is probably the best video editing/design/animation pre-built workstation. Still, you’ll end up paying much more than the individual parts, with the most expensive build costing north of $50,000. I know that for some, editing on a Mac is as normal as breathing, but building your own Windows PC does have its advantages. Mostly, it’s the freedom to build the PC you want, not the one that Apple deems worthy.
If researching and putting it together is too much, you can buy a pre-built PC made for video editing, though they are not as available as ones made for gaming. Pre-built PCs don’t always use the best components, and manufacturers charge a premium for putting it together. There’s no shame in buying a pre-built PC, just know that you won’t always get what you want at the price you want.
Below, I’ve put together three builds at different price points, which should serve as a guide. Only you know what you need for video editing, but before we dive into selecting parts, it’s important to know what each component does and why you need it.
Parts Guide: What’s in a PC?
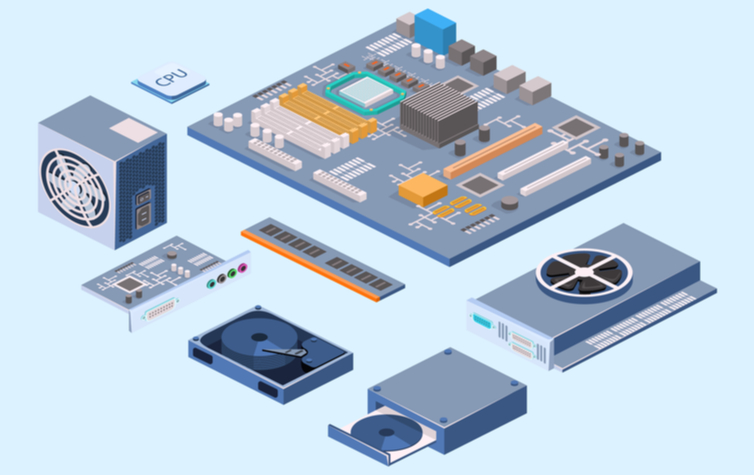
Computers are incredibly complex, but you only need a handful of parts to build one. Image via Reenya.
Budget-conscious consumers may not have the luxury to buy the best parts, but it’s essential to know where to spend money and where to save. For video editors, the CPU is where the most significant part of the budget should go, but VFX artists may spend most of their budget on a professional-level GPU. While building the PC is another story altogether, picking the right parts is even more important.
A later section of this article will go over three different builds, but if you feel comfortable building your PC parts list, check out PC Part Picker. You can kit out your PC on this site, and it alerts you when there is a compatibility issue. The site will give you an estimated price, which it calculates by choosing the lowest price from several different retailers. PC Part Picker can help you stay on budget, and, more importantly, you can tweak your build as much as you want until it’s just right.
Parts Guide: Motherboards
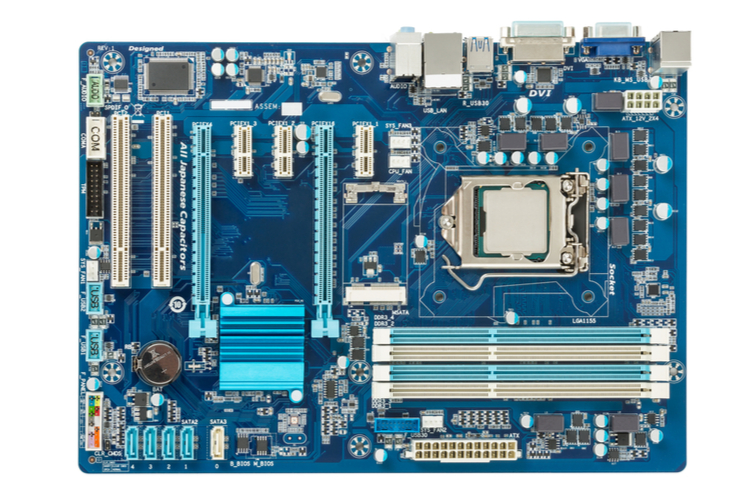
Motherboards may look intimidating with all their ports and sockets, but they’re very simple to understand once you read the manual. Image via Naumov S.
The motherboard is the foundation of the system, and it will dictate the parts of the build. While GPUs, RAM sticks, and other hardware components are interchangeable across systems, for the most part, motherboards have specific CPU sockets.
Picking up a motherboard with an Intel CPU socket means you can’t upgrade to an AMD CPU without buying a completely new motherboard. And, while motherboards are not nearly the most expensive component in a PC, they’re still not cheap. For the sake of upgrading the systems listed further down in this article, all the motherboards below use the same AM4 socket, which only supports AMD Ryzen CPUs.
You’ll want to think about the PC you’re building and the types of upgrades you want to make in the future. For budget-conscious shoppers, buying a more affordable motherboard makes sense financially, but going too cheap can limit what you can update in the future, making the computer obsolete much sooner than necessary.
If you can’t afford an M.2 NVMe SSD right now, that’s understandable, but if you want one in the future, make sure you get a motherboard with an M.2 socket that supports NVMe PCIe 3.0 drives. You’ll thank yourself down the line when you can finally afford the upgrade.
Motherboard Sizes
The other thing you have to consider about motherboards is the size. There are three main sizes — ATX, Mini-ATX, and Micro-ITX — to consider, and each of them has their perks. Larger ATX motherboards are the biggest consumer-grade motherboards, and they also have many features, some of which are not available on smaller motherboards. The downside of buying a larger motherboard is that you’ll also need a larger case, which, depending on the case, can occupy more space than is available.
Since smaller motherboards are crowded, building on them can be a hassle, but they are sometimes more cost-effective and have the same essential sockets, ports, and connections. Smaller motherboards fit on bigger cases, whereas the same can’t be said about large motherboards and small cases. Small motherboards, such as a Micro-ITX, may not have every feature available, but pricier models use the limited space creatively. Sure, your fingers will have to perform some gymnastics, but the smaller form factor means the PC won’t completely take over the desk.
Motherboard Chipsets/BIOS
Finally, motherboards have distinct chipsets that vary by manufacturer, and they control many basic features on a computer. Every motherboard is different, but the ports available dictate what components you can use. Hardware such as RAM, PCIe cards, NVMe SSDs, HDDs, and others depend on the motherboard.
Motherboards operate via the UEFI, or Unified Extensible Firmware Interface, which is commonly referred to as the BIOS (Basic Input/Output System). The BIOS varies by motherboard and manufacturer, but it’s the control room for your computer. You can adjust fan speeds, RAM clock speeds, lighting, and other highly technical CPU, GPU, and memory settings. You most likely won’t spend too much time in the BIOS, but a good BIOS makes a big difference.
When purchasing a motherboard, do some research beforehand to make sure the BIOS on the motherboard supports your CPU. Check if the motherboard ships with an updated version of the BIOS that supports your CPU without an update. If you get a motherboard with an outdated BIOS that doesn’t support your CPU, you’ll have to borrow a CPU that does to update the BIOS. Some manufacturers will loan you a CPU to upgrade your BIOS, but that’s not always the case.
Regardless, do your research. If the motherboard won’t support your CPU out of the box, just look for another one and save yourself the hassle. You’ve been warned. If you ever update your BIOS, which you should, please don’t update when there is a possibility of a power outage. Because, well, that’s one mother you won’t want to deal with.
Parts Guide: CPU
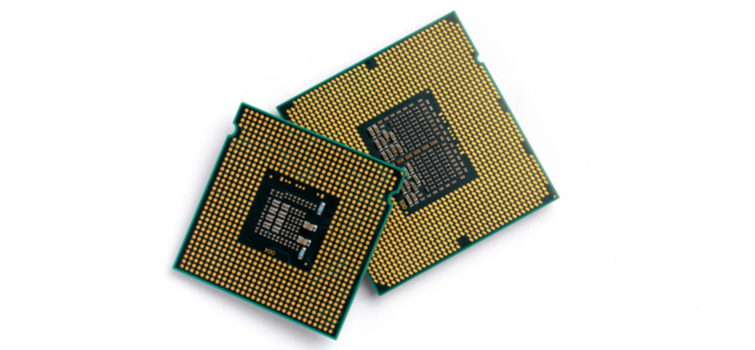
Barely larger than a cracker, the CPU is the brains of the operation and the most important piece of hardware for video encoding. Image via weera.otp.
The CPU, or central processing unit, is responsible for all the computing. Essentially, it’s the brains of the operation, and it’s one of the core components for a fast, reliable video editing PC. Video editing software relies heavily on the CPU — GPUs, however, are increasingly becoming more important for video encoding — so you’ll want something fast, powerful, and capable of handling lots of things at once.
The CPU industry is a duopoly, with the two reigning companies being Intel and AMD. Intel has a more significant share of the market, but AMD has steadily been gaining on its competitor in recent years.
Video editors tend to stick with Intel because it’s a reliable brand with solid products, and benchmarks show that it does a great job of handling single-core workloads. However, Intel chips are expensive, and they reserve their best features for higher-priced CPUs. In an effort to gain market share, AMD is extremely generous, and many of the best features are available on their lower-end CPUs.
AMD CPUs are more affordable than their Intel counterparts, and the AMD Ryzen line of CPUs, which are direct competitors to Intel’s flagship CPUs, are all unlocked. In layman’s terms, an unlocked CPU is capable of overclocking, which is when a CPU runs at a faster frequency than the stock frequency. Some of AMD’s Ryzen chips are factory overclocked, with enough room for users to push the overclock even further.
Multi-threaded/Hyper-threaded CPUs
Adding fuel to the fire, all Ryzen CPUs use simultaneous multi-threading, which means that there are twice as many threads as there are cores. My CPU is a Ryzen 7 2700X with eight cores and 16 threads, and it’s capable of computing more tasks per second than a CPU that is not multi-threaded. Intel uses the same technology on some of their CPUs, though they call it hyper-threading, and it’s only available on pricier CPUs.
Multi-threaded CPUs use two threads for every core. Instead of one thread feeding tasks to each core, there are two threads simultaneously tasking each core, which increases efficiency. There are more threads pushing work to the cores, so there is always another task in the queue. Although both manufacturers use similar technology, AMD Ryzen CPUs are multi-threaded at much lower price points than their Intel counterparts. That alone is reason enough to hop on the AMD bandwagon.
What to Look Out For in a CPU

The CPU fits into the CPU socket on the motherboard in a specific way. Typically, a corner of the CPU has a yellow triangle that aligns with a specific corner of the socket, which is also sometimes marked with a triangle. Installing the CPU is the first thing you should do. Image via Preechar Bowonkitwanchai.
When researching a CPU, there are several features to analyze. First, you’ll want to know the number of cores and whether the CPU is multi-threaded or not. Then, look for the frequency of the CPU.
According to PC World, CPU frequency “represents how many times the internal clock inside the CPU ticks in cycles per second.” While factors other than frequency impact a CPUs performance, a higher frequency equates to faster, therefore better, performance.
You’ll also want to know if it’s possible to overclock the CPU, which increases the frequency. Overclocking is a science, though, and overclocking too much can cause the CPU to overheat. The more you overclock, the more you need to think about CPU cooling, which I’ll cover later in this article. Though you might not overclock right away, it’s something you could do in the future to squeeze more performance from the CPU.
Whatever your budget is, plan on spending at least a quarter of it on your CPU. Be economical, sure, but don’t be a cheapskate, either. More than any other part on this list, the CPU is the component that video editors rely on the most because it’s what allows videos to be rendered. A faster CPU that can handle heavier workloads will decrease the time spent rendering.
Parts Guide: GPU
The graphics processing unit is similar to the CPU in many ways, though it’s physical appearance is decidedly large. Whereas the CPU computes information and tasks for general computing purposes, the GPU processes graphical tasks that vary from watching videos on Youtube to editing special effects to rendering video game graphics in real-time. The CPU handles more data-intensive workloads that require whole cores, while the GPU has hundreds of cores that each handle smaller tasks.
The frequency of the GPU and the frequency of the GPU’s video RAM, (VRAM) as well as VRAM capacity, are all important units of measurement that you should inspect before purchasing. GPU frequency is much like CPU frequency, which measures how many cycles are happening per second. Higher GPU frequencies mean you can render video faster, since the cores within the GPU are working at a faster pace.
A GPU’s VRAM holds the instructions that the GPU needs to execute. Having more VRAM is always better since it can hold more instructions, which prevents bottlenecking the GPU. The frequency of the VRAM dictates how often it’s syncing and passing off instructions to the GPU. This thread on Quora dives much deeper into GPU and VRAM frequency, if you’re interested.
For editing video, GPU frequency and VRAM are important, but GPU frequency has a higher impact on rendering times.
GPUs and Hardware-Accelerated Rendering
Video editors each have their preference for video editing software, so it’s tough to pick one GPU for each software, but I’ll use Premiere Pro as a reference since it’s one of the most popular.
Premiere Pro users recently got some great news regarding hardware-accelerated rendering, making the GPU way more important for video than it has ever been. GPUs can now handle the rendering, and they can assist with certain effects in Premiere Pro thanks to the Mercury Playback Engine.
GPU accelerated promises faster render times, and it’s a feature that should have been added years ago. Whereas before the CPU was the most important video editing component, it seems that GPUs are the future. Adobe says that hardware-accelerated features are supported when using a GPU from their recommended list, but it’s not clear if that’s a suggestion or a requirement.
Consumer Vs. Professional GPUs

Modern GPUs are huge, so you’ll want to make sure the case you buy has enough clearance. Image via kvsan.
There are two kinds of dedicated GPUs out there: consumer-grade GPUs for video games, and professional GPUs used by video game developers, VFX artists, designers, engineers, architects, and video editors. AMD and Nvidia are the two big companies in the GPU space, both offering options for average consumers and creative professionals. Intel has recently begun to manufacture GPUs, but they have a long way to go before they’re considered viable options.
When comparing consumer-grade GPUs, I would outright recommend an Nvidia GPU, mostly because my AMD gaming GPU is a high-priced headache-inducing piece of hardware that has brought me more frustration than the joy it promised. However, the two companies have excellent professional GPUs, each of them suited for different types of creatives.
Professional-grade video cards are sometimes incredibly expensive, and because their use is niche, there is sometimes not much information available. In an age where consumers look at a dozen reviews for a toaster before purchasing, it’s hard to ask someone to spend a few hundred dollars on a GPU with little to no information available.
There are upsides to using a professional GPU, however, and that’s because the manufacturers offer more hands-on support for their professional users. Also, the GPU drivers are pushed out at a slower pace to ensure compatibility across many applications. Conversely, AMD’s driver updates for their current flagship consumer GPU, which I own, have been so bad that I frequently find myself wishing I had bought a GPU from Nvidia. Such is life.
When looking at Adobe’s list of recommended GPUs, none of the AMD GPUs listed are consumer-grade. AMD GPUs such as the AMD Radeon Pro WX 7100 are excellent for video editing, but they are expensive, niche, and hard to find. On the other hand, there are many consumer-grade video game GPUs from Nvidia.
While there are affordable options from both AMD and Nvidia, the lack of consumer-grade AMD cards in Adobe’s list is worrisome, especially for those who want a system for video editing and other activities. Hopefully, Adobe will support consumer-grade AMD GPUs in the future.
With hardware-accelerated rendering on Premiere Pro and DaVinci Resolve, having a powerful GPU is more important than ever. Hardware-accelerated features are still new to Premiere Pro, but rendering with a GPU is quickly becoming the best option.
Parts Guide: RAM

Before inserting the RAM sticks into the DIMM slots, undo the levers. You should hear a loud click as the levers lock up again when the RAM sticks are correctly inserted. Image via Kom_Pornnarong.
If you’re a veteran video editor, you know the importance of RAM. The amount of available RAM dictates how fast videos load as you’re scrubbing the timeline. Every cut, effect, and transition requires RAM, and more RAM means you can quickly load and view your video without waiting. Trying to edit video on a computer with just four or eight gigabytes of RAM is an exercise in frustration, with tons of crashes, slow scrubbing, freezes, and dropped frames. But what is RAM, and how much do you need?
What is RAM?
Thanks to Cambridge University, the first part of the question is easy: Random Access Memory is a type of volatile memory that holds data and program instructions used by the CPU. When there isn’t enough RAM, lesser-used instructions move to virtual memory, where they remain until they are needed again. Switching between RAM and virtual memory slows down the CPU, so it’s crucial to have plenty of RAM. With more RAM available, the CPU can efficiently multitask and continue to operate RAM-heavy programs such as Premiere Pro. There are other factors on a stick of RAM that are important, such as frequency and latency, but capacity is the most important.
When it comes to how much RAM you need, well, like everything on this list, that depends on what you’re doing, which software you’re using, and your budget. Just know RAM is more expensive per gigabyte than any other type of memory, and you’ll have to pay dearly for a fast system.
Think of RAM as an incredibly fast and expensive storage device that holds your computer’s instructions — RAM is a volatile type of memory, meaning that it’s wiped clean on reboot. CGI Director explains precisely why you need more RAM for video editing: RAM is responsible for storing the rendered preview of your video, which is cached on the RAM. The more RAM available, the faster you can scrub through the preview timeline, which has effects and other video editing components.
How Much Ram Should You Use?

Full-size motherboards typically have four DIMM slots, but you don’t have to use all four. If a motherboard uses dual-channel memory, make sure to insert the RAM sticks into the correct DIMM slots. Image via daniiD.
If I had to put a number on it, I would say to go with 64GBs of RAM, which would cost, depending on the manufacturer and speed, between $250 to $300. While it’s possible to go even higher, 64GBs of RAM is more than enough for 1080p and 4K video editing, and it’s just enough for 8K video editing. Special effects software, such as After Effects, also benefits from more RAM, and 64GB should be a sweet spot, but that may also depend on the available VRAM on the GPU. Adobe recommends up to 128GBs of RAM, but that can cost well over $500.
Before we move on, one thing to keep in mind is that all CPUs have a RAM limitation. I have a Ryzen 7 2700X, which only supports up to 64GBs, so it wouldn’t be possible for me to go any higher unless I bought a better CPU. Just keep that in mind, and try to future proof your PC as much as possible. Better to spend a little more now than spending a lot more later.
Parts Guide: Storage
There are several storage options these days, as we’ve recently covered, but none are better than an M.2 NVMe PCIe SSD. If you want to know more about what each abbreviation means, I recommend taking a look at the article linked in this paragraph. An NVMe SSD is the fastest type of consumer-grade storage currently available, and while it is expensive, it has speeds that are up to 25 times faster than a standard hard disk drive (HDD). Unless you have an exorbitant budget, however, I recommend going with a dual storage system that utilizes an NVMe SSD in conjunction with a slower, though larger-capacity, HDD.
Using a Dual-Drive System

Unlike SATA SSDs and HDDs, storage drives with an M.2 key can only connect to an M.2 socket. NVMe SSDs, which are the fastest storage devices, have an M.2 form factor with an “M” key. Check if your motherboard has an “M” key M.2 socket before purchasing an NVMe SSD. Image via Christian Wiediger.
The NVMe SSD is where you’ll want to install your operating system to improve load times when booting or loading software. You’ll want to store everything else on your HDD. To make editing more manageable, it’s good practice to transfer the related video files from the HDD to the SSD to help with loading and exporting. When you’re done with video files, you can store them on the HDD, which should be the more substantial of the two storage drives. This method saves you from spending hundreds of dollars on high-priced storage while still taking advantage of the speed from an NVMe SSD and the storage capacity of an HDD.
Video editors need lots of storage, much more than can physically fit on a computer, but there should be enough available storage without having to delete files after every edit. There are solutions for long-term storage, such as a Network Attached Storage (NAS) device, but we won’t get into that. I recommend having at least a 500GB NVMe SSD, and a much larger HDD with at least two terabytes of capacity. While the former costs around $60, the latter should be about the same price for four times the storage.
The great thing about storage is that you can always upgrade in the future, so long as you buy a decent motherboard. My motherboard, an ASUS Prime X470-Pro, has 6 SATA ports for HDDs or SATA SSDs, and it also has two M.2 sockets for NVMe SSDs. Just make sure that whatever motherboard you buy has enough room to upgrade storage, which you will always need.
Parts Guide: PSU
There’s nothing flashy about a power supply unit (PSU). The power supply unit gives your computer life, and a cheap PSU might end that life prematurely. Never, and I repeat, never buy an off-brand PSU from a company you’ve never heard of, and be extremely cautious when purchasing a used PSU. The best-case scenario for buying a cheap PSU is that your computer won’t start; worst case, your computer will catch on fire. I get wanting to save money, but not with a PSU.
PSU Efficiency Ratings
Which PSU you need depends heavily on the system you’re building, with the CPU and GPU being the two most significant power hogs. Luckily, PC Part Picker and Outervision, which provides a power supply calculator, can give you a decent estimate of what PSU you will need.
Apart from the wattage on a PSU, you’ll want to look out for the efficiency rating, which Gizmodo explains in great detail. Purchase a PSU with an 80+ rating for the best efficiency. The 80+ rating is split into three tiers: bronze, gold, and platinum. PSUs with better efficiency ratings give off less heat, and they don’t draw as much power. Investing in a high-quality PSU with a good efficiency rating will be more expensive at first, but it won’t drive up the electric bill as much as a less efficient unit.
Non-Modular, Semi-Modular, or Fully Modular

This is the dreaded non-modular PSU, which has all the cables permanently installed to the hardware. Fully modular PSUs, on the other hand, give you the most freedom when building your system. Image via K_attapon.
You should consider whether to go with a non-modular, semi-modular, or fully modular PSU. The latter is the best choice because it doesn’t come with any cables attached to the PSU, leaving the user with more room for customization. Semi-modular PSUs have some cables pre-attached, which cannot be removed, but there is still some freedom. Lastly, non-modular PSUs are bad, and you shouldn’t get one.
Semi-modular PSUs are a bit more affordable than their fully modular counterparts, and they’re not entirely bad, but I recommend a fully modular PSU if there is room in the budget.
Parts Guide: Case
The case is probably the most aesthetic-based purchase you’ll make, and there are tons of case options these days. Cases come in all shapes, sizes, and colors, but most of them are black towers with a glass side panel. If you’re not into the traditional gaming case, there are still options, but you’ll have to look harder. And while a PC’s look is important, it’s better to buy something functional and easy to build on. First-time builders should get a spacious case.
Each case is different, and the number of supported fans, cutouts, and drive bays varies by case. Pick one with good airflow and room for upgrades, and find out if your parts will fit comfortably.
Parts Guide: CPU Cooling Options
As we’ve already covered, video editing is a CPU-intensive task that takes up a lot of resources, and the harder a CPU works, the more heat it outputs, especially if it’s overclocked. There are two CPU cooling options to choose from, both of which you should consider.
CPU Cooling Fan or AIO Cooler

CPU cooling fans don’t look very glamorous, but they get the job done. Apart from being easy to install, CPU cooling fans are affordable. In some cases, however, the cooling fan may have clearance issues caused by the RAM, which is typically located right next to the CPU. If possible, purchase low-profile RAM to prevent any clearance issues. Image via Scharfsinn.
CPU cooling fans are the go-to for most builds because they’re affordable, easy to install, and require no maintenance, but they are loud. The other contender is the AIO water cooler, which is not as complicated as it sounds.
The AIO is an all-in-one (hence the name) cooling solution that includes all the parts needed. The water block connects to the CPU and absorbs the heat, transferring it to the radiator via the coolant in the tubes. When the heat reaches the radiator, the fans blow the heat away from the PC.
This type of CPU cooler is more expensive than a CPU cooling fan, but it does keep the noise down, and many swear by its cooling properties. If you’re planning to install an AIO water cooler, get a case with air vents at the top of the case, which is the best place for the radiator and fans.
When the CPU is under a heavy workload, the cooler goes into overdrive to prevent overheating, making tons of noise. Some manufacturers sell cooling fans that operate at much quieter sound levels. Silent CPU coolers are not cheap, but they do help a lot with the noise without losing too much cooling performance.
For most users, I recommend using the stock cooler included with an AMD Ryzen processor. The stock Ryzen coolers do a decent job, especially when considering it’s bundled in at no extra charge. The stock coolers, however, are no match for overclocked CPUs. Invest in a beefier CPU cooling fan or AIO cooler if you’re overclocking.
Applying Thermal Paste/Compound to the CPU
I have an AMD Wraith cooler that came included with my CPU, and I’ve had no issues so far. The great thing about AMD’s CPU cooling fans is that they’re shipped with thermal paste pre-applied, so that’s one less product to buy and use.
The thermal paste is necessary for heat to travel from the CPU to the cooler. Incorrectly applying thermal paste can lead to overheating or completely frying the CPU. When I first built my PC, that’s not something I wanted to stress over, so I stuck with the stock cooling fan. If you do want to apply the thermal paste yourself, just place a pea-sized amount onto the CPU and then install the cooler.
Parts Guide: PC Cooling
Proper cooling is the best way to prevent your PC from overheating. The hot air that is expelled from the CPU and GPU needs to escape. Otherwise, the heat builds up and overheats the computer.
Fans introduce cool air to the system while removing hot air. Every PC case varies in the number of fans it supports, but there is a standard procedure for fan cooling. You’ll want some fans in the front of your case to intake air and fans at the rear to outtake the hot air. For even better cooling, you should also place fans at the bottom of the case to intake cool air and fans at the top for air outtake.
There are fans of several different sizes, but 120mm fans are the most common and are compatible with a wide variety of cases. There are also two types of fans to consider: airflow fans and static pressure fans. The former are great for air intake, while the latter are better at removing the hot air trapped within the PC. PCs with lots of obstructions and no clear path for airflow benefit the most from static pressure fans. If you truly want to optimize cooling, buy the proper fans for each situation, though the differences are minimal.
One final thing to ponder is the number of fan headers that are available on your motherboard. The fan header is what powers a PC fan, and while it’s best to plug one fan per fan header, it’s also possible to connect the fan cables to a fan-splitter, which turns one fan header into three or more. The problem with fan splitters is that you may not be able to control each fan separately, but I don’t think it’s a significant issue. It’s better to have the right number of fans than individual fan speed control.
The Three Builds
With all that information neatly tucked away for future reference, it’s time to look at some PC builds. You’ll notice that I only included the core components for building a PC, so items such as monitors, speakers, fans, RGB lighting kits, and peripherals are not included.
It’s reasonable to assume that most people have a monitor, keyboard, and mouse, but if you don’t, don’t sweat it. You can find decent monitors for around $200 or less, and keyboards and mice typically sell for $50 each. Just buy what you need and keep adding until you have the perfect setup.
I decided on three different price tiers for video editors, with each tier becoming progressively more advanced and expensive.
The first tier should be great for beginner video editors looking for a capable editing PC, and it has plenty of room for upgrades down the line. The middle tier has a faster processor, a professional-grade AMD GPU, and more RAM, while the last tier is arguably one of the best PCs you can build at that price point.
Every PC on this list uses an AMD processor to make it easier to upgrade — it’s not possible to upgrade to an Intel chip while using a motherboard with an AMD AM4 socket and vice versa.
Though veteran PC builders may differ in opinion when it comes to some parts, these builds are, essentially, blueprints, with the end-user making the final decision. Feel free to exchange parts where you feel necessary and build the PC that is right for you. Some editors may need more RAM, while others may need a better GPU for rendering special effects. Whatever the case, the guides below are blueprints upon which you can build on.
(You can click on each of the titles below, which are linked to PC Part Picker. The prices for each part are listed, and you can copy the build and modify it to your liking.)
Budget: Under $1000
CPU: AMD Ryzen 3 3200G 3.6 GHz Quad-Core Processor
This is one of the best processors for under $100, and while it won’t wow you when using CPU rendering, there is no denying the amount of performance this chip produces compared to its value.
This four-core APU has a boost clock of 4GHz, which is solid, and it supports up to 64GBs of RAM. Because this chip is an APU, it has integrated Radeon Vega 8 graphics, and, as a bonus, it comes with a CPU cooler. Seriously, this is a fantastic deal.
Motherboard: MSI B450 Tomahawk Max ATX AM4
This motherboard, or “mobo,” is a good deal, with four DIMM slots for RAM, (up to 64GBs) six SATA 3.0 drives, (HDD and SATA SSD) and one NVME M.2 socket. This motherboard does lack wireless connectivity, so you’ll have to purchase a Wi-Fi card or stick to an ethernet connection.
GPU: MSI GeForce GTX 1660 Ti 6GB Gaming X
The 1660 Ti is one of the best values in PC gaming, and Adobe recommends this GPU for hardware-accelerated rendering. The 6GBs of VRAM isn’t best-in-class, but it’s more than plenty for hardware-accelerated rendering at 1080p and even 4K. At around $300, there is probably no better GPU at this price-point.
RAM: Corsair Vengeance LPX 32 GB (2 x 16 GB) DDR4-3200
32GBs of RAM is the bare minimum for serious video editing these days. The Corsair Vengeance RAM sticks are well-known for their reliability, which is why I have them in my system. They’re not as flashy as other brands, but they perform well at an affordable price. Since this kit only occupies two DIMM slots, you can buy another kit in the future and double the memory. It’s better to buy the whole RAM kit all at once, but don’t sweat it too much.
Storage: Sabrent Rocket 256GB M.2 NVME SSD and a 2TB Barracuda Compute 3.5” 7200RPM HDD
This NVME SSD is just enough for the operating system and some software, which guarantees fast boot times and minimal software loading. The HDD is where you’ll want to store larger files.
PSU: Corsair CXM 550W 80+Bronze Semi-Modular
Corsair PSUs are some of the best in the industry, so you’re in good hands.
Case: NZXT H510 ATX Mid Tower Case
This case is very popular because it’s easy to build on, and it has a minimal look. The PSU shroud is a compartment located in the bottom third of the case, and it hides the PSU. The case also comes in white.
Approximate Price According to PC Part Picker: $929 (prices may change)
Mid-Tier: Under $2000
CPU: AMD Ryzen 7 3700X 3.6 GHz 8-Core Processor
At almost $300, this multi-threaded CPU is one of the best on the market, supporting eight cores (16 threads) with a boost clock speed of 4.4 GHz. With a thermal design power (TDP) of only 65W, this CPU runs cool, so overheating shouldn’t be a problem. I have the older version of this CPU, and it’s a beast. You couldn’t get a better CPU at this price point, and it comes with a reliable Wraith Prism CPU cooler with RGB lighting.
Motherboard: ASUS TUF Gaming X570-Plus (Wi-Fi) ATX AM4
Unlike the motherboard in the previous build, this one does have built-in Wi-Fi. What’s more, this motherboard supports up to 128GBs of RAM, and it has eight SATA 3.0 ports for multiple HDDs and SATA SSDs.
GPU: AMD Radeon Pro WX 7100 8GB
The Radeon Pro WX 7100 is one of AMD’s newest professional-grade GPUs. There are other cards in the Radeon Pro WX line, but this one specializes in 4K video editing and video encoding, making it perfect for most video editors.
This GPU has 8GBs of video RAM and a memory clock speed of 8000MHz, which is insane. Adobe Recommends this GPU for hardware-accelerated rendering on Premiere Pro and After Effects.
RAM: Corsair Vengeance LPX 64 GB (2 x 32 GB) DDR4-3600
This kit is similar to the one from the build above, except that this is slightly faster. AMD Ryzen CPUs perform better with faster RAM. While it’s possible to buy even faster RAM, it comes at an extremely high price. More RAM is better than faster RAM.
Storage: Samsung 970 Evo 1 TB M.2-2280 NVME SSD and 2x Seagate Barracuda Compute 2TB 3.5” 7200RPM HDD
This is the best of both worlds. You have, arguably, the best NVME SSD, the 1TB Samsung 970 Evo NVMe SSD, for the OS, software, and editing. Archived video files and projects can go on either of the two HDDs. For faster editing, just move the files in use to the SSD.
PSU: Corsair RM 750W 80+ Gold Fully Modular ATX
Again, I have to recommend Corsair. Ask anybody who knows about PCs, and they’ll tell you the same. Also, this PSU is fully modular, giving you full control of cable management. You can buy new cables for your PSU to match the color scheme of your PC.
Case: NZXT H510 Elite ATX Mid-Tower
When it comes to cases, it’s really up to you. I think this one is flashier than the NZXT case in the previous build, but it still maintains that minimalism. The black and white color scheme is eye-catching but not over the top.
The case comes with two 140mm RGB fans in the front, one 120mm fan in the rear, and another 120mm fan at the top. There’s also an RGB hub for the fans. While I haven’t built a PC with this particular case, most reviewers agree it’s easy to build on.
Approximate Price According to PC Part Picker: $1,858 (prices may change)
High-End: $4000+
CPU: AMD Ryzen 9 3950X 3.5 GHz 16-Core CPU
This is, hands down, one of the best CPUs available, and it’s a 16-core, multi-threaded beast of a processor. It’s impossible to get more than 16 cores on a CPU without spending north of $1000.
This CPU has a boost clock of 4.7GHz and supports up to 128GBs of RAM. There’s no cooler or integrated graphics, but we’ll take care of that. Rest assured, this is the best CPU you can get for under $1000.
Motherboard: ASUS ROG Crosshair VIII Hero (Wi-Fi) ATX AM4 Motherboard
Apart from supporting fast RAM, this motherboard has two M.2 sockets for NVMe SSDs, and there are 8 SATA 3.0 ports for extra storage. The X570 chipset is the best available for 3rd generation Ryzen chips, and, most importantly, it supports PCIe 4.0, which is capable of transferring data at 2GB/s per PCIe lane.
The motherboard also comes with Wi-Fi, plenty of USB ports, a great audio chip, and many other features. At almost $400, this motherboard is “high-end” at a relatively affordable price.
GPU: NVIDIA GeForce RTX 2080 Ti Founders Edition 11GB Video Card
Currently, the RTX 2080 Ti is the best consumer-grade video card that money can buy. When it comes to gaming, this GPU is the undisputed king, though it’s just as useful for video rendering.
At over $1000, this GPU is steep, but it has 11GBs of video RAM, which alone justifies this GPU for video editing. While Nvidia makes professional-grade cards that are several thousands of dollars more expensive, the 2080 Ti is all you need for fast video rendering.
If you want to decrease your rendering times further, consider buying a second one. The motherboard in this build is 2-way SLI capable, which means you can run two of these GPUs simultaneously.
RAM: Corsair Vengeance RGB Pro 128GB (4x32GB) DDR4-3600
Yes, it’s Corsair once again, but the kit is a bit different this time. The Corsair Vengeance RGB pro sports a different look, and it has RGB lighting that syncs with other Corsair hardware via the iCue software. This kit includes four 32GB RAM sticks for a total RAM capacity of 128GBs, which is the maximum RAM that this CPU supports.
Storage: 2x Corsair MP600 Force Series Gen4 2TB M.2 NVME SSD and 2x Seagate Barracuda Compute 2TB 3.5” 7200RPM HDD
The Corsair MP600 NVME SSD is one of the few SSDs on the market that uses the PCIe 4.0 interface. The M.2 sockets provide each SSD with four PCIe lanes, each capable of transmitting up to 2GB/s per lane for a total of 8GB/s, which is theoretical. In “real-world” use, Corsair claims that this SSD has sequential read speeds of 4,950MB/s and write speeds of 4250MB/s.
The HDDs are for archiving large unused files, old footage, and projects. For the sake of comparison, a typical HDD has sequential read/write speeds of about 120MB/s — you do the math. I know the MP600 SSDs are expensive, but they’re genuinely the best that money can buy at the moment.
PSU: EVGA SuperNOVA G3 850W 80+ Gold Fully Modular ATX Power Supply
While this system doesn’t need the full 850W of power, it might come in handy if you upgrade later on. The 80+ Gold rating means it’s efficient, saving you money on your electric bill. This PSU is also fully modular. EVGA makes excellent PSUs, and I wanted to offer an alternative to Corsair, primarily because many Corsair PSUs are currently sold out or overpriced due to the pandemic.
Case: Corsair iCUE 465X RGB ATX Mid Tower Case
If you haven’t noticed already, I tried to make this the “Corsair” build, but I do have a reason. The iCue software syncs all the RGB lighting on your PC, but it only works with Corsair products — the motherboard, though not Corsair branded, should also sync.
The case comes with several RGB fans, and this build includes a Corsair RAM kit and CPU cooler for maximum synergy. Parts from other brands use specific lighting software, making it impossible to sync everything, which leads to a PC that looks like an RGB clown show. This is also a solid case with plenty of space to build, a PSU shroud, a mesh roof where you can mount a radiator, and more.
CPU Cooler: Corsair iCUE H150i RGB PRO XT 75 CFM Liquid CPU Cooler
With a CPU as powerful as the 3950X, you’re going to need a beefy CPU cooler. Luckily, Corsair has just the right product at a reasonable price — I promise you they’re not paying me. This cooler has a radiator with three 120mm fans, which you should attach to the upper part of the case. While the fans do not have RGB lighting, the waterblock does.
Approximate Price According to PC Part Picker: $4,296 (prices may change)
Now Comes the Part where You Build it
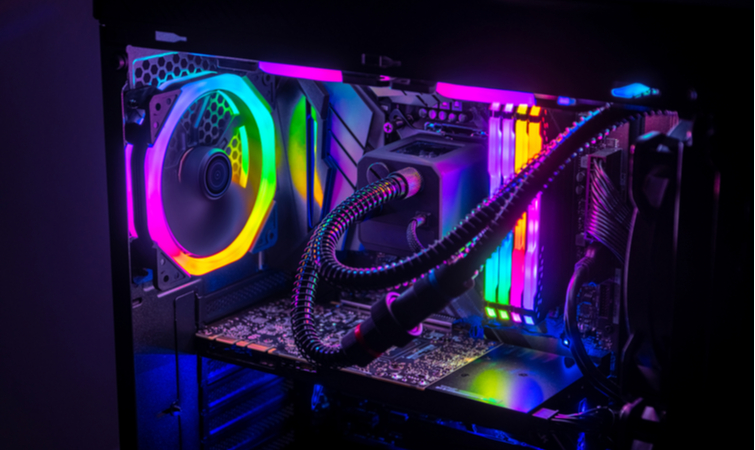
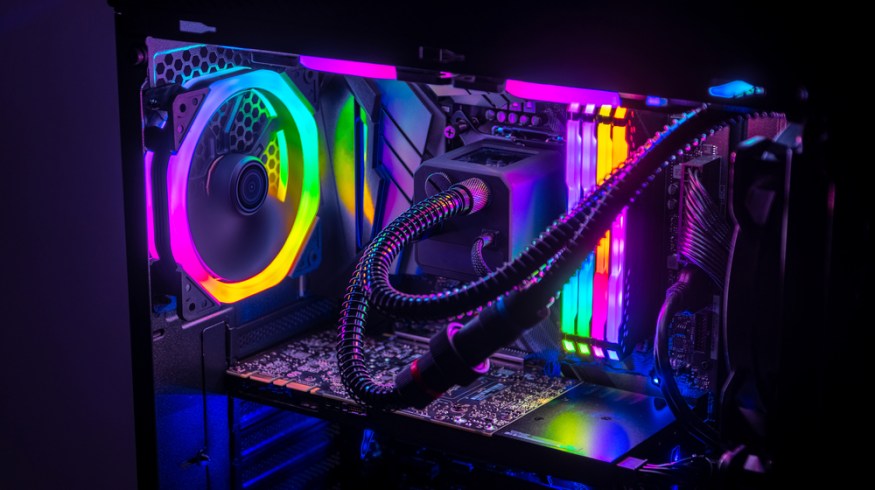
Look, I get it. RGB lighting may not be for everybody, but you can customize the setting to your liking. I find that the RGB on my PC, which is set to pink and blue, is soothing. If it’s not for you, turning off the RGB is simple. Image via Alberto Garcia Guillen.
After researching, part-picking, finding the lowest price, and buying the parts, comes the assembly. Handle parts cautiously, read the motherboard manual, and watch some tutorials on YouTube. Don’t stress too much, though, because everything will be fine if you take it slow. If you don’t know what you’re doing, check out our PC building guide, or check online forums for specific answers.
Several people have told me that building a PC is like building a Lego set but for adults. They’re not far off. The parts are more expensive, sure, but Lego building and PC building do share similarities: Both require you to simply slot parts in the correct place.
While the above builds are merely well-researched suggestions, don’t be afraid to go off-book. There are so many variables when it comes to building a PC, so pick the parts that fit your video editing style.
When your video editing PC turns on for the first time, you’ll be the newest member of an ever-growing enthusiast club. When people come over, you’ll want to show off your masterpiece, and they won’t get it, not like you do, but you’ll know. When your PC renders video faster than ever, you’ll know for sure.
Cover image via Alberto Garcia Guillen.