

Closing Multiple Gaps in a Premiere Pro Timeline

Learn how to close the gaps between clips in your Premiere Pro timeline. Use this quick tip to speed up your Premiere Pro video editing.

When you work on a video editing sequence in Premiere Pro you may find that you have many clips with gaps in-between them. Closing each of these gaps can be time consuming! With this quick tip, first taught to me by Premiere Pro expert Ann Bens, you can close all your Premiere Pro timeline gaps fast! Let’s jump in…
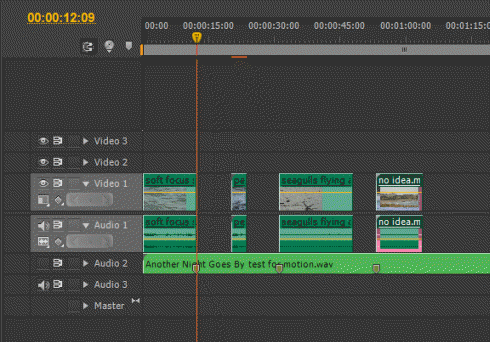
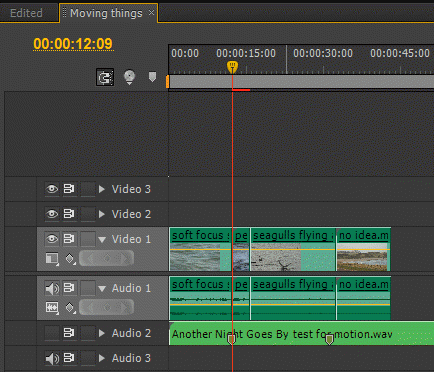
So, we start with our Premiere Pro timeline with lots of gaps. This example is using large gaps just for demonstration purposes, however sometimes its smallest gaps in sequences can equal disaster! In general, you should rid your sequence of all gaps for smooth and predictable results.
Sequence With Gaps
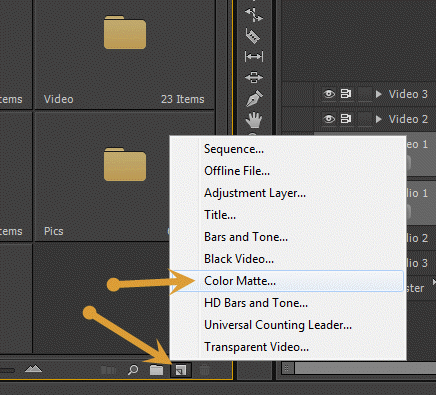
Next you need to create a new ‘Color Matte’.
Selecting A New ‘Color Matte’
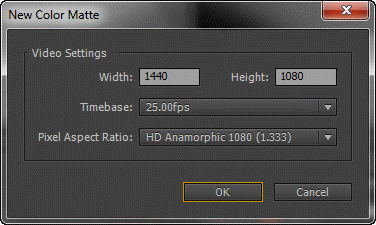
Accept the dialogue box that is basically asking you if you want the color matte to match the settings of your presently selected sequence.
New Color Matte Dialogue Box
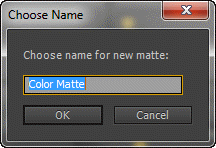
Press OK and then name it (if you want to) and hit OK. To be honest it’s not really important to name the matte as it isn’t going to stay in your timeline by the time you’ve finished. However, I like to name things because then I know why they are there in my project panel in the first place – but it’s up to you.
Name It
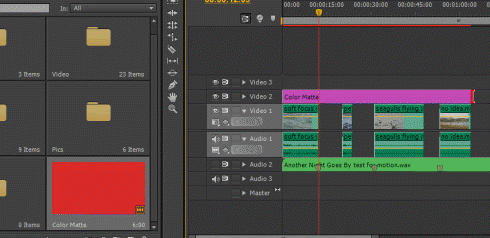
Now, move that color matte to the video layer above the clips which have the gaps in them and trim it out to the same length as the total of all the clips.
Putting The Color Matte Over The Clips With Gaps
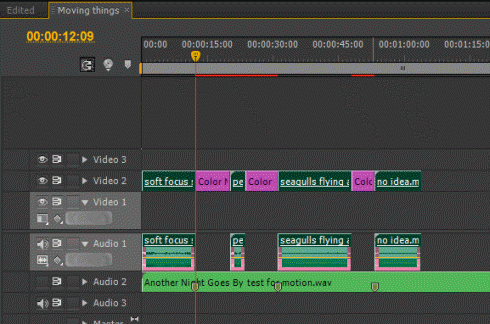
Next, select all the clips in your video layer which has gaps in it – make sure they are all selected – and then drag them up over the color matte but DO NOT deselect them!
Select Clips And Move Them Over The Matte
After this – and with the clips still selected – click on any one of the clips and drag them all back down to their original video layer.
With The Clips Still Selected Bring Them Back To Video 1
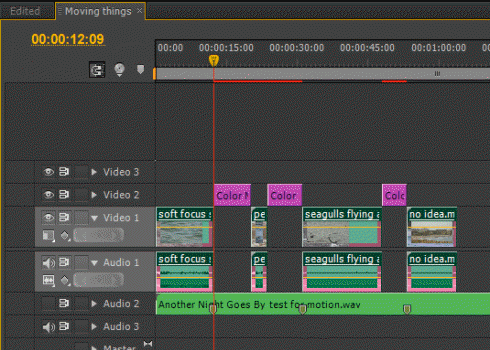
As you can see, this leaves color matte clips which are the same length and placing as any gaps you may have had between your video clips.
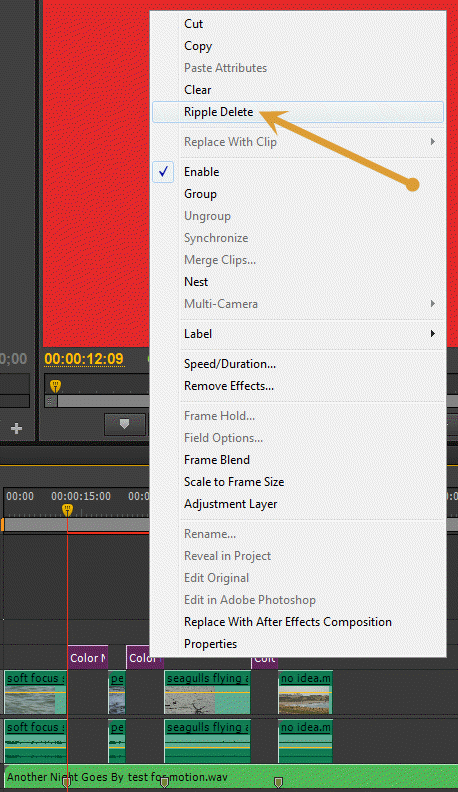
So finally, select all the remaining color matte clips in the layer above your video clips and then right click on any one of them (with them all selected) and choose ‘Ripple Delete’.
Select The Color Matte Clips – Right Click And Choose Ripple Delete
And, as if by magic, the color matte goes and so do all the gaps that were in your Premiere Pro timeline!
All Gaps Closed And Color Matte Gone!
A very useful Premiere Pro tip to close up all the gaps in you timeline! Thanks to Ann Bens for sharing.


