Video Tutorial: How to Create Anime Speed Lines in After Effects
Bring some movement into your video projects and guide your viewer’s eye with this fun motion graphics technique.
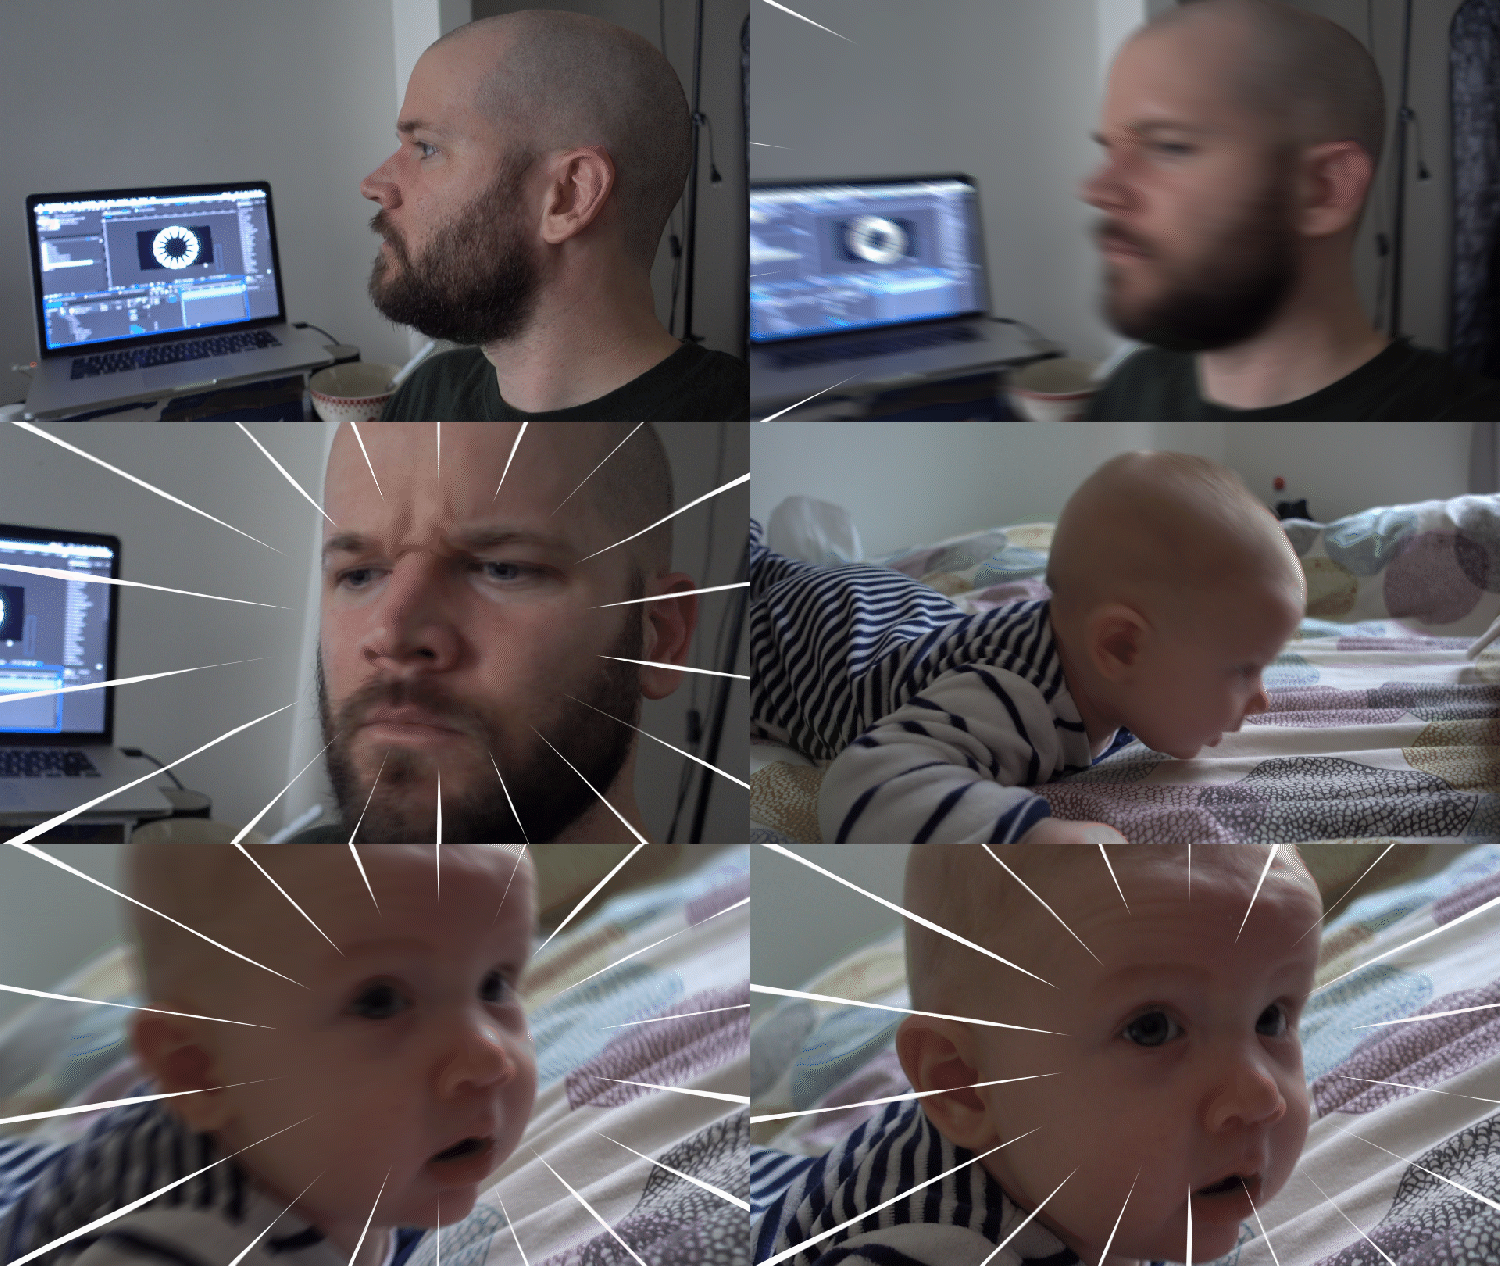
Speed lines serve a number of purposes. Not only do they indicate motion, they also draw a viewer’s eye into a specific area of the frame. Used in conjunction with sound effects and a few other animation tricks, they can give your shot an extra punch.
In this tutorial, we’re going to take a closer look at how to create these speed lines using Adobe After Effects.
Create the Shape

First, I will create just one line. I’ll use the pen tool to draw out a narrow triangle shape, with the tip of the triangle in the center of the frame. To get the vertices exactly where I want them, I’ll use Rulers and Guides. I don’t need to worry about getting the length and width of the shape perfect, as I can customize these attributes later. With the Pan Behind tool, I’ll place the shape’s anchor point in the center of the frame as well.
Add a Repeater
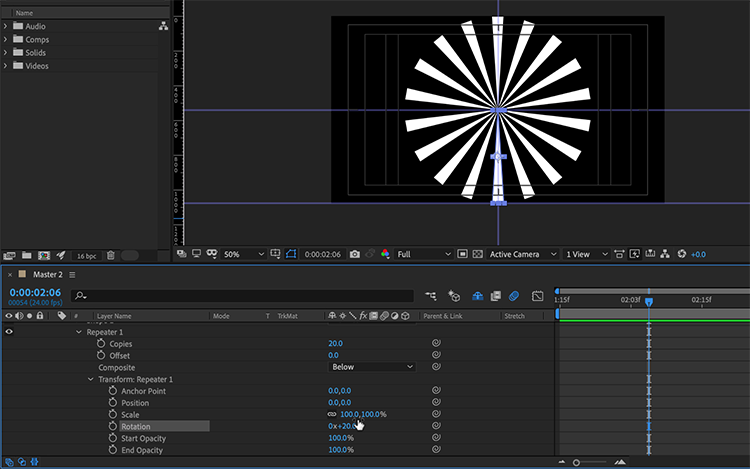
To create multiple lines, I’ll add a Repeater. You can find the Repeater by clicking on the Add button just to the right of Contents. (It’s important to place the Repeater under the shape group and not inside it.)
Now I’ll set the number of copies to 20. To line up the shapes, I will open up the transformation attributes and bring the X position from 100 to 0. Now I can set the rotation of the Repeater to 20 degrees to get my speed line circle in place. I’m finished with the Repeater, so I’ll close the menu to avoid confusion when working with other properties.
Position the Lines
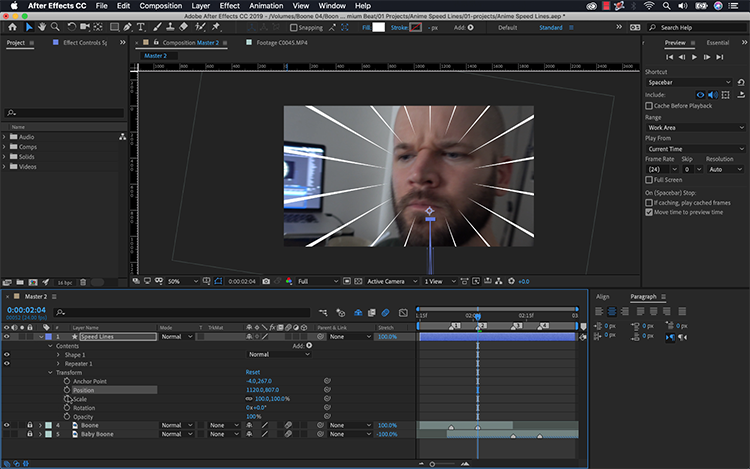
Next, to position the elements, I’ll turn on the baby reaction video layer. I can move the speed lines circle directly over the baby’s face using the main position attribute of the shape layer. To spread out the circle, I’ll open up the transformation options of the individual shape element and drag the Y position up. This will be the same attribute I animate to bring the lines in and out of frame. To adjust the width and length of the lines, I can change the X and Y scaling of the shape element. To adjust the width and length of the circle as a whole, I can change the X and Y scaling of the shape layer. Now I’m ready to bring the lines to life.
Bring the Lines to Life
Finally, I’m ready to animate my lines. I want to match the animation of my speed lines to the movement of my digital zoom. To do this, I’ll add keyframes to the Y position of the speed line shape element to start and end around the same time as the zoom on the baby’s face. I’ll add Easy Ease to the keyframes to help smooth the animation out.
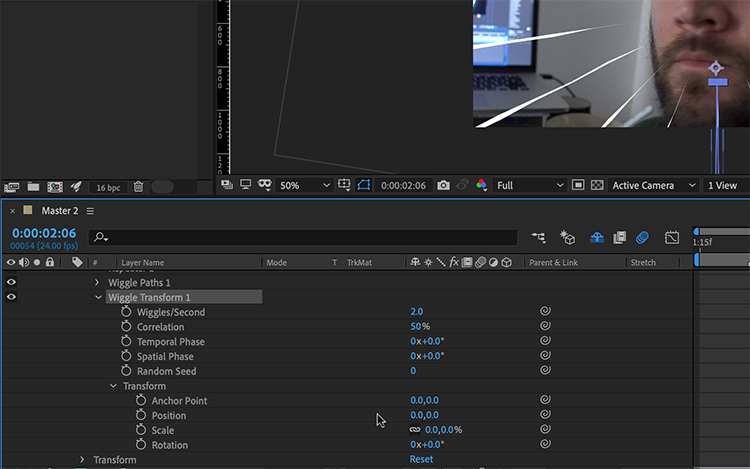
To really spice things up, I’ll add a Wiggle Path and Wiggle Transform animator just below the Repeater. Even though the speed lines are only up for a brief second, these animators will add detail. To wiggle the path, I’ll adjust the Size and Wiggles/Second attributes. This will bring movement to the edges of each line shape. Wiggle Transform will allow me to offset and bring movement to just the Y position of the lines. To do this, I’ll slightly adjust the Y position of Wiggle Transform and then fine-tune the Wiggles/Second.
Voilà! Now I have anime-style speed lines to spice up my shots.
Interested in the tracks we used to make this video?
- “Outrun” by Aulx Studio
- “Jovian Night” by Bedlake
- “Laidback Summer Vibe” by Mattijs Muller
- “Sudden Impulse” by Origami Pigeon
- “Coming Alive” by Monad
Looking for more video tutorials? Check these out.


