Video Tutorial: How to Morph Graphics Using Adobe After Effects
In our latest video tutorial, learn how you can create dynamic motion graphics in Adobe After Effects with this simple morphing technique.
For this project, I’m creating some basic infographics and working with Adobe Illustrator files of each state in the U.S.A. Each graphic will quickly transition to the next, with each state including corresponding textual information. However, I want to use a more dynamic transition than just the standard cut.
Let’s take a step-by-step look at how we can use solids and mask paths to create an interesting morph effect between each graphic.
Step 1 — Create a New Solid Layer
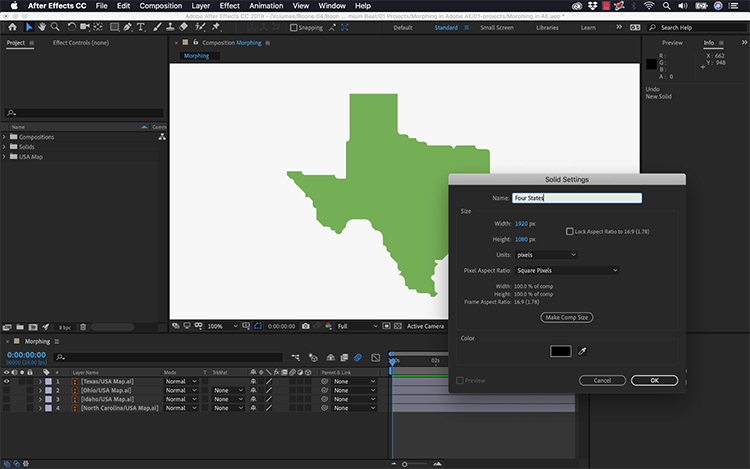
First, I need to create a new solid layer. This solid layer is going to serve as my main graphic, so I’ll be sure to select a color I like. Once I’m done, this entire animation will essentially be a keyframed mask path on one simple solid layer.
Next, it’s time to bring in our graphics.
Step 2 — Autotrace
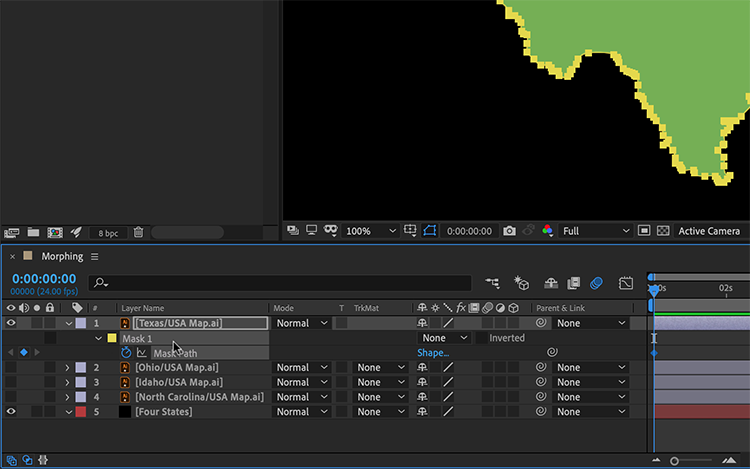
For this particular sequence, I’m focusing on animating four different states. I want each state to seamlessly morph into the next. To do this, I need to get the path information of the state. I can trace the outline of the state by highlighting the graphic in the timeline and going to Layer > Autotrace.
In the Autotrace dialogue box, I’ll keep the default settings, making sure that “Apply to a New Layer” is not selected. The Autotrace feature will automatically add a mask path to my graphic. Pressing the M shortcut key shows me the mask and its corresponding path.
Now let’s get this path information over to the solid.
Step 3 — Copy/Paste Mask Paths
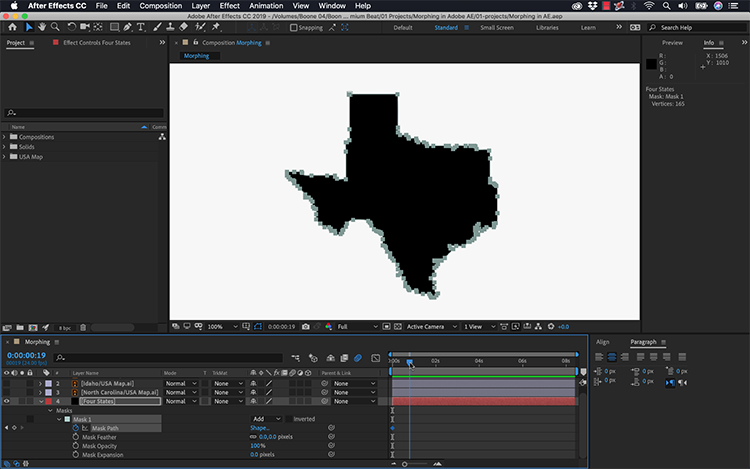
With the path now created, I’ll click on the mask path attribute and simply copy it with Cmd/Ctrl+C. Now I can select the solid layer and press Cmd/Ctrl+V to paste the mask on the solid — along with the mask path keyframe. Make sure the mask is set to Add, and position the keyframe wherever you want.
I can see the state in my solid, so I’ll delete the original graphic. Now I can simply repeat these steps for every state graphic, spacing each mask path keyframe specifically where I want it on the timeline. For this particular animation, I’ll space the keyframes 1-2 seconds apart. Now that everything is in place, all that’s left to do is fine-tune the animation.
Step 4 — Fine-Tuning

Sometimes this method of morphing will give you some not-so-nice-looking results. There’s not much you can do about this, save from manually positioning each keyframe exactly where you want it. But that’s not very efficient. I find that ramping up the speed of the transitions and adding a motion blur will nicely mask any strange overlaps or unnatural movement.
For smooth movements between keyframes, I’ll add Easy Ease. To do this, I’ll grab all of the keyframes and go to Animation > Keyframe Assistant > Easy Ease, or just hit the F9 keyboard shortcut. For the final touch, I’ll open up the Graph Editor and adjust the speed values accordingly. And voilà — now my states are animating on screen via morph transitions.
Many Ways to Morph
This mask path method is just one example of morphing graphics in After Effects. It’s a very simple example, using just one path. But you can use this same method with text, logos, and any other graphics that have a path. Just as I performed a copy/paste via the mask path, you can do the same techniques with shape paths.
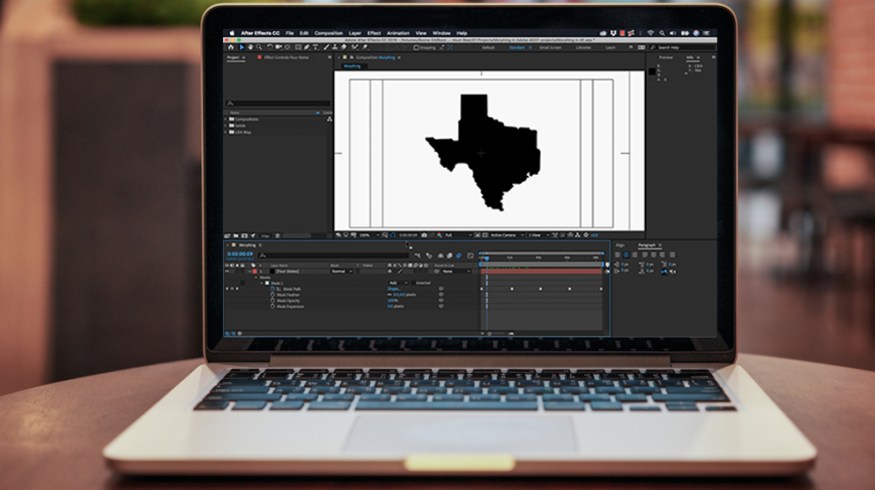
Cover mockup via CrispyPork.
Looking for more After Effects video tutorials? Check these out.


