
DaVinci Resolve Tip: Use an EDL and Scene Cut Detection to Set up a Project

For long-form DaVinci Resolve projects, one of the easiest ways to get up and running involves using the powerful scene cut detection feature.
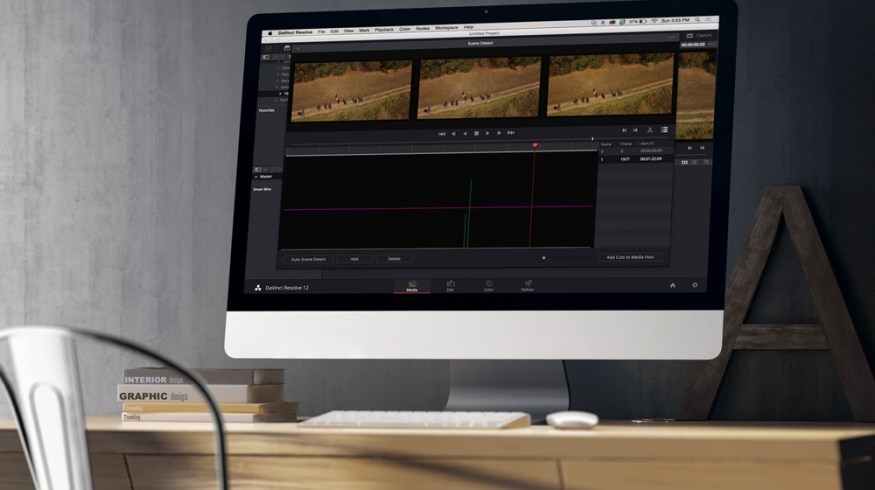
For those of you that aren’t as familiar with this feature, scene cut detection is a powerful tool within DaVinci Resolve that will scan through a video file and automatically create cuts for you so that you can grade each shot individually.
It works beautifully, but like any tool, it isn’t always 100% accurate. Sometimes it misses an edit, while other times it may create an edit where there shouldn’t be one. The good news is that you can use scene cut detection in conjunction with an EDL file in order to get frame-accurate cuts every time.

Typically when I’m going to color grade a feature film that doesn’t need to be linked to RAW files (for instance if we’re using a ProRes workflow), I’ll simply ask the editor for two files: one master file of the film in full resolution and one EDL file.
I’ll also specify that the master file should have no text, filters, or effects on it and the EDL should be created after the project has been flattened down to a single video track. In other words, if the editor has been layering clips on tracks two, three, etc. to test them out, I’ll request that they flatten everything down to track one before creating the EDL. This makes it easiest for DaVinci Resolve to translate the edit points.
From there, I’ll simply right click on the master file in DaVinci Resolve and select Scene Cut Detection…

Next, click on the top right of the Scene Cut Detection window and select Load EDL. Choose the EDL the editor has provided.

As soon as that’s done, the project is instantly sliced up for me. I can add the edits to the media pool and ultimately drop them into a new timeline.
This method of working is so simple, easy, and accurate. I recommend using it whenever possible. That said, if you need to deliver a file with handles, or are working with RAW footage this may not be an option for you. But when you can pull it off, it’ll save you a lot of time and keep your workflow in check.
Got and DaVinci Resolve workflow tips to share with the community? Let us know in the comments below!


