Speed Up Your Editing In Resolve with These Quick Tips
DaVinci Resolve 12.5 is a non-linear-editing powerhouse. Streamline your workflow with these quick tips.
Keeping up with new application releases takes time. Ultimately, this is why many simply keep using the same version year-in and year-out. It’s familiar, and you’re already proficient with it. After all, being able to work quickly can make or break a job.
Here are a few quick tips to bring you up to speed with the features in DaVinci Resolve 12.5.
Favorites Folder
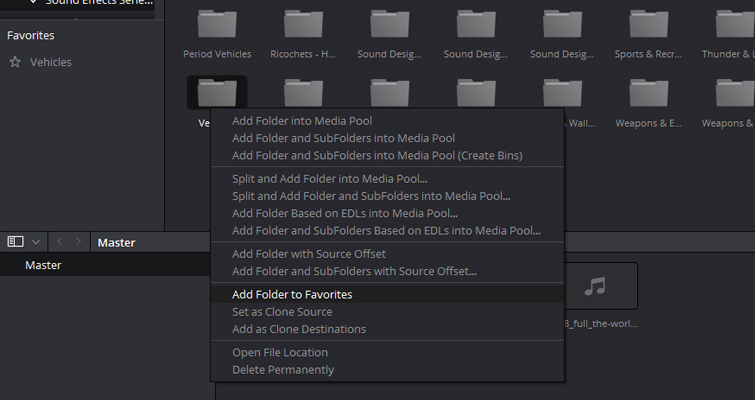
Do you have a set of elements or sound effects that you use often, but there are just so many that importing the entire folder would be too process heavy? If so, look at setting up a favorites folder. Very simply, while on the media page, navigate to the designated folder in the volume list, right-click, and select Add Folder to Favorites.
Now you can very easily bypass the hierarchy of your folder database and jump straight into your elements/media folder to import the selected files when you need them.
Sync Your Audio in the Media Pool
Forget the days when you had to sync your audio with a separate program or plug-in — or even by hand. You can do this quickly in the media pool with just a few simple steps.
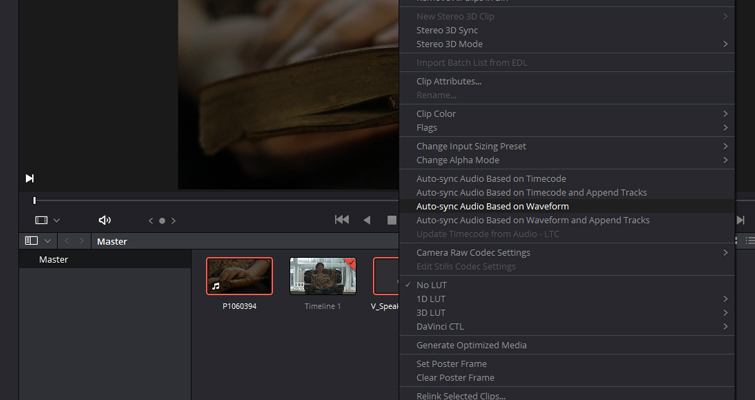
Ctrl-select your clip and audio file, right-click with both highlighted, and select the sync options you need.
If your footage and audio have the same timecode metadata, choose Auto-Sync Based on Timecode. If you shot with a DSLR and have onboard sound with your video footage, you can choose Auto-Sync Based on Waveform.
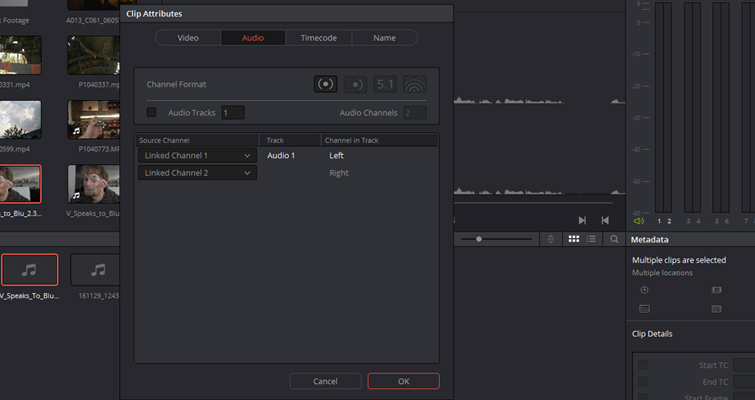
Resolve does an incredibly great job of auto-syncing whether you use the timecode or waveform method. You can also select Auto-Sync Based on Timecode and append tracks, which will add the synchronized audio to any timelines that include the footage. If you find that your clip is playing back the recorded sound and the camera sound, follow these steps to remove the camera sound.
- Right-click on your video clip and select Clip Attributes.
- In the pop-up menu, shift to the audio tab.
- Change the audio tracks from 2 to 1.
- Change the audio channels from embedded channel to linked channel for both source channels.
Use Audio To Mark Clips
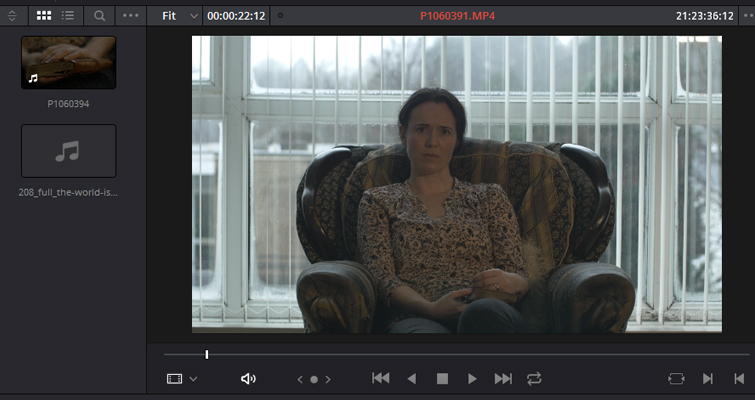
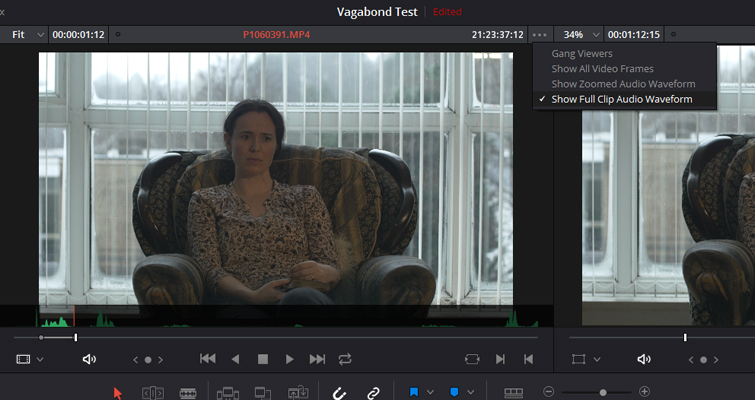
If you have synced your audio and footage on the Media page, you can make your clip trimming a little more fluid in the Edit page by trimming the clip to the audio waveform. This is very useful if you’re editing an interview or a speech.
On the Edit page, double-click your footage clip to bring it up on the source monitor. Click the ellipsis in the top right corner, and select Show Full Clip with Waveform.
You’ll now be able to trim your footage more quickly by pinpointing moments of speech before bringing it into the timeline.
Trim Long Clips Before Import
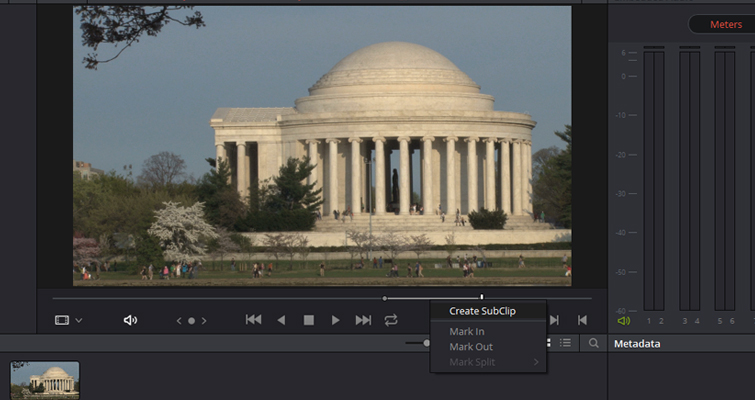
Conventionally, you would import your files and then adjust the start and end points in the source monitor or on the timeline itself. Resolve offers the ability to trim long clips during import. This is useful if you have a ten-minute clip, perhaps a time-lapse or nature shot, and importing the entire file and scrubbing through it in the timeline will be too time-consuming. Creating sub-clips makes handling the media much easier.
Simply click the media file to bring it into the viewer, find your designated area, mark your in and out points, hover over the jogger, right-click, and select Create Sub-Clip. This will then import the file at the specified length instead of the whole clip. It’s important to note that this doesn’t create a new file on your media drive. The sub-clip’s timecode will also start where it originally appears in the source clip. You can also make multiple sub-clips from the same footage.
Bonus Tip
If you’re editing a preexisting scene or piece of media such as archived news footage, you can import using Scene Cut Detection. This automatically cuts your media into multiple shots based on where Resolve thinks there is a cut. You can read more on that in this PremiumBeat article.
Do you have other Resolve tips to share? Let us know in the comments.


