Documentary Tips: Capturing the Who, What, When, Where, and Why

Documentary film is only as good as its story. Consider the following filmmaking advice when capturing documentary exposition.
To tell a good story, you have to get really good at exposition and setting things up. For documentaries, in particular, this can be tricky because you’re often dealing with real-life people and complicated issues.
In my time as a run-and-gun documentary journalist, I had to develop many different ways to help tell (or often, show) the who, what, when, where, and — most importantly — the why of your documentary’s story.
There are several tricks for this — some simple and direct, a few more complicated and stylized. So, if you’re setting out on your own documentary storytelling project, here are some filmmaking tips for capturing the who, what, when, where, and why.
Scene-Setting Exteriors and Signage
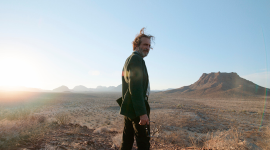
I’d say that the most common (and often, obvious) way to set up exposition for your documentary story is with your standard exterior shots. These can often be pretty boilerplate, and you’ll also see them in similar corporate and commercial-style projects, but if done right, they can be quite cinematic and helpful.
When shooting exteriors, you’re looking to capture the “where.” Try looking for shots that are as wide and expansive as possible, to give context into where you’re shooting. From there, you can start to focus in on the who, what, and when.
If you’re shooting a documentary about a basketball player, for example, starting with a wide exterior of the player’s high school gymnasium (hopefully with a sign out front) would be a good way to begin.
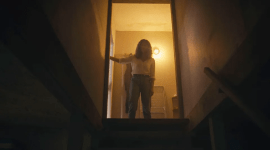
Thematic Close-Up Reveals

Image via guruXOX.
Instead of starting as wide as possible, you can also consider starting with a close-up on some item (or perhaps person) to begin revealing visual information early.
From close-ups, you can build intimacy — as well as insights — into the “who” or “what” of your documentary’s story, as you get wider to reveal more.
Using the same basketball documentary example, you could also start with a macro-lens focusing on a basketball, or the player’s shoes, before slowly revealing the player in question.
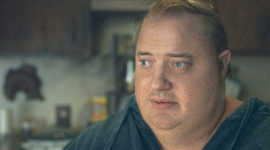
Straight from Your Subject
One of my favorite techniques for getting the who, what, when, where, and why exposition for a documentary project is by simply asking your main subject to give it to you. Sounds crazy, right? And I have to say that, from experience, not every subject can deliver the goods. But if you have a particularly talented individual who likes to talk, they can be very valuable in helping you set up your story.
My usual opening question would go something like this: “If you don’t mind, could you introduce yourself to the camera and tell us who you are, where we are right now, what’s going on, and . . . why does that matter?”
At the very least, you’ll have footage of them introducing themselves, which can be useful in the edit. However, if they are blessed with the gift of gab, you might find yourself with a soundbite succinctly and authentically establishing all the exposition you need.
Text and Lower Thirds

Alternatively (and don’t take this advice as a cop-out to setting exposition organically), you could always use text on-screen and/or lower thirds to establish a good deal of the who, what, when, where, or why information.
Text on-screen can be powerful when used sparingly. Date and location are usually the primary facts to put on-screen for context — especially if you’re dealing with multiple timelines in your documentary.
Lower thirds are also very much a part of the documentary lexicon, these days. So no one will blame you for using them to tell your audience the “who” for your subject’s name — and perhaps a little information about their title or relevance.
And there are some great resources online for working with text and lower thirds, which can make your documentaries a little more stylized. Here are some text templates and free animated lower thirds.
Counterpoint: Try Hiding Some Elements
As you grow as a documentary filmmaker, you’ll begin to recognize which of these expositional elements best suit your project. In many cases, once you really define your stories (and narratives), you may find that it can be beneficial to not provide your audience with all the information, right away.
If you’re editing your documentary project, as well as shooting, try experimenting with what information is most captivating to an audience (in the beginning) and what information might be best to bury for a later reveal.
Cover image by Elizaveta Galitckaia.
For more documentary filmmaking tips and tricks, check out some of these articles: