Three Ways to Sync Audio to Video

Keeping your sound in sync with your footage is critical. Use these techniques to improve your editing workflow.
Top Image via Red Giant.
As simple as syncing audio to video might sound, this crucial process can be very time-consuming. This is especially true on extensive, multi-camera shoots. In the already-tedious world of filmmaking, the technology to simplify this process is invaluable.
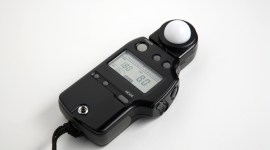
Recording audio and video separately on set ensures you get the highest quality sound for your project. As you may have experienced, built-in microphones on even the best cameras will never capture sound that’s clean enough for professional work. So using an external shotgun microphone and syncing your audio with a slate, snap, or a clap is essential.

Image via Shutterstock.
While that’s easy enough to do on set, once you get into post production and are organizing footage from multiple camera angles as well as all of your audio files, syncing can become daunting and tedious. But you have options.
Your three main options for syncing audio to video are Red Giant’s Plural Eyes software, Premiere Pro’s “Merge” or “Synchronize” options, or the good old-fashioned way of doing it manually.
Red Giant’s Plural Eyes
Video via Red Giant Tutorials.
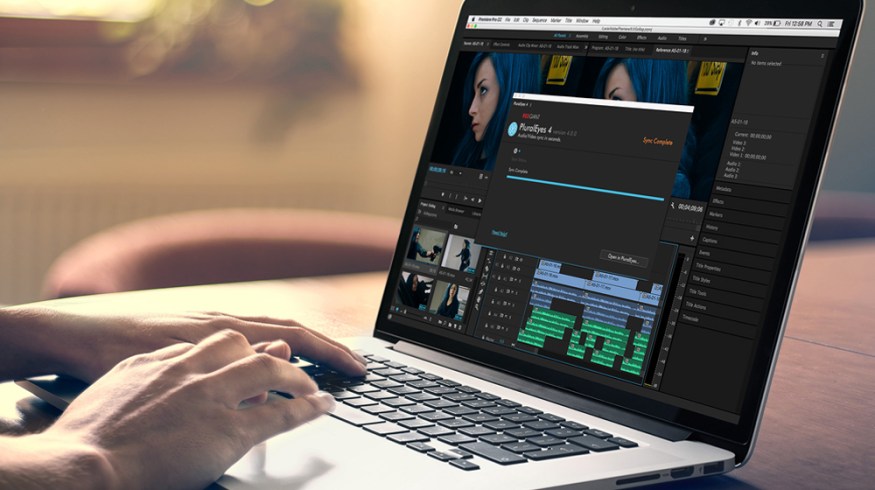
The best option by far (but with a price tag of $200) is Red Giant’s Plural Eyes. This software makes up for the price with the amount of time and energy you will save — especially if you work in documentaries with long interviews involving multiple camera angles. Plural Eyes allows you to import an entire project (clips and audio) and handles the syncing for you.
To synchronize, simply open Plural Eyes and click “Add Media” or drag your clips directly into the app. Next, hit the “Synchronize” button and watch the program do its thing. Successfully synced clips will show up in green, while clips with errors are red. If you get a red error, navigate to the “Sync” drop-down tab and make sure you’ve selected “Try Really Hard.”
Once everything is synced, click Export Timeline and drag the exported project directly into Premiere Pro. As an added bonus, Plural Eyes also can help correct audio drift in your project.
Premiere Pro CC

Image via Shutterstock.
If Plural Eyes isn’t in your budget, or if you only have a few clips to sync, Premiere Pro CC offers two different options. The first is merging. To do so, click the video file and its corresponding audio file in your project bin, right-click, and select “Merge Clips.”
A menu will open up, allowing you to name your newly synchronized clip. Select “Audio” as your “Synchronize Point” and make sure to select “Remove Audio From AV Clip.” Hit “Ok,” and you’re all done. A new file will appear in your Project bin that you can drag into your timeline.
Another option for syncing in Premiere Pro is dragging both your video file and audio file into your timeline and stacking them on top of one another, roughly aligned. Select them both in your timeline, right-click, and select “Synchronize.” In the menu that pops up, simply make sure to select “Audio” and hit “Ok.”
Manually
Video via Corey Machado.
The final option is to sync clips manually, which I did for an entire painstaking year in my filmmaking infancy. If, for some reason, the previous methods don’t work for you, lining audio and video up manually is very straightforward and surefire way to synchronize.
To do this, pull your video file and corresponding audio file into your timeline and loosely stack the two. Ideally, you have clapped or used a slate, and all you need to do is zoom in on your audio tracks in the timeline and find the spike in the waveforms representing your slate. I find this spike in the video file’s audio and put a marker directly on that clip and then do the same with my audio file. Then I just slide the audio file until both markers line up.
Play your clip, and make sure it worked properly. Occasionally, a little tweaking is necessary, so I simply click the audio file and hold the Shift key while I hit my left or right arrow keys on my keyboard to make frame-by-frame adjustments.
At the end of the day, all these options can take care of your syncing. While Premiere Pro does a great job syncing individual clips to individual audio, it still doesn’t compare to the ease and speed of syncing entire projects in Plural Eyes. And when you really need to, you can always dig in and do the work by hand.
Do you know other tips for syncing audio to your footage? Let us know in the comments.