How to Remove a Dead Pixel in DaVinci Resolve

Here’s how to quickly remove an unwanted dead pixel from your footage in just a few clicks—all inside DaVinci Resolve.
You’ve seen it before—the dreaded (but sort of inevitable) dead pixel. Today, we’re going to look at what they are, how they differ from “hot pixels,” and how to remove both of them from your image inside DaVinci Resolve.
But first, we need to share some potentially tough news.
There’s a good chance that your dead pixel problem is permanent. Dead pixels are a camera malfunction, one that you’ll constantly be correcting in post. So, it’s probably a good idea to check your camera warranty or reach out to the manufacturer.
What Is a Dead Pixel?
A dead pixel is a pixel that is no longer receiving any information or power. Typically, they show up as a red or blue dot on your image.
Hot pixels are caused by a hot sensor, usually created from long exposures. Hot pixels are far more common than dead pixels. You might just need to have your sensor cleaned.
Regardless, while dead pixels and hot pixels are different beasts entirely, theoretically, you can still use the following method to fix them both and save your footage in DaVinci Resolve.
Let’s take a look.
How to Fix a Dead Pixel in DaVinci Resolve
Recently, after shooting with my Blackmagic Pocket Cinema Camera for a few years, I finally encountered a dead pixel on some of my own footage.
Here’s the shot in question.
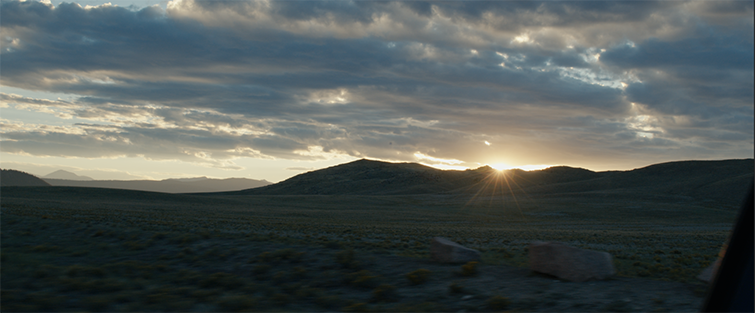
Do you see it? Let’s look a bit closer, shall we?
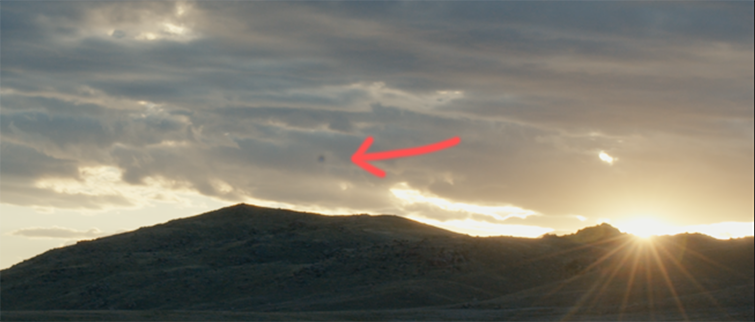
Boom. There it is. It might not seem like that big of a deal, but it was keeping me up at night.
It wasn’t just the blue-ish tint that bothered me. It was also the fact that I knew the dead pixel would quickly become more noticeable once camera movement was incorporated into the video.
Here’s how I cleaned it up in DaVinci Resolve. . . .
Step 1: Dead Pixel Finder
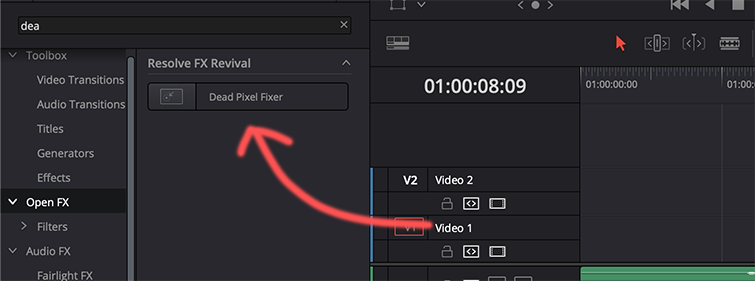
First, I applied the Dead Pixel Finder to a node on the color page. I find that a node-based workflow, especially when working on specific areas of an image, is easier and more efficient than just slapping the tool over an entire clip and working within the Effects panel.
Step 2: Apply the Effect
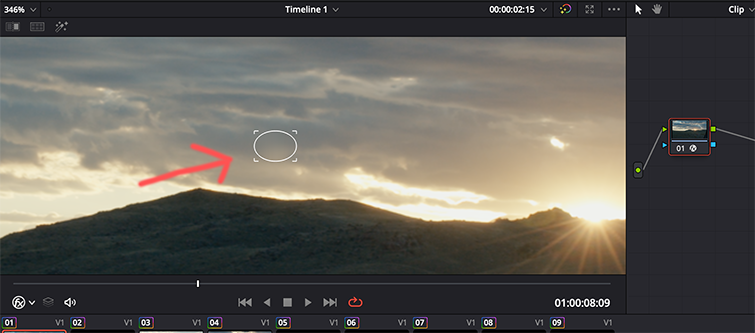
Next, underneath the clip, make sure that the Qualifier isn’t selected. Instead, select Open FX Overlay. This will allow you to drag-and-drop over the dead pixel, as seen above.
Now, the pixel is blurred out/hidden behind the effect.
This might not be your exact desired outcome when attacking a dead pixel. For instance, there might be some unwanted artifacts around the area. This will also happen if you have Stabilization applied to the clip—due to the effect shifting the image around, the dead pixel will move as well.
The next step will solve this. . . .
Step 3: Fix the Stabilization
This stabilization problem can be solved by applying the Dead Pixel Finder to your clip. After you’ve done so, make that clip a Compound Clip and apply the stabilization to it.
The result? The footage that’s being stabilized already has the dead pixel fixed.
That wasn’t too bad, was it? Don’t forget, this solution can also be applied to a hot pixel caused by a dirty sensor.
Speaking of, PetaPixel recently published a super-helpful step-by-step look at how to clean your sensor. If the thought of doing it yourself makes you nervous, ask a local camera store if they can handle the task. They probably can, and it’s usually not that expensive.
License this cover image via cybermagician.