
How to Repair Rolling Shutter in Adobe Premiere Pro

If you shoot with a DSLR or camera phone you’ll notice that the image integrity is sacrificed if there is movement in the shot. In this post we’ll address how to repair “Rolling Shutter” problems in Premiere Pro.

CMOS sensors used in DSLR and mobile phone cameras are notorious for introducing distorition when the camera moves or pans. This type of video distorition is called rolling shutter. Luckily there are tools within Adobe Premiere Pro (and after effects) to repair rolling shutter issues in your video footage.
Understanding Rolling Shutter
First, it may be helpful to explain what’s going on with ‘Rolling Shutter’ in your video image…
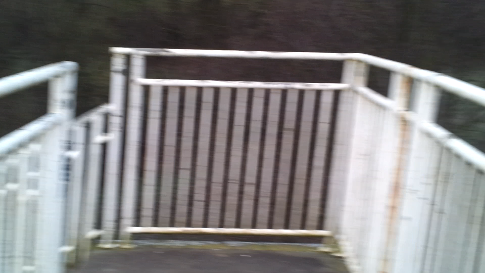
Image as it Should Look with No Panning
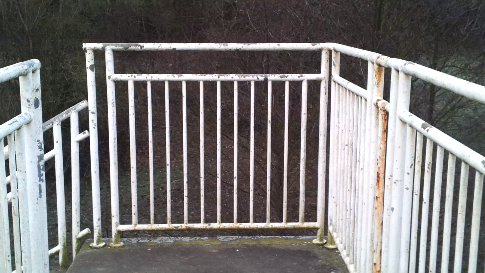
Footage ‘Wobbling’ During a Pan
As your camera scans an image, it scans in lines starting at the top and works its way to the bottom of the frame. This means that if you are panning or moving the camera as the image is being recorded, the lines at the top of the screen are being recorded at a different point in time than the lines at the bottom of the screen. So, if the camera moves the lines no longer match up. This will end up with a wobbly look to your footage.
If you look for it, any time you are shown mobile phone footage and the camera is moving a lot you will see the picture warping all over the place. This is ‘Rolling Shutter’. Additionally, the problem seems to be directly proportional to the quality of the sensor your camera is using. For example, the images I’m using in this blog where taken on my mobile phone.
To see the changes we are going to make it is often helpful to have some kind of reference on screen. So if you can’t see the ‘Safe Margins’ button in your Premiere Pro Program Monitor, click the little ‘+’ button at the bottom right of the program monitor and choose the ‘Safe Margin’ button as shown.
Choosing the Safe Margin Button
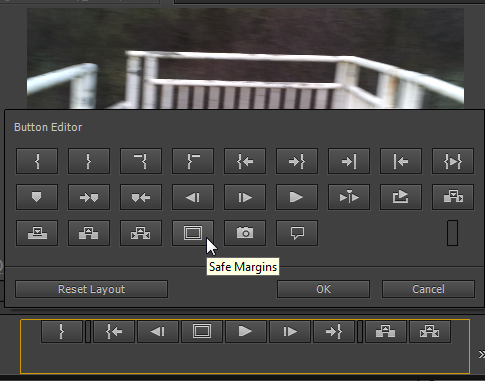
Drag the button into your buttons menu bar so that you can quickly toggle it on and off as you need. When you’re done, click the ‘+’ button again to shut the button editor and then hit the ‘Safe Margins’ button to turn them on.
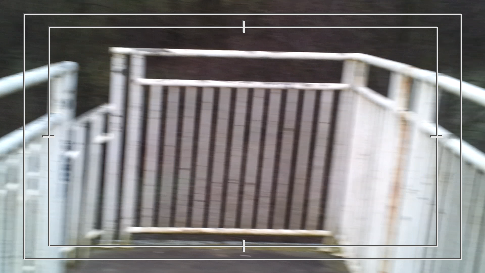
Safe Margins On
Now we are ready to find and apply the ‘Rolling Shutter Repair’ effect to our wobbly footage.
Rolling Shutter Repair in Premiere Pro
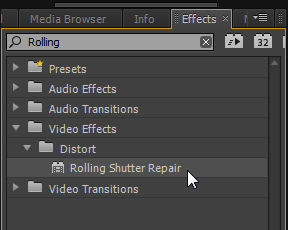
Finding the Rolling Shutter Repair Effect
Before we jump in, it is worth noting that to some extent you can add rolling shutter repair through the use of the ‘Warp Stabilizer’ effect in Premiere Pro prior to the latest release. If you delved deeper into its controls you would have found that there was a section that offered some rolling shutter repair. However, from version CS6 the ‘Rolling Shutter Repair’ effect was brought over from After Effects and is the best way to deal with this problem.
It is also worth noting that this is a ‘repair’ effect and not a guarantee to fix all your rolling shutter problems. Although my experience of this effect is that it usually sorts out my problems simply by being applied with its default settings, there can be times when the rolling shutter damage is so great that it cannot be repair – only improved. Bear that in mind as you deal with your footage. And, if you are responsible for the shooting it is worth keeping in mind that fast pans can cause problems and should be avoided in most cases.
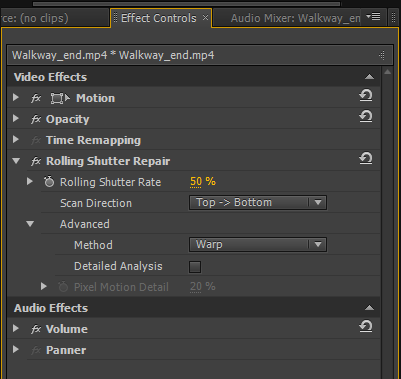
Now, let’s apply the Premiere Pro ‘Rolling Shutter Repair’ effect to our footage either by dragging it on to the footage or (if your footage is already selected) by double clicking the effect in the Effects Panel:
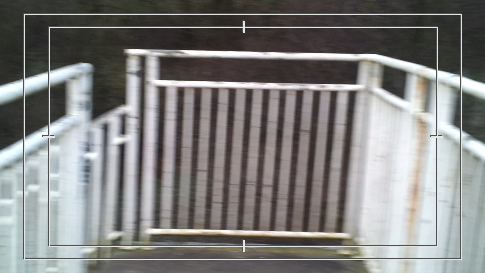
Rolling Shutter Repair Applied
Original Shot
Default Settings Show Some Improvement
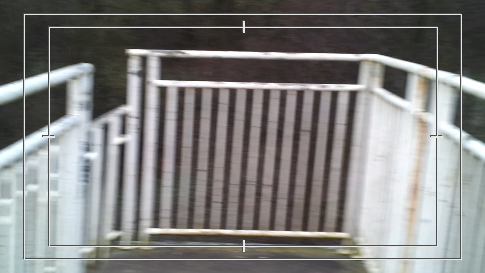
As you can see, if you compare the before and after– which are the same frame – there is some improvement with the default settings. But let’s look at the settings and see if we can make it even better.
Rolling Shutter Rate
The level of the Rolling Shutter Rate setting is going to depend on the extent of your problem. In other words, lower quality cameras such as camera phones will probably need to have this set at 100% while higher quality DSLRs will need lower levels. Experiment with you footage to see what works best for you. As this footage was taken on a camera phone, I’m going to increase my rate to 100%.
Rolling Shutter Rate at 100%
Under ‘Rolling Shutter Rate’ you have the ‘Scan Direction’ setting which refers to how the camera or camera phone is being held to record the footage. For example, it is quite common now for camera phones to be rotated 90 degrees and be used to film ‘widescreen’ as opposed to straight up and down. You can see that I have done that with my own footage in this blog. The idea is that the sensor will only film from top to bottom, so if you turn the phone 90 degrees it will be now either be scanning Right to Left or Left to Right.

A word of warning though at this point; with my own camera phone, even though I have turned it 90 degrees I still find the best result is had with Top to Bottom. While I don’t know for sure why this is, it could be that with newer camera phones that the scan direction is linked to the rotation sensor of the phone? But whatever it may be, try the various settings to see which will give you the best results – you have all four options just in case.
At this point most footage will now look significantly better and may well be at a point where it has become usable. However, for a small minority of clips this won’t be the case and further repair will be needed. This is where we move into the ‘Advanced’ setting, starting with the ‘Method’.
Rolling Shutter Advanced Settings
Advanced Settings – Method Options
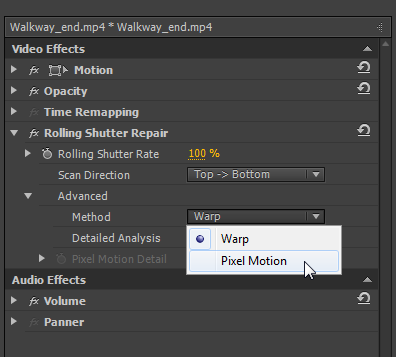
Warp is the standard setting but as you can see above, we also have another option called ‘Pixel Motion’ which comes in with a default setting (Pixel Motion Detail) of 20%.
Pixel Motion at 20%
![]()
As you can see, this makes a big difference but it will also significantly slow down render times because I am now asking Premiere Pro to process significantly more data than with the ‘Warp’ method.
In short, what we are now saying to Premiere Pro is this, ‘Look at 20% of the pixels across this image and work out how they are moving frame to frame and then correct for rolling shutter based on your analysis’. So, obviously, Premiere Pro is working much harder to correct the image and everything will slow down. And it goes without saying that the larger the percentage you ask Premiere Pro to analyze the slower everything will go!
There is one more option for the ‘Warp’ method called ‘Detailed Analysis’. While this may make some difference and is always worth trying, I find that using the ‘Pixel Motion’ method is usually much better in comparison to ‘Detailed Analysis’
100% Pixel Motion
![]()
Original For Comparison
Lastly, if you must use Pixel Motion try and keep it as low as possible. You can see the end result with 100% Pixel Motion above is great when compared to the original, but be careful not to get bogged down by the technical possibilities of any effect that in the process you lose the importance of storytelling.
Yes, I can make the clip much much better at the cost of rendering time and playing with the effect. But, if this clip is on screen for only a short period of time a small amount of Rolling Shutter likely won’t distract my audience. Make your aim to deal with problems to the point where they won’t distract or confuse your audience and then can get on with telling them the story. That is after all, what video editing is all about!


