Saving Color Grades Using Final Cut Pro’s 3-Way Color Corrector

Final Cut Pro comes bundled with a 3-way color correction filter that, although relatively basic, can tackle many of your color correction needs.
In this Final Cut Pro tutorial, we’ll explore how you can save your grades from the 3-way color corrector and apply them to multiple shots — making your project’s color more consistent and saving you time in the edit bay!
To save a color grade:
- Apply the 3-Way Color Correction filter to a clip and make adjustments
- Then, drag the “hand” icon from the Viewer’s 3-Way Color Corrector tab over to the Browser window.
- A grade will be saved in the Browser.

Color grading, like color correction, is the process of tweaking or enhancing color in video or film. In turn, a color grade is how an image is modified based on the color grading settings (i.e. hue, saturation, color balance). Color grades can be dramatic, like making footage black and white… or can be subtler, such as tweaking the white balance or adjusting a subject’s skin tones.
With Apple’s early 2011 preview we got a hint of some of the incredible color correction abilities of Final Cut Pro X. Although to date information regarding these new features is relatively sparse, the introduction of the new Color Board color corrector and the ability to copy and paste a clip’s inherent color information seems quite impressive. Until we see a formal release of Final Cut Pro X, and for those that may not be upgrading right away, let’s take a look at one of the most overlooked color correction features of FCP 7 and earlier versions…
Knowing how to save color grades with Final Cut Pro’s 3-way color corrector is a simple feature will expedite your workflow and allow for creative experimentation. When working with clients I like to test different color grades on shots until we settle on a desired color “look”. Saving grades as you work gives you the ability to revert back to a previous version, so you don’t have to worry about losing older settings.
Once saved, you can quickly apply the grade to other similar shots in the sequence. This takes the guesswork out of “matching” shots and allows you to maintain a color consistency throughout your project.
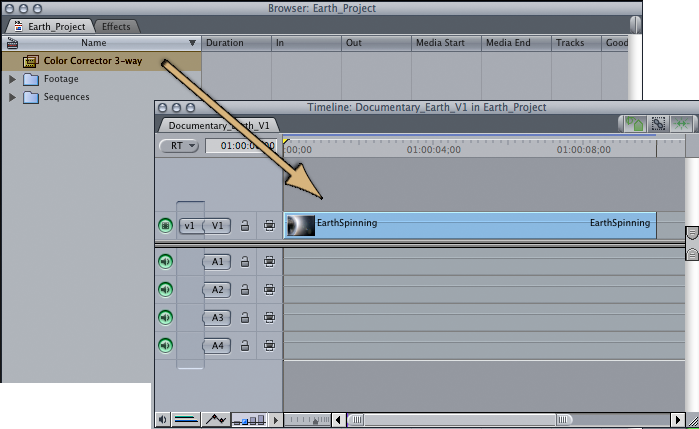
To apply a color grade to a clip in your Final Cut Pro timeline:
- Select the grade from the Browser.
- Drag the grade onto a clip in the timeline.
Because the color grades are saved in the Browser, I find it helpful to give them unique names and organize them into bins (I usually base my color grade bins on scenes). Organization is one of the core foundations of good editing, so make sure that you organize them in a way that makes the most sense to you!

Although you can achieve stunning results knowing and using high-end color correction programs like DaVinci or Lustre, these applications are expensive and have significant learning curves.
Remember, with it’s easy to navigate interface and the ability to save color grades, you can accomplish many of your color correction needs without ever leaving Final Cut Pro!
For additional information about Final Cut Pro’s 3-way color corrector, check out this great video tutorial by Creative Cow contributor Richard Harrington.