How to Start a Twitch Stream with Your Filmmaking Camera
While Twitch is primarily known for streaming gaming content, you can also stream presentations, tutorials, ceremonies, and events. Here’s how.
Content creators with hustle know that moving from platform to platform to win the next viewer is just part of the game. As content creation evolves, the most popular platform is never on top for too long. And just as soon as you think you’ve mastered the latest trend, something new pops up, creating another channel you can use to reach your audience.
While not new, Twitch has grown exponentially over the last few years. It’s primarily known for gaming streams, but it’s certainly not limited to this one category — you can stream presentations, tutorials, ceremonies, events, you name it.
Whether you’re looking to become the next big streaming sensation, or you’re simply a filmmaker searching for a new way to present your content, knowing how to utilize Twitch can help you reach your goal — and a wider audience.
Let’s take a look at how to inexpensively stream picture-in-picture content on Twitch using your filmmaking or photography camera.
Miss a step? Read the video transcript beneath at your own pace.
Camera Setup
While obtaining a picture-in-picture with a webcam is a relatively straightforward process, it doesn’t scream high-quality. We’ll fix this issue by using a mirrorless camera instead. As these cameras don’t have a built-in IP encoder, you’ll need a capture card to transmit the information from the camera to the streaming software. Capture cards are usually installed inside of a desktop computer, like one of these:
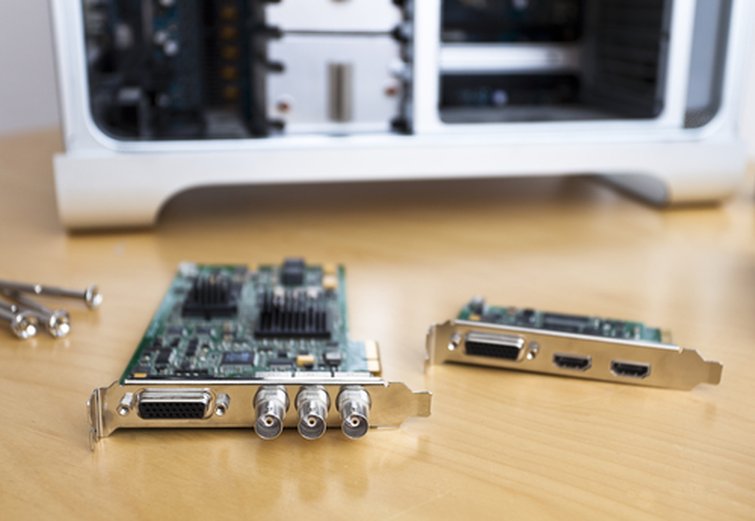
Video capturing cards assist in transmitting the information from your camera to the streaming software. Image via rawcapPhoto.
If you’re not tech-savvy, you may want to consider using the Elgato Cam Link. It’s a relatively inexpensive device that allows you to connect your camera to your PC with just the dongle.
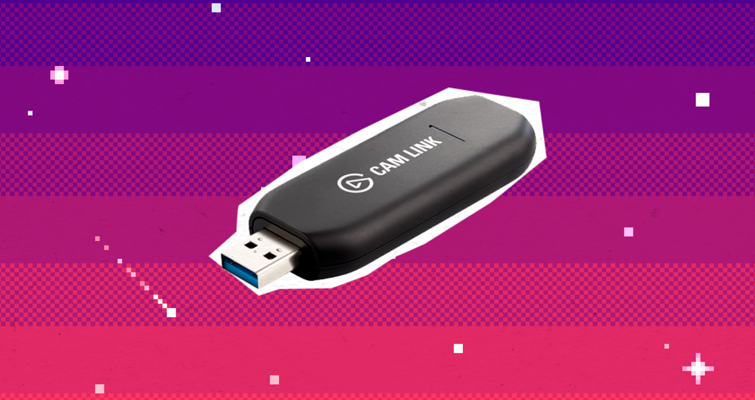
Use the Elgato Cam Link to connect your camera to the PC. Image via Elgato.
You connect the camera to the Elgato Cam Link via HDMI, then the Cam Link to the PC, and then the device automatically installs the needed driver. Congrats, you’re now the proud owner of a $2,000 webcam.
Depending on the camera model you’re using, you’re also going to need to make sure your feed is clean, as you’re also receiving the data from the monitor. Therefore, be sure you go into your Settings and select a Clean Feed. Next, we need to look at the software you’ll use to stream.
Software Setup
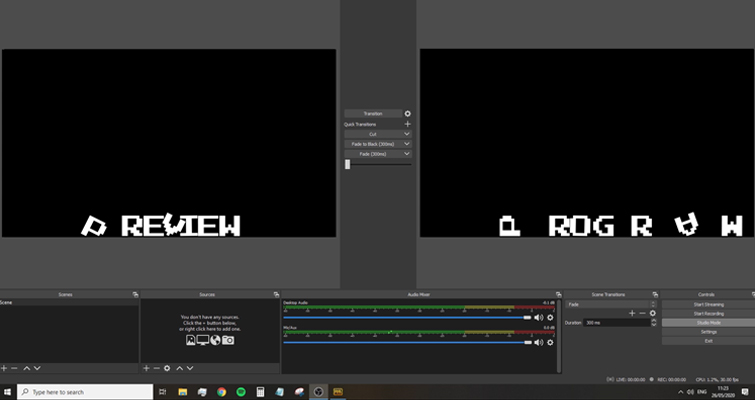
Not only is OBS perfectly compatible with Twitch, it’s free.
Quite like everything else in 2020, there are numerous streaming applications on the market. We’re going to use OBS Studio because it’s free, simple, and perfectly compatible with Twitch. Download it from here, install the software, and then open the desktop application.
As seen above, the software is divided into three areas. The preview monitor is where you’ll preview the content before taking it live. The program monitor displays the live content. And then there’s the functions area, which is further divided into several sub-menus.
First, you need to add your game window. So, make sure your game application is running, go into the Sources panel, click the plus icon, and choose Game Capture.
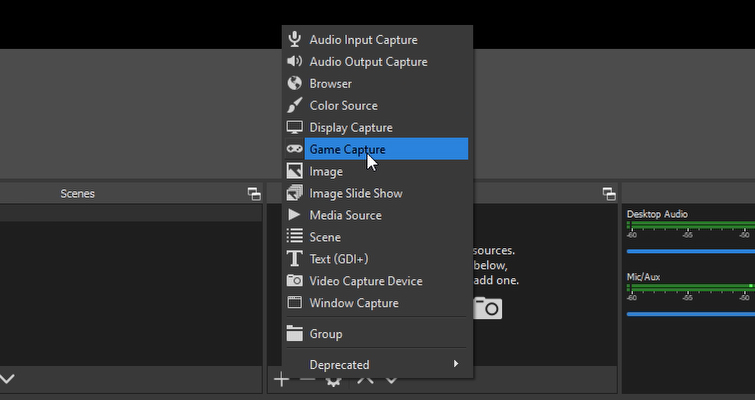
Select “Game Capture” to add your game window.
Now, select the window in which the game is running. If this were a live software tutorial, you’d perform the same action, but with the software application window.
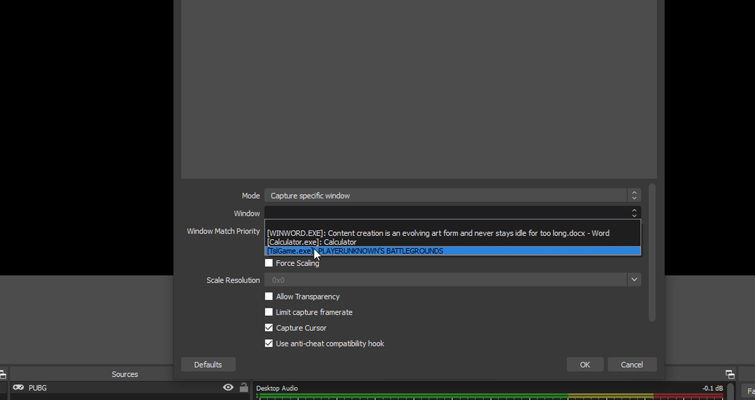
By choosing a specific window, you’re only capturing the active application.
Technically, you could select the option that captures what’s currently active on screen, and then switch to the game or software when you go live. Still, due to privacy and possibly embarrassing circumstances, you want to make sure the streaming software is only capturing the active application.
Next, you’re going to add your camera overlay. So, again, select the plus icon in the Source viewer and choose a Video Capture Device.
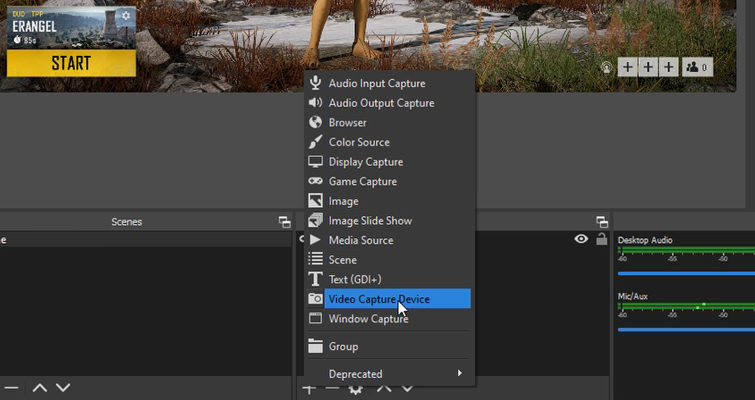
Choose a “Video Capture Device” to add your camera overlay.
The system won’t explicitly read the camera you’re using. Instead, it will see the Elgato device, so select Cam Link and proceed.
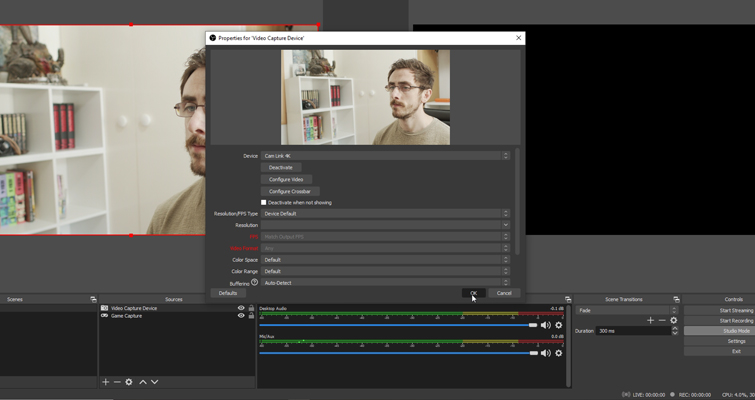
Once the system recognizes your Cam Link, select it to proceed.
However, the camera is currently consuming the full streaming window. There’s an option to change the structure using the arrow buttons, but quite like Photoshop or your NLE, all you need to do is select the corner of the video screen, hold shift to contain the diameter setters, and decrease the size until the video feed is but a fraction of the entire picture.
You can now place the video in the corner for your picture-in-picture. As to which corner, that’s up to (and to some extent, dependent on) which game you’re playing.
Twitch Setup
Finally, you need to go to the Control window and click the Settings button. This will take you to a pop-up menu, where you then need to jump to the Stream sub-menu.
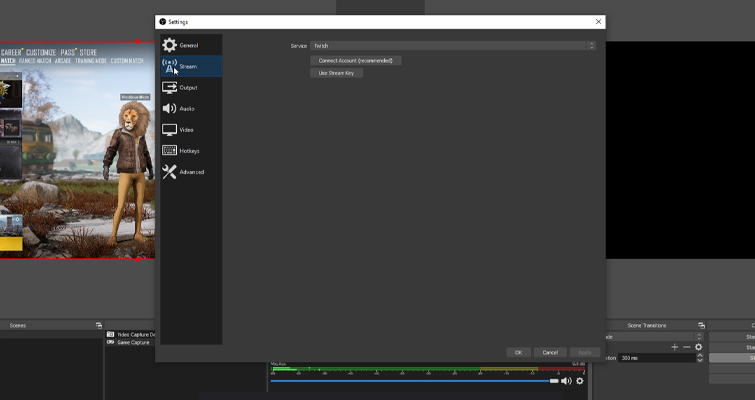
Once on the “Settings” panel, jump to the “Stream” sub-menu and select “Twitch.”
Open the Service menu and select Twitch. Then, click Get Stream Key, which will open your browser and take you to Twitch. If you haven’t already, please create an account before doing this. This primary stream key is the bridge that links Twitch to your streaming software, so never share it while live streaming. Click Copy, go back to OBS, paste the primary stream key into the empty field, and hit Apply.
Go Live
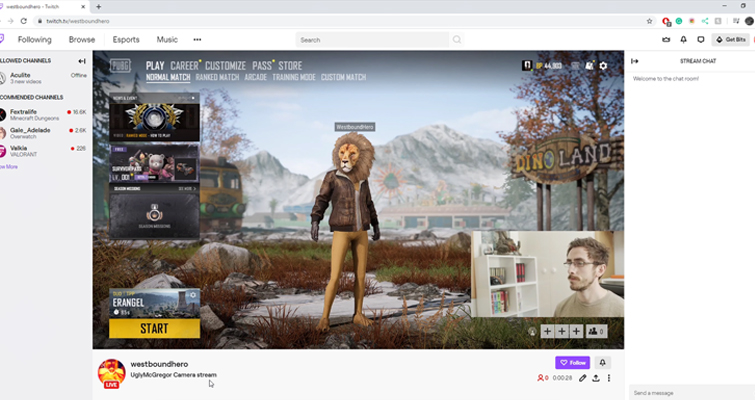
Hit the “Transition” button then click “Start Streaming” and you’re live on Twitch.
That’s it. You’re set up and ready to go live with a picture feed running from your DSLR or mirrorless camera. Just hit the Transition button to bring your preview into live view, then click Start Streaming. Just like that, you’re officially live on Twitch. Show ’em what you’ve got.
If you’re looking to up your live-stream game or extend your content’s reach online, these resources will help.
- Your Canon Camera Just Became the Best Webcam You Own
- A Guide to Organizing Your Own Online Film Premiere
- Submit Your Scripts: The 7 Best Online Screenwriting Contests
- The New Raspberry Pi Camera Is a Worthwhile Upgrade
- What I’ve Learned From Starting a YouTube Channel in 2020
Cover image via Iconic Bestiary.


