

Using Neat Video: Exceptional Noise Reduction for Video

Is grainy footage ruining your project? Neat Video packs a powerful punch for reducing grain and noise in footage. In this post we’ll show you how to get the most out of it in your projects.
Digital noise is an inevitable, undesirable facet of working with video. Unlike film grain, we find digital noise ugly and wish to eliminate or limit it. Luckily, noise reduction tools exist to combat grainy footage. While native software noise reducers suffice for many projects, sometimes additional firepower is required for egregiously dirty shots.
Enter Neat Video, a professional noise reduction plugin. At its price point (free or up to $199 – depending on the version), it’s become an industry standard. However, its interface is anything but intuitive. Let’s wrap our heads around it.
How Neat Video Works
Neat Video profiles a portion of the image to evaluate the noise in the overall frame. It is optimal that this portion should contain as few characteristics as possible. Good profiles might contain a piece of pure blue sky or a shadow region that lacks detail. Neat then reports a Quality level on this profile as a percentage. The higher the percentage, the more effective the reduction.
Once it’s gathered a profile for our shot, the Noise Filter Settings tab activates. The intra-frame controls are tweaked inside the plugin and temporal reduction is controlled outside the plugin.
Treating a Clip
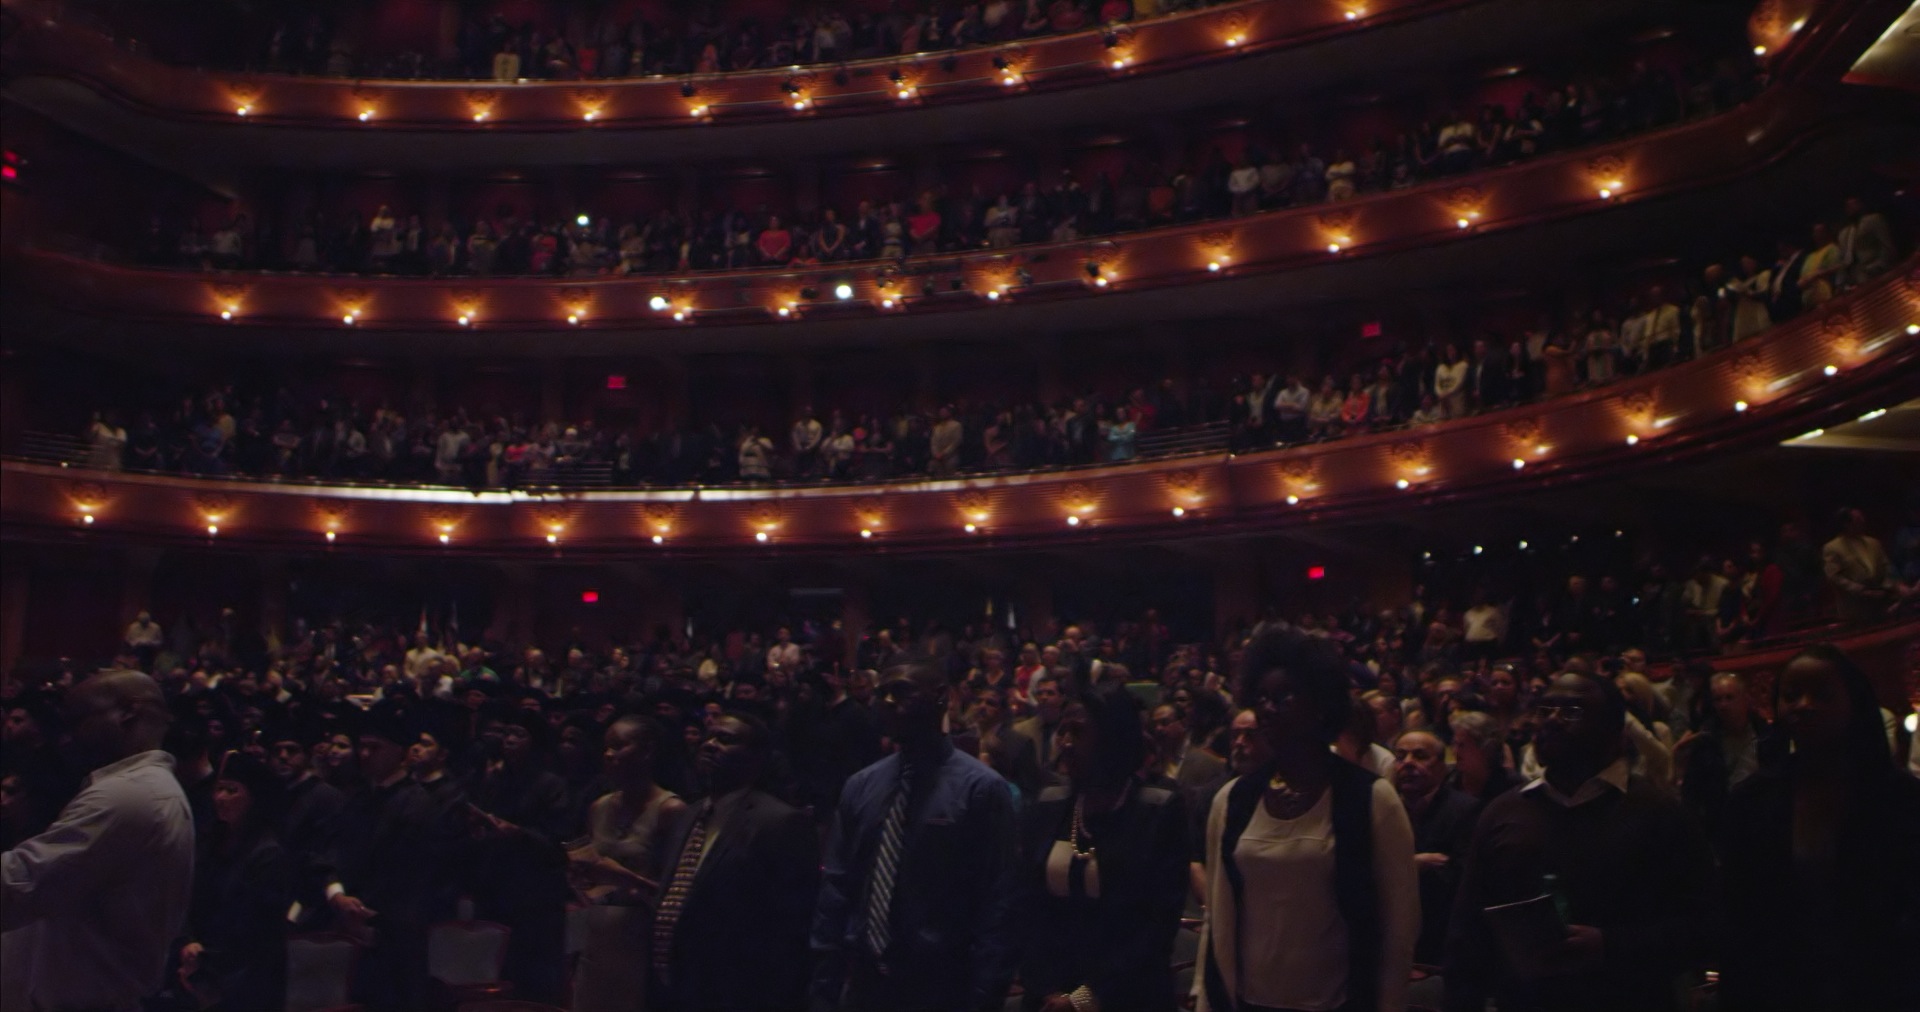
Low light in a concert hall, a pretty classic candidate for potential noise. The noise is in this one for sure: 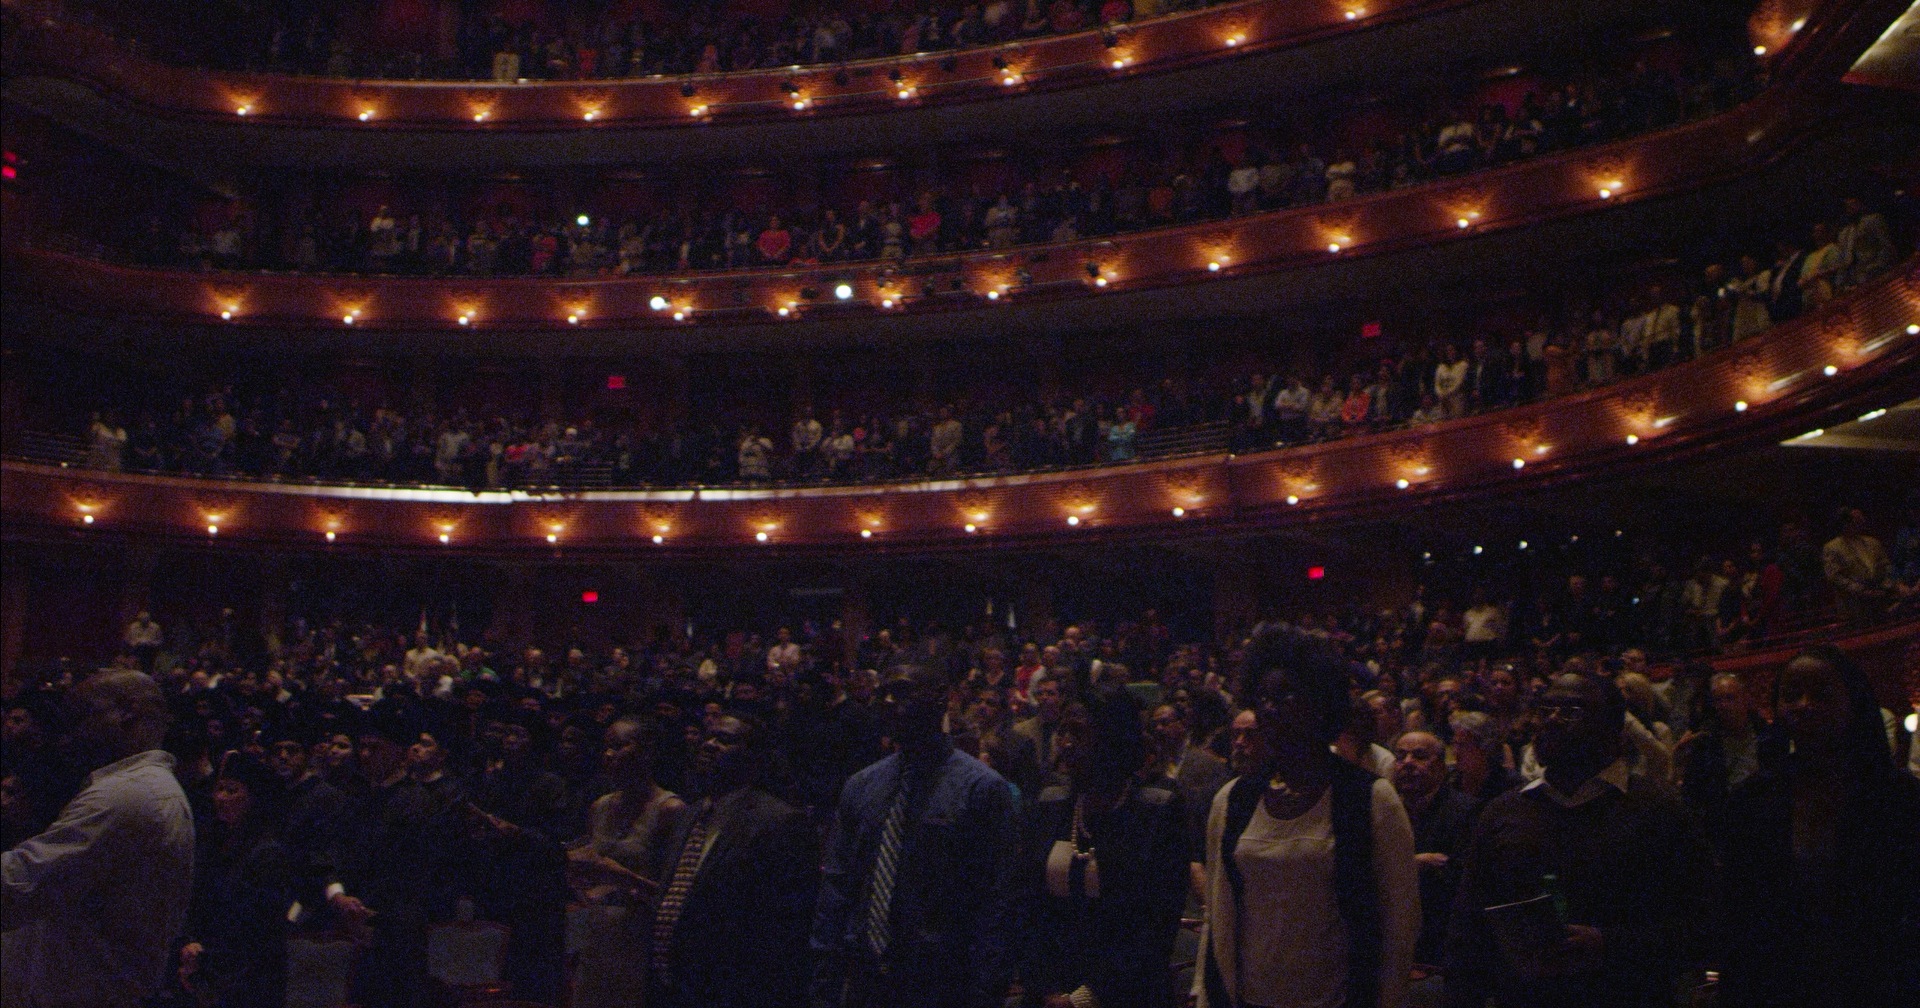 We’ll be working with an extremely noisy RED clip shot in a low-light concert hall. My chosen software is Davinci Resolve, but Neat works in a host of applications like After Effects, Premiere, Final Cut Pro, and others.
To use Neat Video in Resolve, add a new serial node and open up the FX panel. Drag the Reduce Noise plugin onto the new node. We’ll worry about the parameters here later. Click the Options button. Click the FX icon all the way on the right interface, above the timeline.
Some parameters will come up but click Options for now. 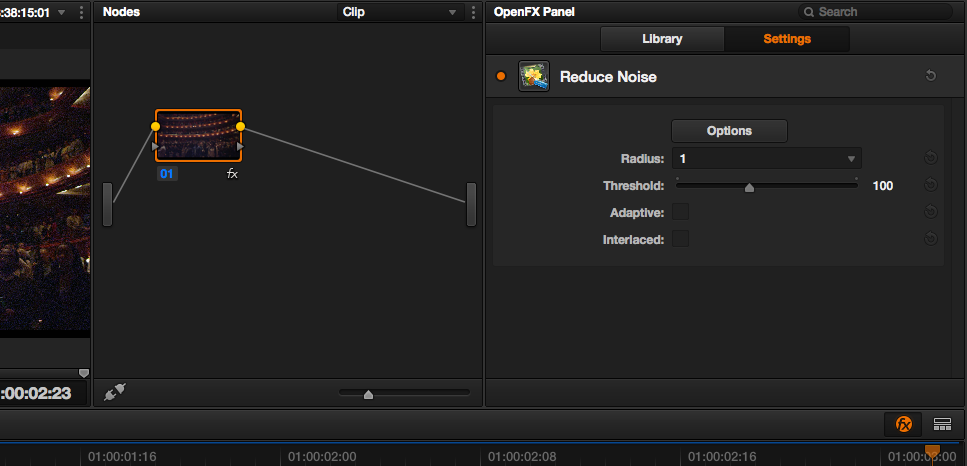 Neat Video works really well with minimal user input. Clicking Auto Profile lets Neat evaluate the image for the best possible profile. You can also set this yourself, but it’s difficult to beat Auto Profile.
Neat Video found a profile at nearly 80 percent quality for my shot, whereas mine were somewhere around 50 or even 30 percent. Best to let it do its thing.
Neat Video picks a square in the lower right for its profile: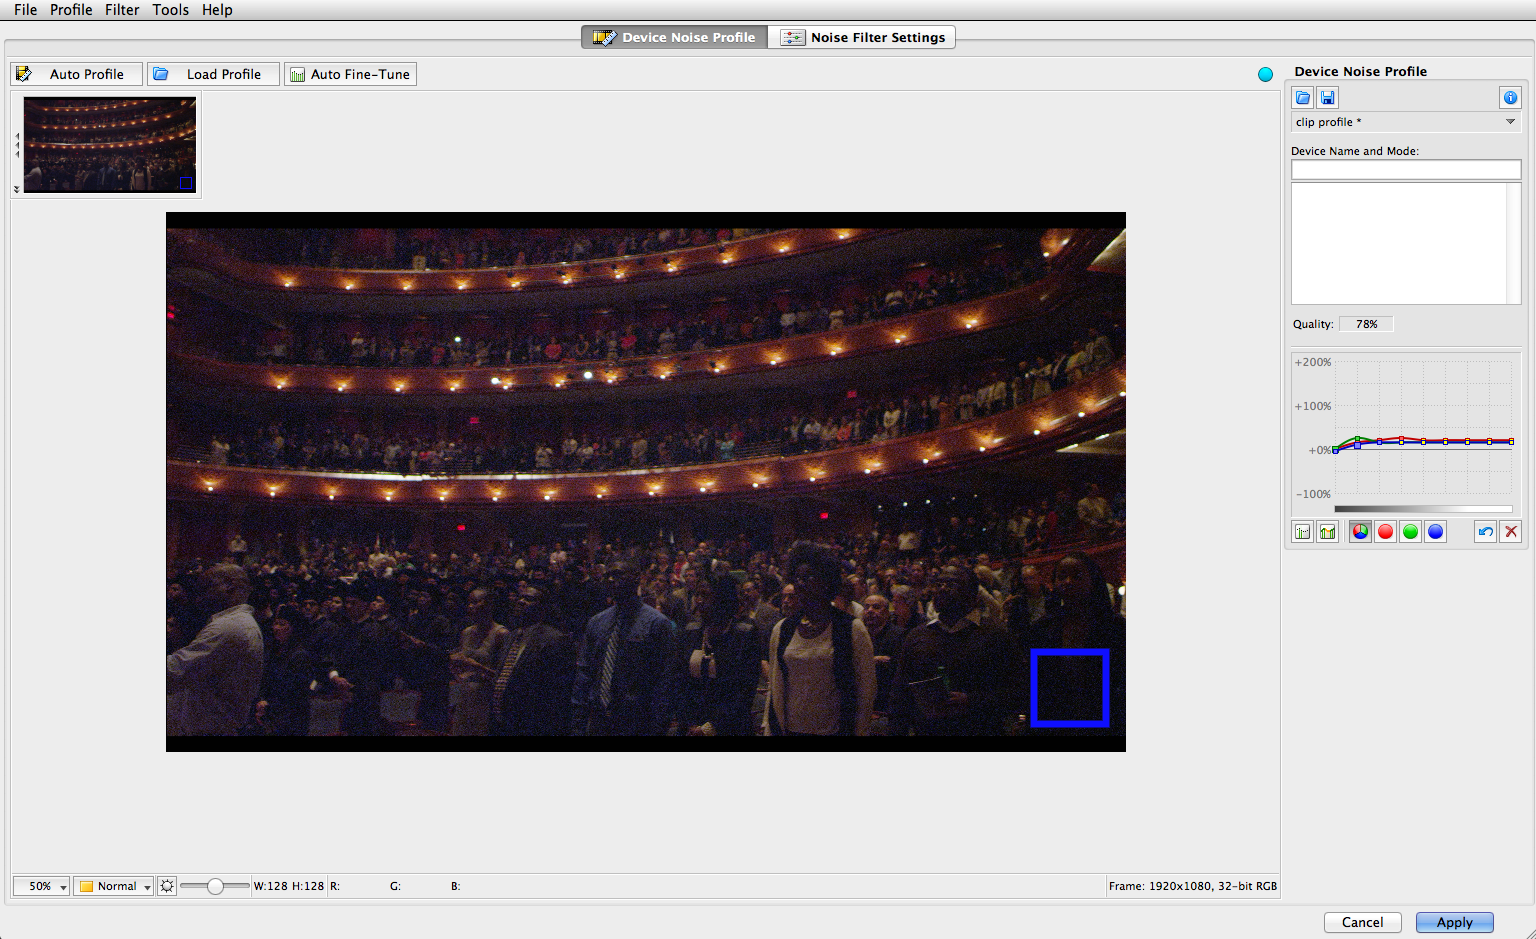 In our shot, Neat chose a portion of the frame that’s almost black in the bottom right of the image. The Noise Filter Settings shows us a preview of the noise reduction. It looks like tons of noise in the blue channel will be greatly reduced. To evaluate the reduction, do one of three things:
- Toggle the Preview button to see the original and filtered results.
- Hold your mouse button down to see the original shot, and release your mouse to see the filtered results.
- Click and drag to draw a square around an area. The inside shows the filtered result. The outside shows the original image.
Draw a square around any area to see the filtered and original versions next to each other. 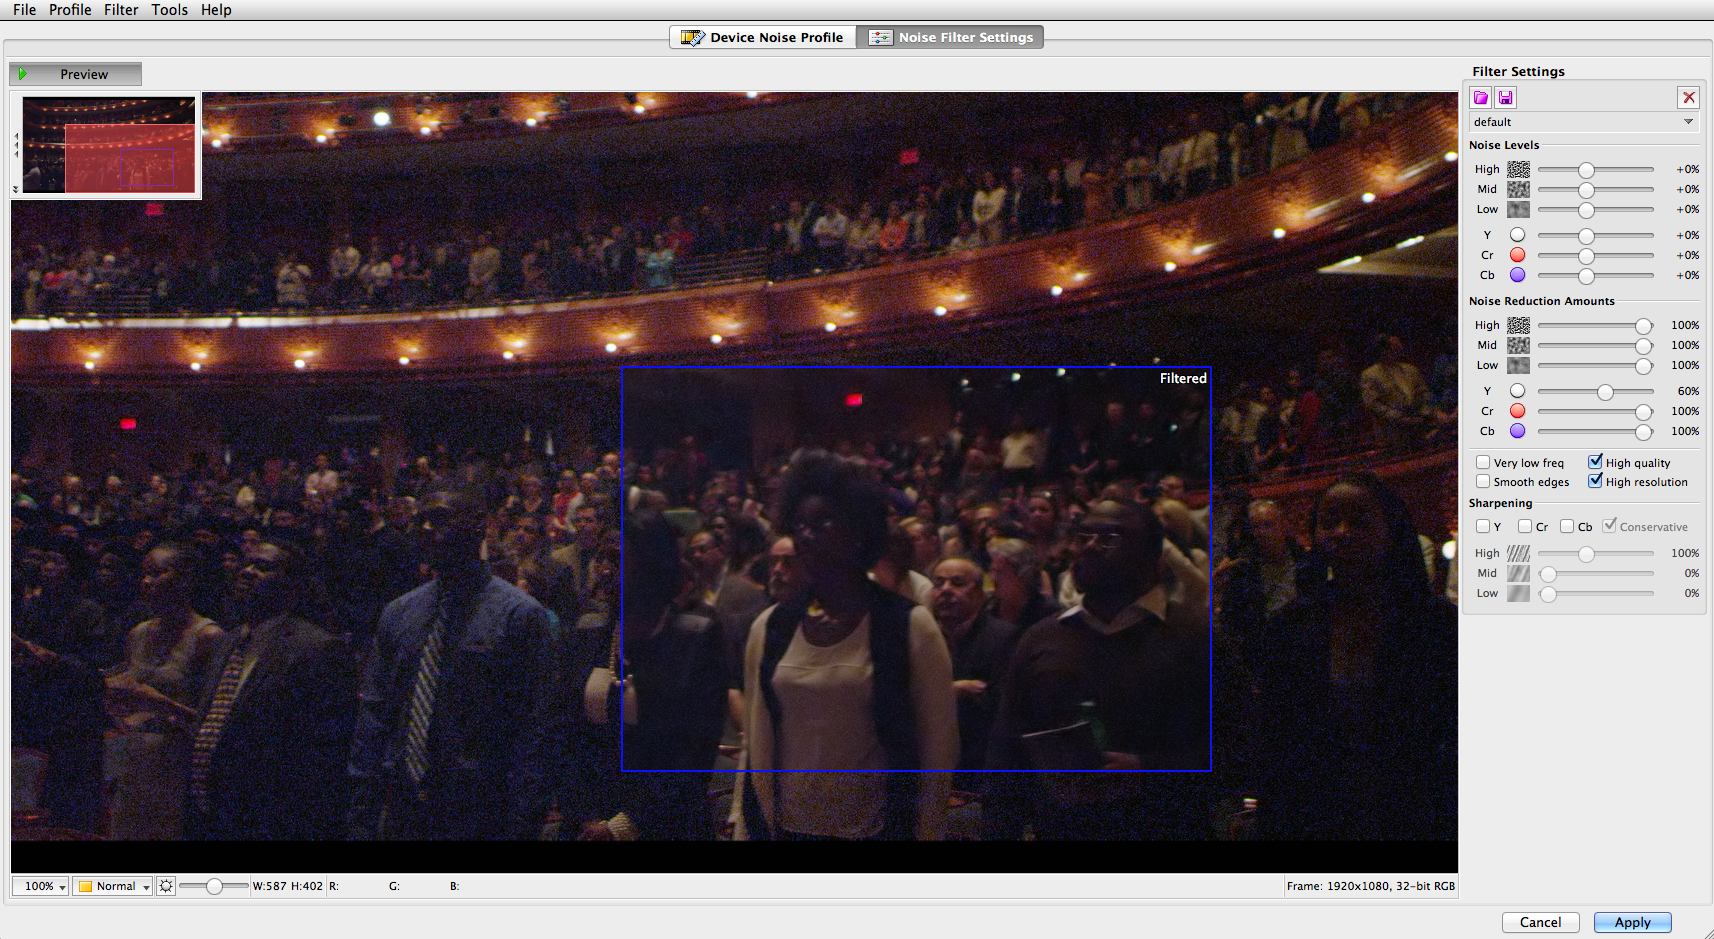 Depending on the shot’s noise level, you may not be seeing dramatic results. You can zoom into the image to get a finer detail of everything that’s going on.
You can zoom in quite a bit to see what the noise reduction is doing. 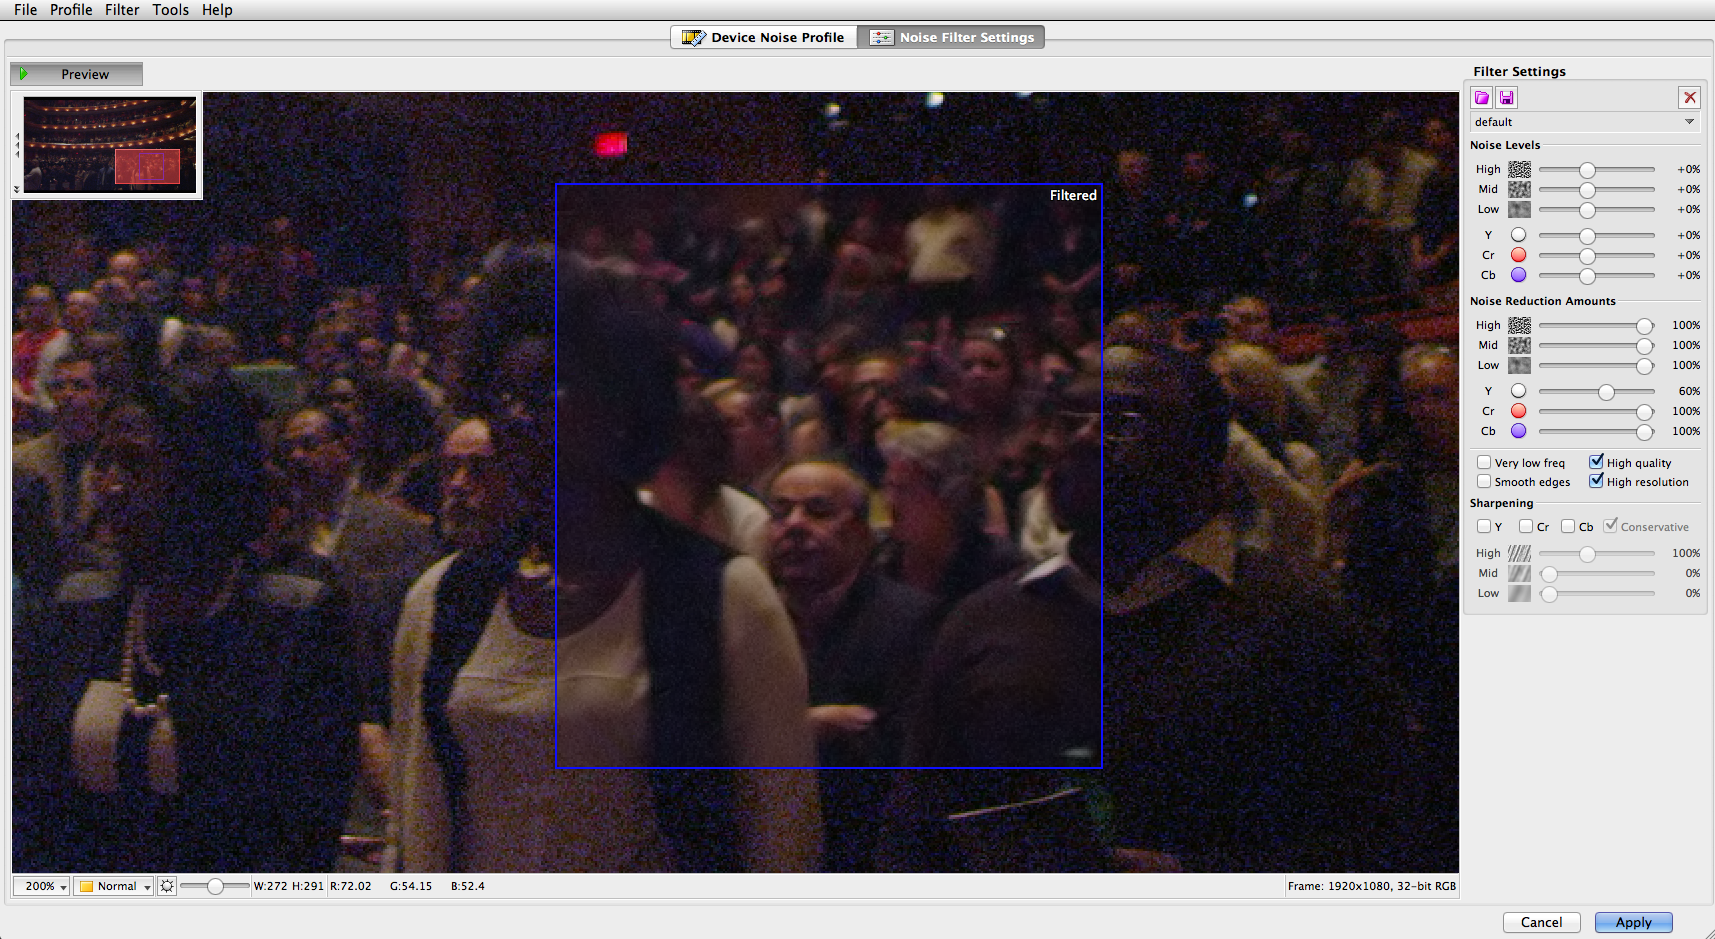 There are also a number of views showing just the luminance channel or each separate color channel that you can use for further analysis.
This view shows the three separate color channels. Check out how noisy the blue channel is compared to the others. You’re slacking, blue channel! 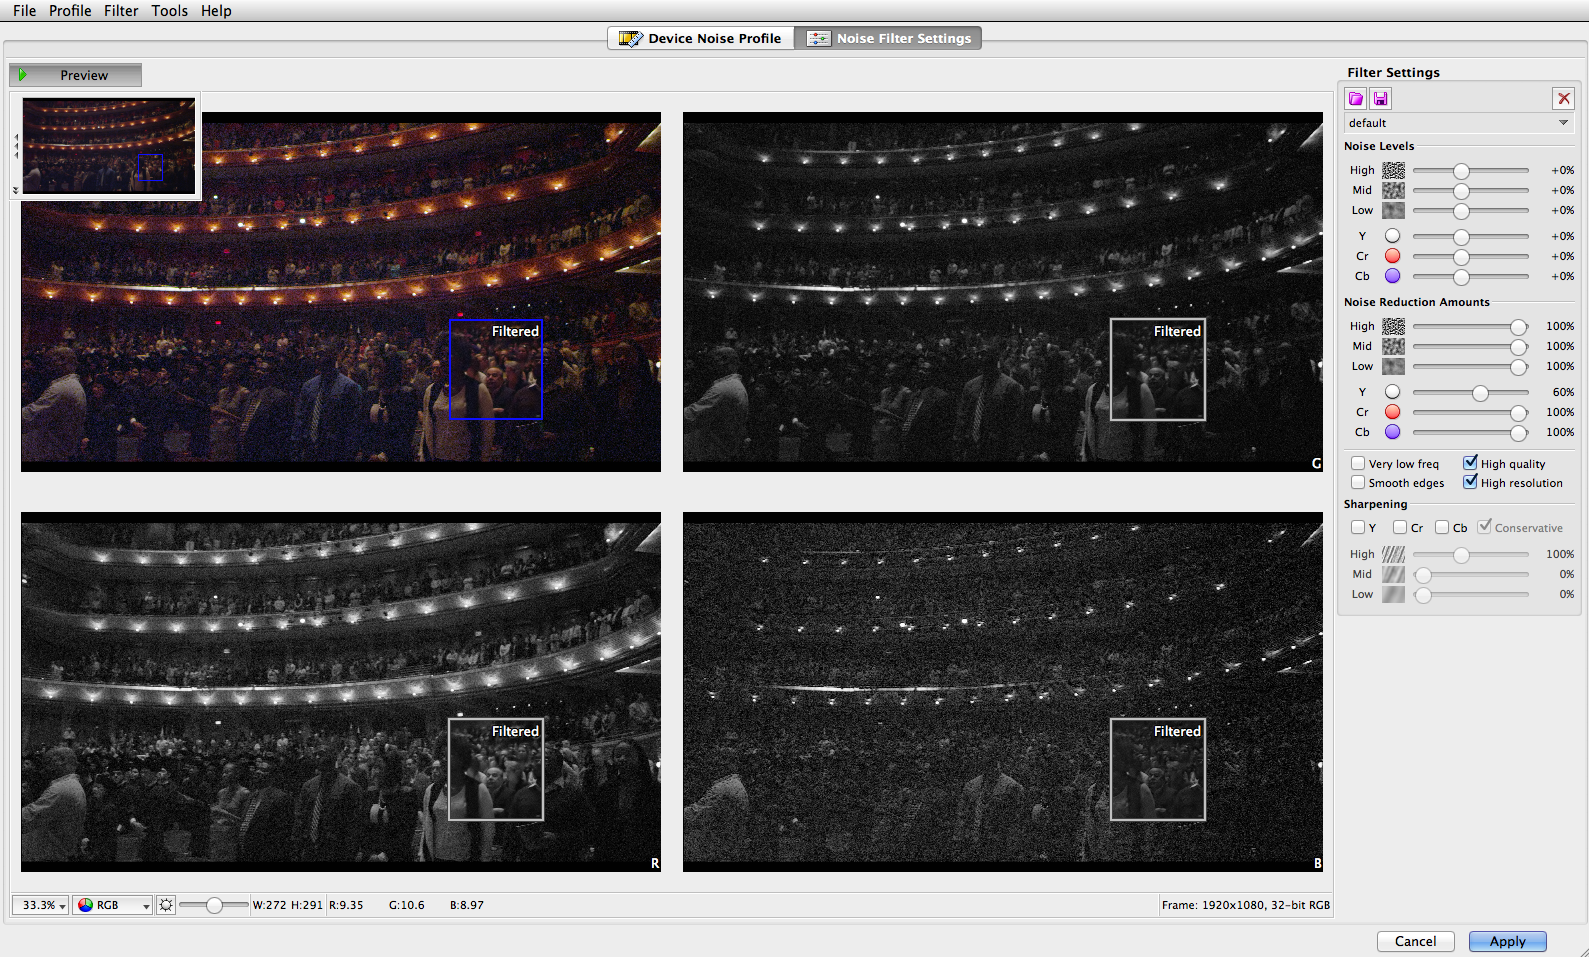 Neat Video works pretty well as is, but depending on how much time you have in session, there may be some time to tweak to find what looks good. You can adjust your Noise Levels and Reduction Amounts inside the Noise Filter Settings. Note that the Luminance Reduction is set lower than for Chrominance because our eyes are more sensitive to luminance than chrominance. Proceed with subtlety! Don’t go too far and risk blurring the footage.
Once you’ve got the profile where you want it, click Apply. You may not get real-time playback, but that’s what the Render Cache is for. Select the Playback menu, and scroll to the bottom to Render Cache and select Smart. Resolve knows what your graphics card can handle in real-time and which nodes it needs to render. Read more in depth about the new Render Cache here.
Neat Video Parameters
The most useful parameter is the Radius button. It allows Neat Video to analyze the noise profile forward and backward by the number of frames you specify. The maximum Neat can evaluate is five frames before and after your current frame, which will be especially processor-intensive. You may see dramatic results by just kicking the Radius up to three. Just know, the default setting of one evaluates three frames: the current one, and one frame before and after it.
Threshold controls how aggressive you want the temporal filtering to be. The Adaptive option can be used when the shot veers greatly in composition, causing the noise profile to change over time. As you may have guessed, Interlaced is for dealing with interlaced footage. Chances are you won’t need this if you’re dealing with modern cameras that shoot progressively.
The noise reduced shot looks much more palatable, especially when it’s moving.
 Our scopes readout before the noise reduction. Note how the lower register appears to be smeared. That’s the noise.
 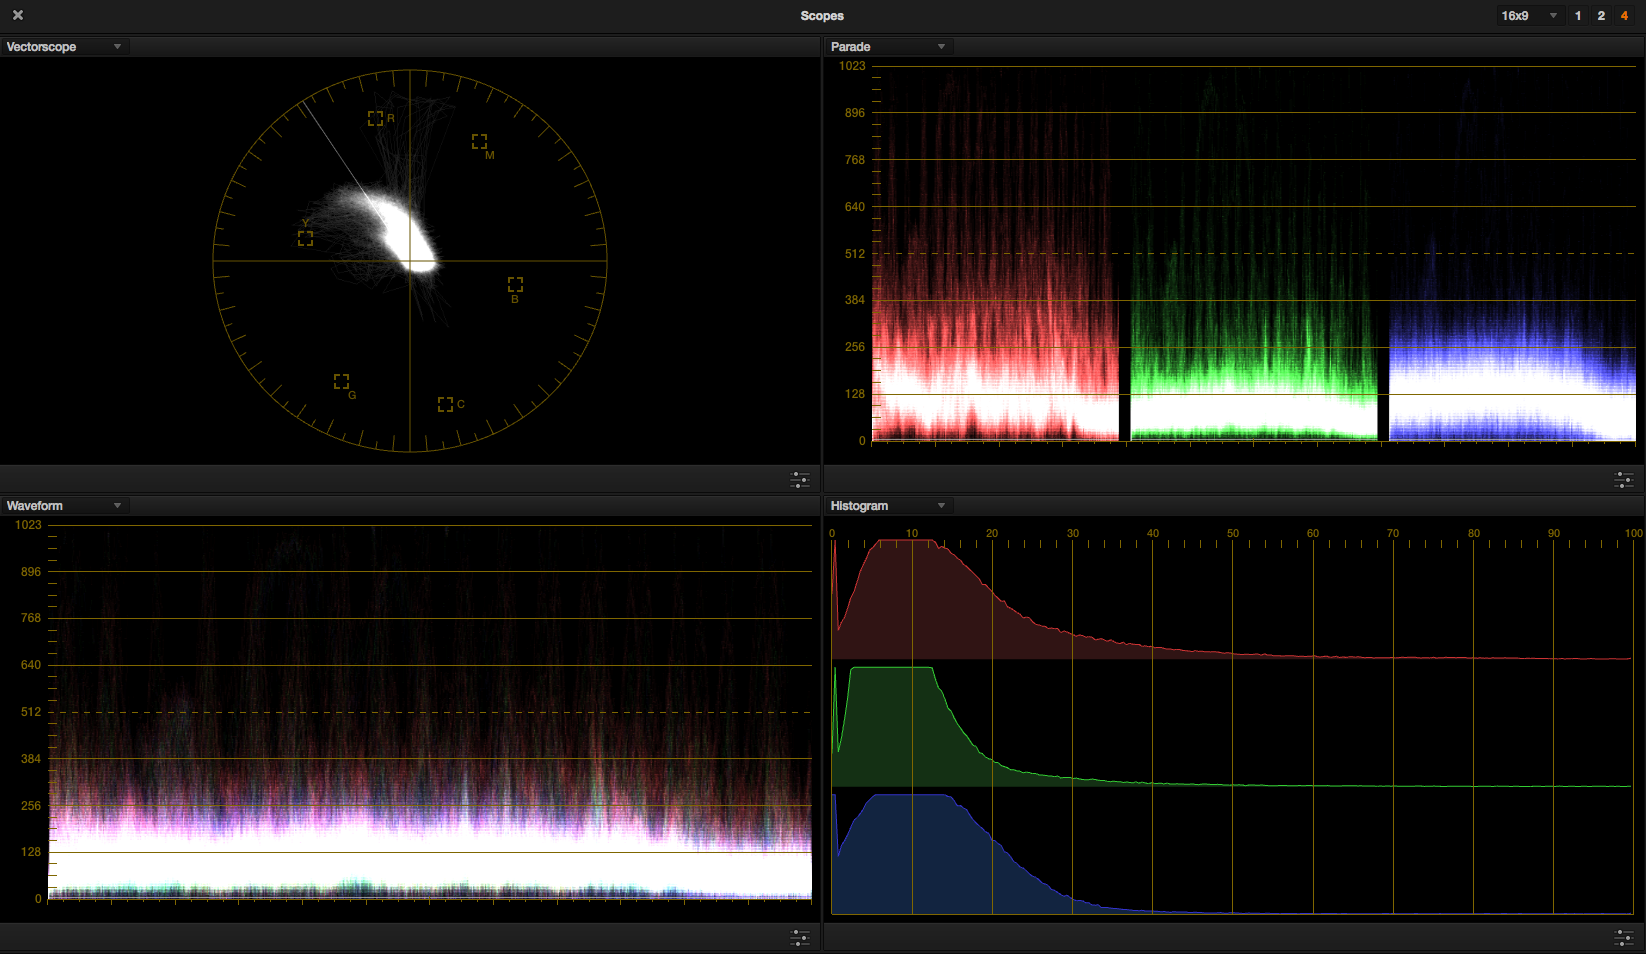 Our much improved scopes, yielding pretty dramatic results.
 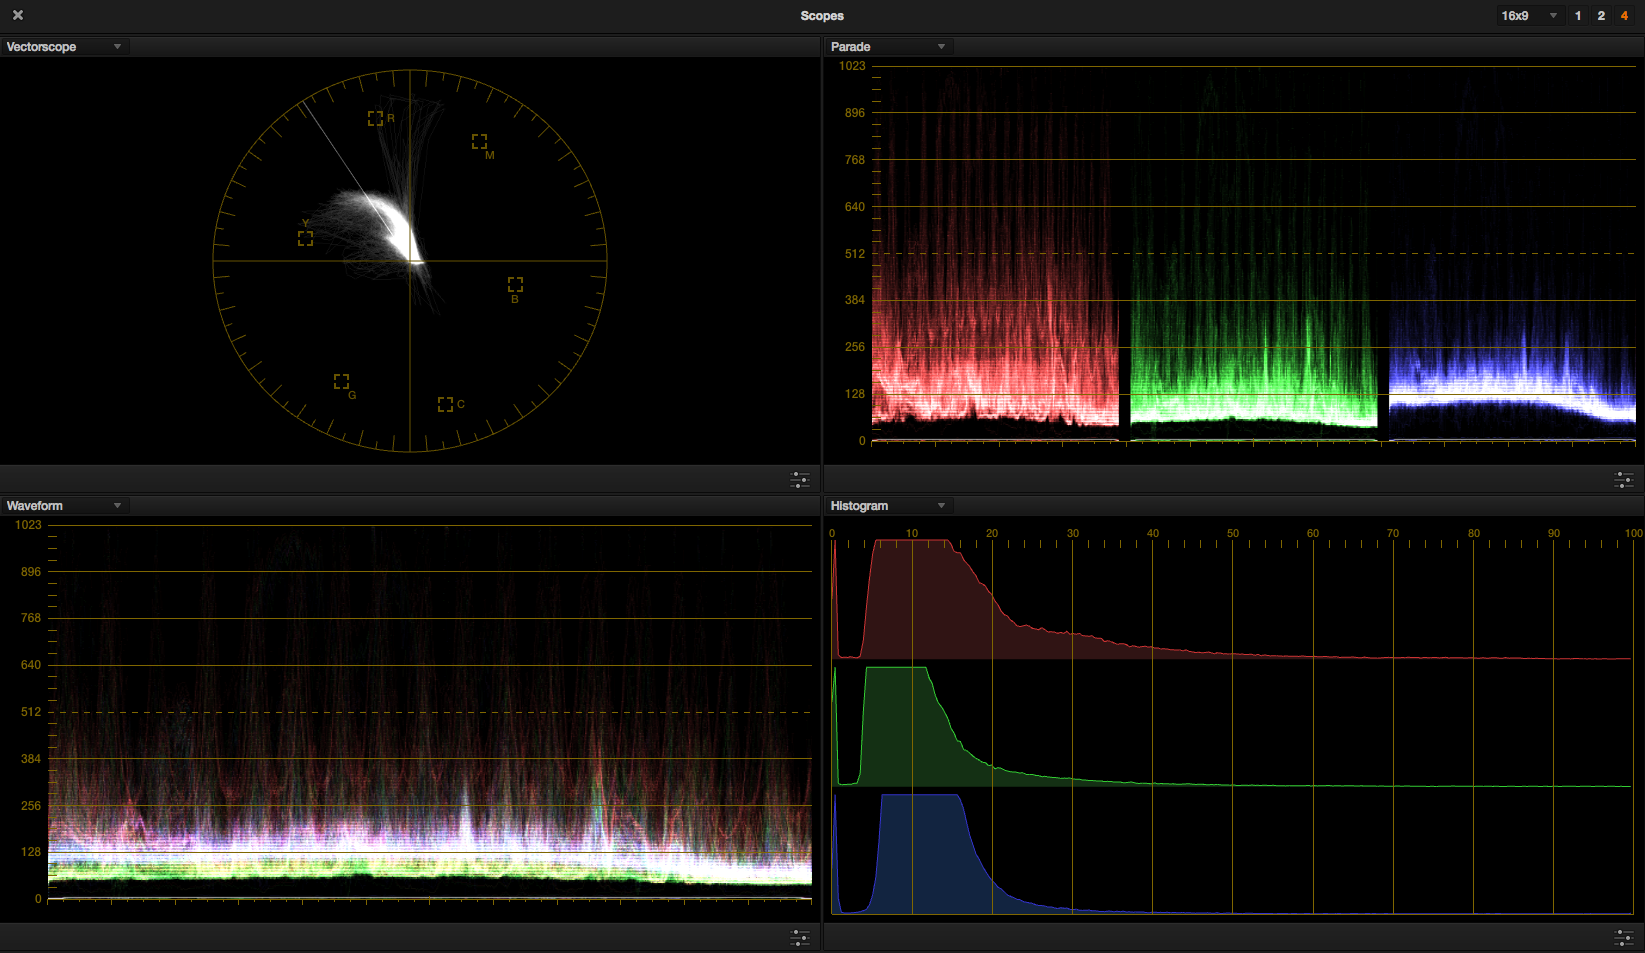 Neat Video is an awesome noise reduction plugin that works with many professional pieces of software. It’s highly processor-intensive and will balloon your render times even if you have a decent graphics card, so make sure to factor in that time when working with demanding clients.
In Resolve, using Neat Video in conjunction with the Render Cache is the preferred workflow. Placing the reduction node near the beginning of your node tree ensures it will stay rendered as you add additional corrections. When wielded with subtlety, noise reduction is a great tool and can dramatically improve image quality.


