5 Tips for Getting Started Working with Audio in Audacity
Audacity is a free audio recording and editing application with an easy-to-use interface. Here are a few tips on getting started.
Audacity is the default software for many multimedia content creators because not only is it free, it’s also relatively easy to use. As a bonus, it doesn’t consume a lot of CPU power, so it can run on pretty much any computer. While it won’t win any awards for aesthetics, recent updates have it looking better than ever.
Unlike other digital audio workstations (DAWs), which are much more expensive and reserved for professional audio engineers, Audacity’s minimal approach to audio editing simplifies the whole experience. But don’t be fooled: behind the simple facade lies a sleeping giant with robust features that you can experiment with over time.
To test out Audacity, and to show you the ropes, I used a Zoom H1n handheld recorder on a tripod to record the sound of my keyboard and make a working audio file. I’ve been obsessed with mechanical keyboards lately, and the click-clack sounds that my keyboard makes are very satisfying in an ASMR-like way. (I’ll link to the finished recording in the end.)
Whether you’re editing a podcast, external audio for a video, or a voiceover, Audacity can handle it. If you really want to step up your videos, first you need to step up your audio — it makes a noticeable difference. If you’ve never worked with a DAW or edited audio in Premiere Pro, here are a few tips to get you started with Audacity.
1. Getting Started

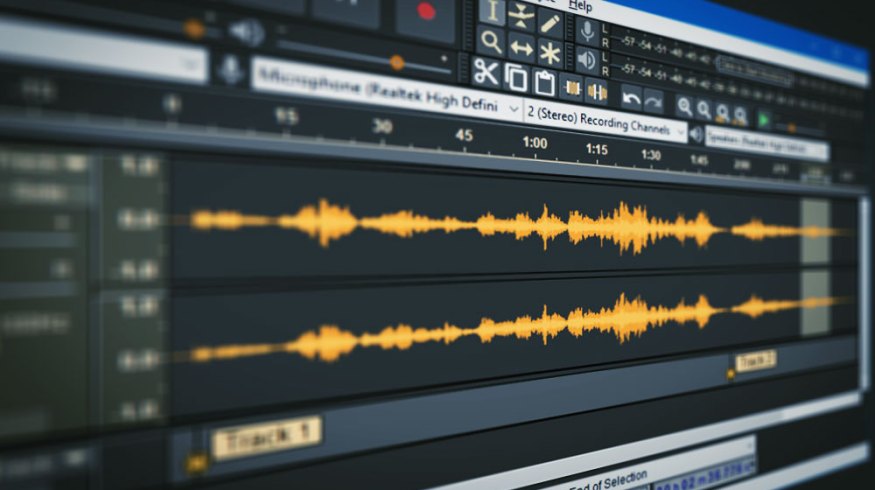
Create a new stereo track by clicking on Tracks > Add New > Streo Track.
First, you’ll need to download Audacity, which works on Windows, Mac, and even Linux operating systems. When you open the software, you’ll start with a new file, and you can import an audio file or hit record. To import, head to File > Import and then find and click on the audio file you want. To record, hit the red circle button on the top left-side of the screen or hit “R.”
Importing a file will automatically create a new track. When recording, the audio will record on the current track, but you can use “Shift + R” to record on a new track. If you want to layer your audio with music, or if you have multiple files, you’ll want to have a track for each one, which makes it easier to edit — you can hit the “Solo” button on the left side of the track to only hear that track and mute the others. Often, a bit of background music can make your video more lively and add emotion to what’s happening on-screen. (Check out our PremiumBeat library to find the right song for your project.)
2. Adjusting Audio Levels
The recorder that I used to capture the audio did a good job, but the sound was a little soft. I decreased the gain on the recorder so it wouldn’t pick up my breathing or other nearby noises. However, the audio was much too soft to hear without blasting the volume, so I highlighted the track, navigated to Effects > Amplify and then I hit “OK.” The waveform expanded a bit, and it was much easier to hear. You can also adjust the volume of certain parts of the clip by using the “Envelope Tool” — it’s the one that looks like a line between two arrows.
If amplifying the sound isn’t enough (or too much), head over to the “Gain” slider on the left side of the track and adjust accordingly. In the past, we’ve recommended that the overall audio level should be between -10db and -14db — the closer you get to 0, the more likely it is that your audio will sound distorted.
3. Getting Rid of Noise and Silence
Because I placed the recorder close to the keyboard, it picked up the noise coming from the fans in the PC on my desk, even though I had lowered the gain. This low humming noise is annoying, and it ruins the listener’s or viewers’ experience, but there is a way to get rid of it with just a few simple tricks.
With your cursor, click and highlight a few seconds of noise within the clip — make sure it’s just noise — then click on Effect > Noise Reduction, which you can find in the top menu. Select “Get Noise Profile,” which will close the “Noise Reduction” window, and then select the whole track, or whichever part of the track is noisy, and use Effect > Noise Reduction again. The “Noise Reduction” effect can get rid of noise coming from fans, A/C units, breathing, and other annoyances.

Before you hit “OK,” highlight a noisy part of the clip and click on “Get Noise Profile.”
With Audacity, you don’t have to remove silence from a clip manually using the selection tool. Often, when recording an interview, for example, there are moments of silence that can add to the overall runtime of the clip. Instead of deleting all those moments yourself, you can highlight the whole clip and, once again, use the effects menu.
For this problem, use Effect > Truncate Silence. It will remove all silent moments from the clip. For my track, it deleted about 15 seconds of silence, so be aware that it will shorten your clip, depending on how much silence there is — I ended up undoing this because I preferred the silent moments.

To get rid of silent moments in your clip, use the Truncate Silence effect.
4. Fading In and Out
Fading in, especially when you start out with an intro song, is important — it eases your listeners in. You don’t want to start out with a song at full volume. To do this in Audacity, highlight the first few seconds of the clip and head to Effect > Fade In. Once you click it, you’ll notice that the waveform is small at the beginning and enlarges progressively until it matches the rest of the waveform.
To wrap up your audio file, head to the opposite end of the clip and highlight the last few seconds then select Effect > Fade Out. The resulting clip will gradually become quieter until it ends. For my clip, I chose the first and last ten seconds of the clip to fade in and out. I think it sounds much better, especially because the original clip immediately started with loud typing. With these effects, your audio won’t be as jarring in the beginning, and it won’t end so abruptly.

By using the Fade In and Fade Out effects, you can see that the track has changed. The waveform gradually gets bigger in the beginning and smaller in the end.
5. Exporting the Finished File
To export, click on File > Export, and select the file type. You can select “Export to MP3” or “Export to WAV” in the Export dropdown menu, but there are other options if you select File > Export > Export Audio. Once you’ve figured out your settings, you can hit “Save” and export your file to the desired destination.
With that, you can move the audio file to a video edit or upload it to a platform. (If you want to check out my typing sound test, you can listen to it below).
It’s not hard to use Audacity, and you can always upgrade to a fancier DAW if you find you need more functionality, but before you do that, memorize and master these shortcuts for a faster workflow.
- Ctrl + N: New File
- Ctrl + O: Open File
- Ctrl + S: Save
- Ctrl + Z: Undo
- Ctrl X: Cut
- Ctrl C: Copy
- Ctrl V: Paste
- Ctrl + F: Fit the track to the width of the window
- Ctrl + Mouse Scroll Wheel: Zoom in and out of the track
- R: Record
- Shift + R: Record New Track
- Space: Play/Pause
Cover image via Audacity.
Looking for more tips on working with audio? Check these out.