

Autodesk Smoke 2013 Power Tips & Tricks

Become a Smoke power editor! Follow these tips and tricks for Autodesk Smoke 2013.

#1. Use Stereo Nodes for Double the Power in Smoke’s ConnectFX
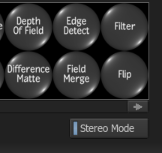
Many useful nodes in CFX are single channel. Resize, MUX, and Damage have to be duplicated in order to use them with both a Front and a Matte source. This takes time to set up and link the connections.
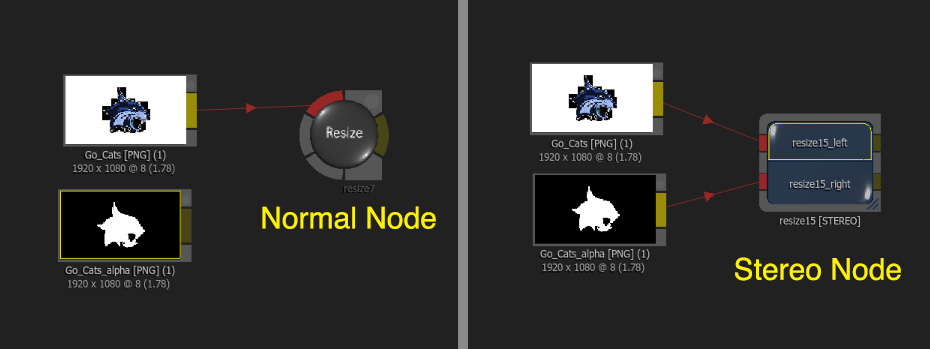
You can speed up your workflow and clean up your schematics by using Stereo Nodes. When Stereo Nodes are active in the FX Nodes for CFX, then each one you drag into the schematic is already linked and grouped. It is basically a prebuilt Group Node. The internal Mimic Link makes each input of the node act as one, so any adjustments to the node get made to both inputs. Now you can Resize the Front and Matte clips together, as well as MUX the Front and Matte Result of a Text Node.

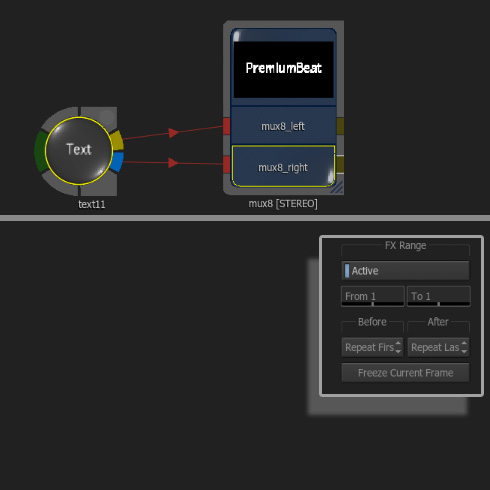
Bonus Tip: If you Freeze the outputs of non-animated TEXT with a MUX node your render speed will increase. TEXT doesn’t have to render the type for every frame. TEXT is an old tool and not well optimized.
#2. Create CFX Clips to Slip Multiple, Complex Keyframes Together
Creating CFX Clips out of your nodes has multiple functions. One lesser known function is to slip all of the keyframe animations along all of the nodes at once.
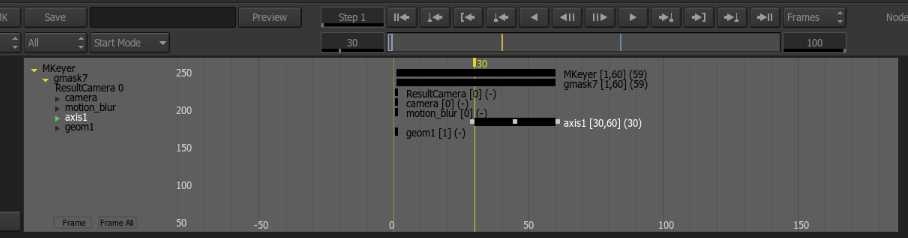
Many keyframe channels are not accessible in the larger CFX Animation Channel Menu. For instance, if you have keyframes inside of Action with the internal Color Correct or Modular Keyer, especially with Gmasks, those Keyframes don’t slip with the overall timing of Action. They exist in their own timing world.
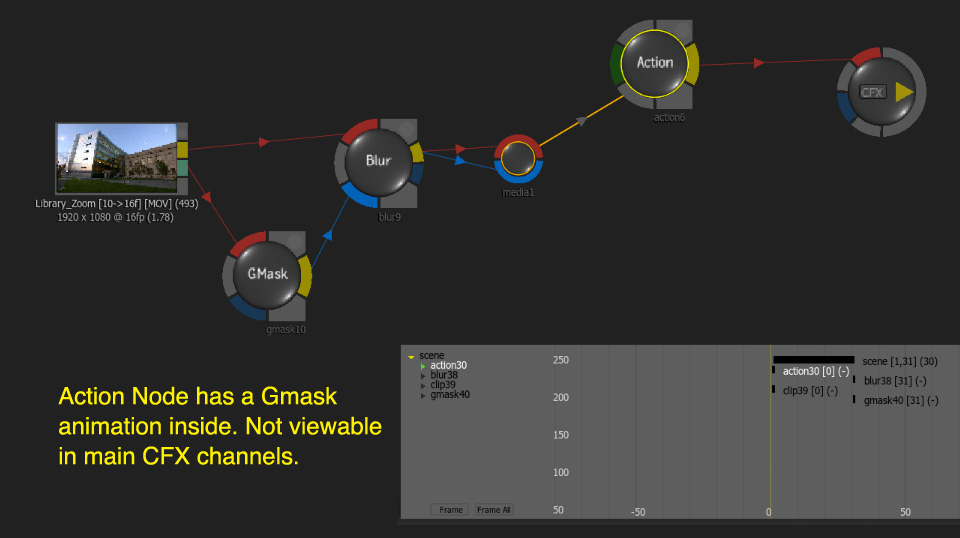
If you have an animation inside of the Modular Keyer with the Gmask that happens from frame 30 to frame 60, and you slip the overall animation of Action by sliding the Keyframe Tracks, the main Action keyframes will slip, but the Gmask Keyframes still happen from 30 to 60.
This is somewhat annoying and a bit of a ‘gotcha’ if you don’t know what’s happening. TEXT is another node that behaves outside of the main ConnectFX Animation world. So any animation of your type can’t be slid with the tracks mode as a whole with all of the other nodes. Sparks and the Modular Keyer outside of Action also behave this way.
By using CFX Clips, all of the keyframes for all of the nodes, including those nodes when the animation channel is isolated from the main CFX, will slip if you change the timing of a created CFX Clip.
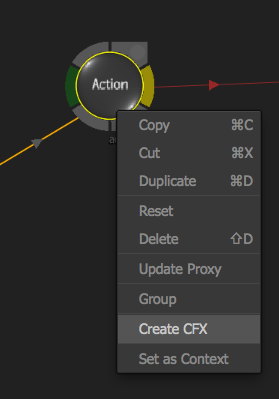
Select all of the nodes for which you want to slip the keyframes. You can ALT-click the lead node and all of the nodes in the tree will highlight. Right-click and select Create CFX Clip. A new clip will be created. Connect the output as needed if there are more nodes upstream, and feel free to delete the original tree to tidy things up.
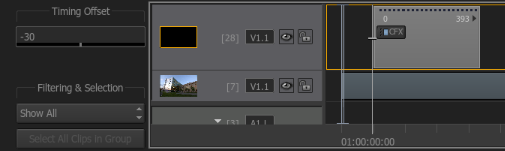
Open up the timing view and find your new CFX Clip. You can select the clip and you can slip the timing forwards or backwards.
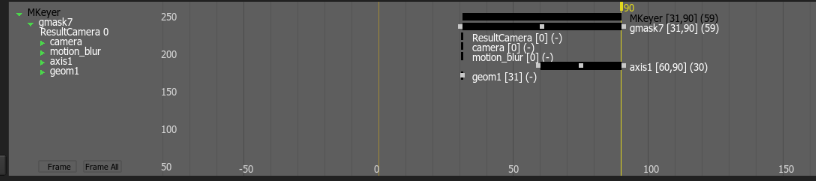
Once you have the desired effect, you can leave the clip as is or you can right-click and Explode CFX and your nodes are returned. But in this instance, the timing of all of the animations are shifted, including those pesky hidden ones.
#3 Bump Mapping Your Textures on 3D Models
 Smoke has 3 mapping textures. Diffuse and Reflection Maps are obvious when you want to texture your 3D models. But these textures are flat because they don’t react to lighting. The model itself does, but not the texture on the model. But you can create some depth to your textures with the Displacement Map.
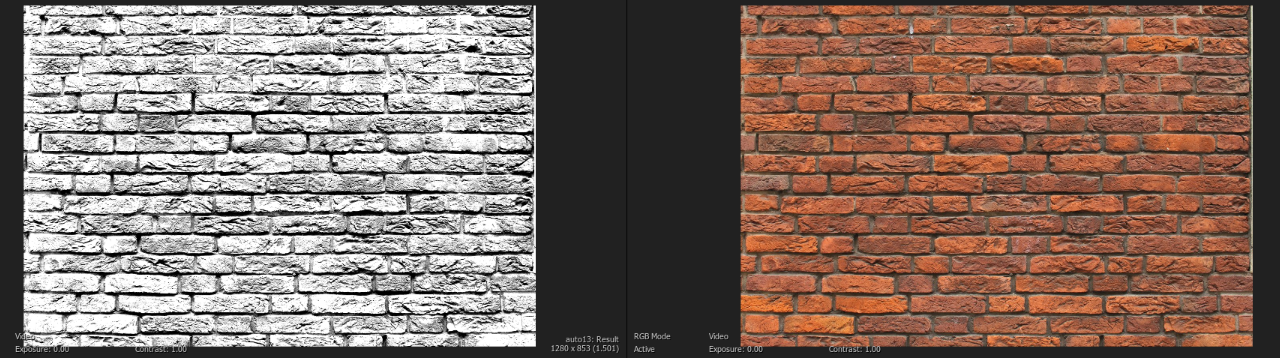
You can create a displacement map from your texture by creating a hi-con version of the texture with the AutoMatte Node.
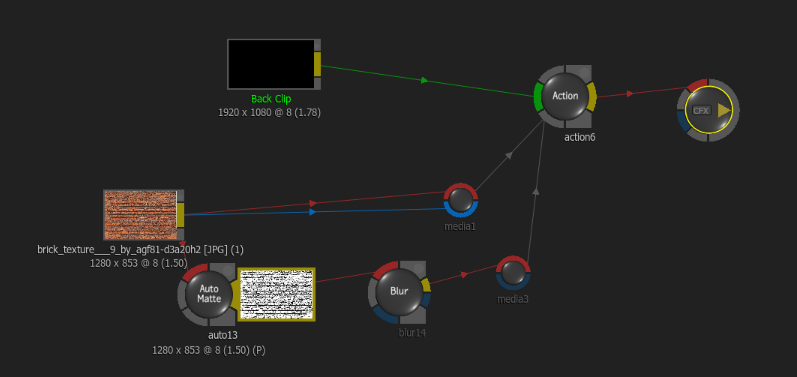
You can also add a blur to soften the map if there is a lot of detail. Once you are happy with your bump map, you can attach it to you GEOM/MATERIAL node just like the Diffuse or Reflection Maps.
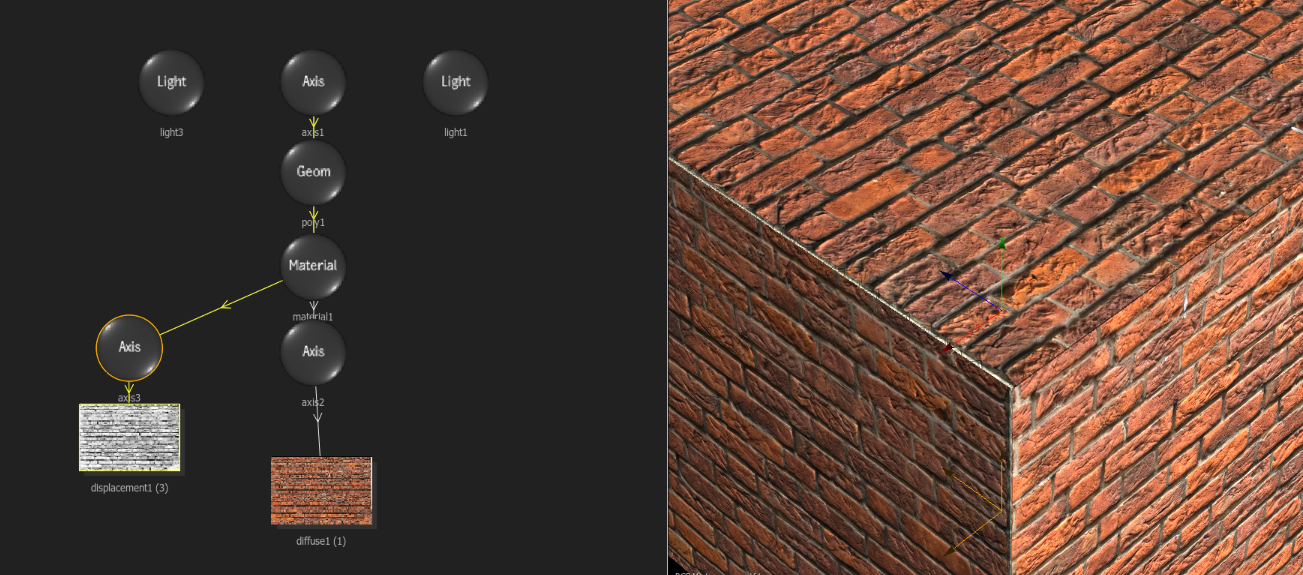
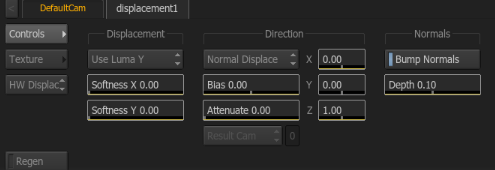
Displacement maps have a Software(SW) and a Hardware(HW) processing option. With the hardware option, you can Bump the Normals of the texture map.
Now you don’t need much…this is a subtle effect. You can also just nudge the Z position up just enough to catch the light and if you use AO (Ambient Occlusion) in the output node this will help create some real intra-geometry shadows.
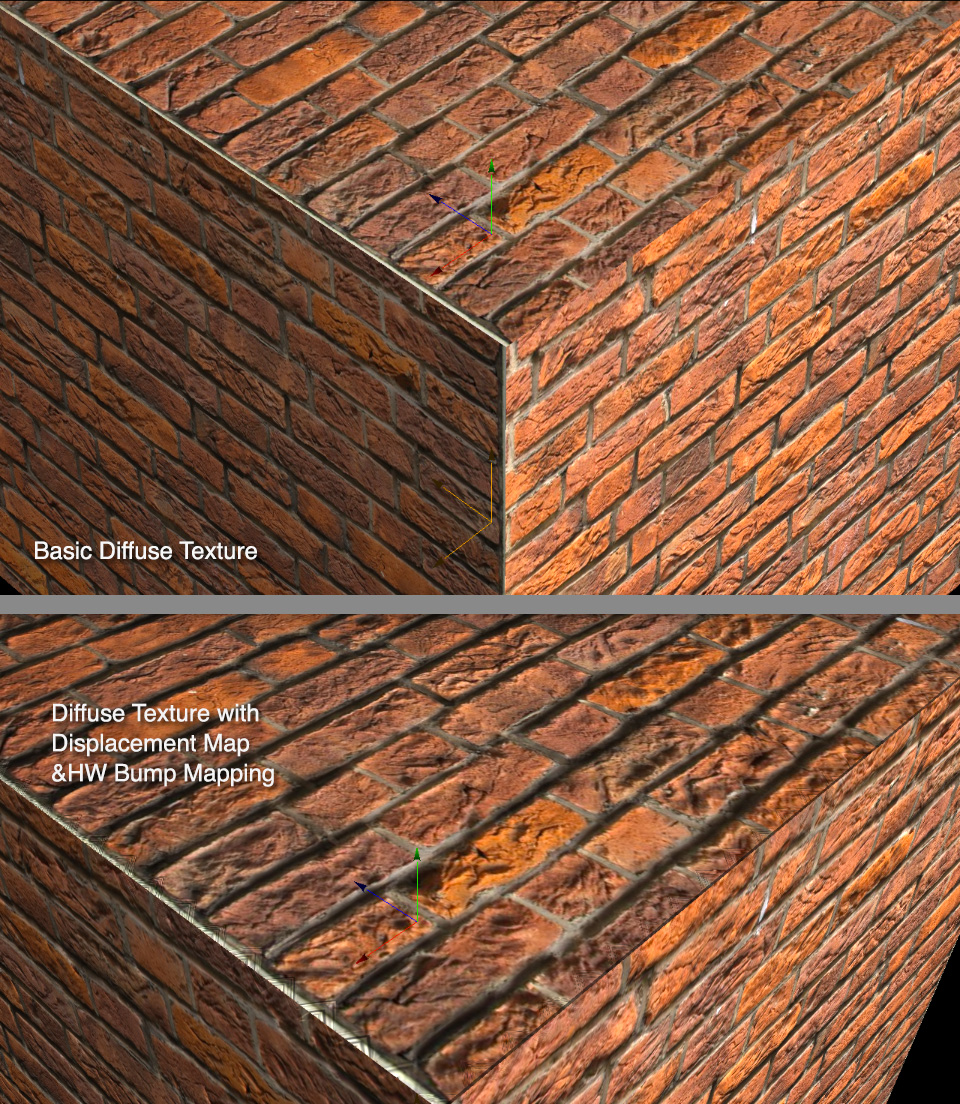
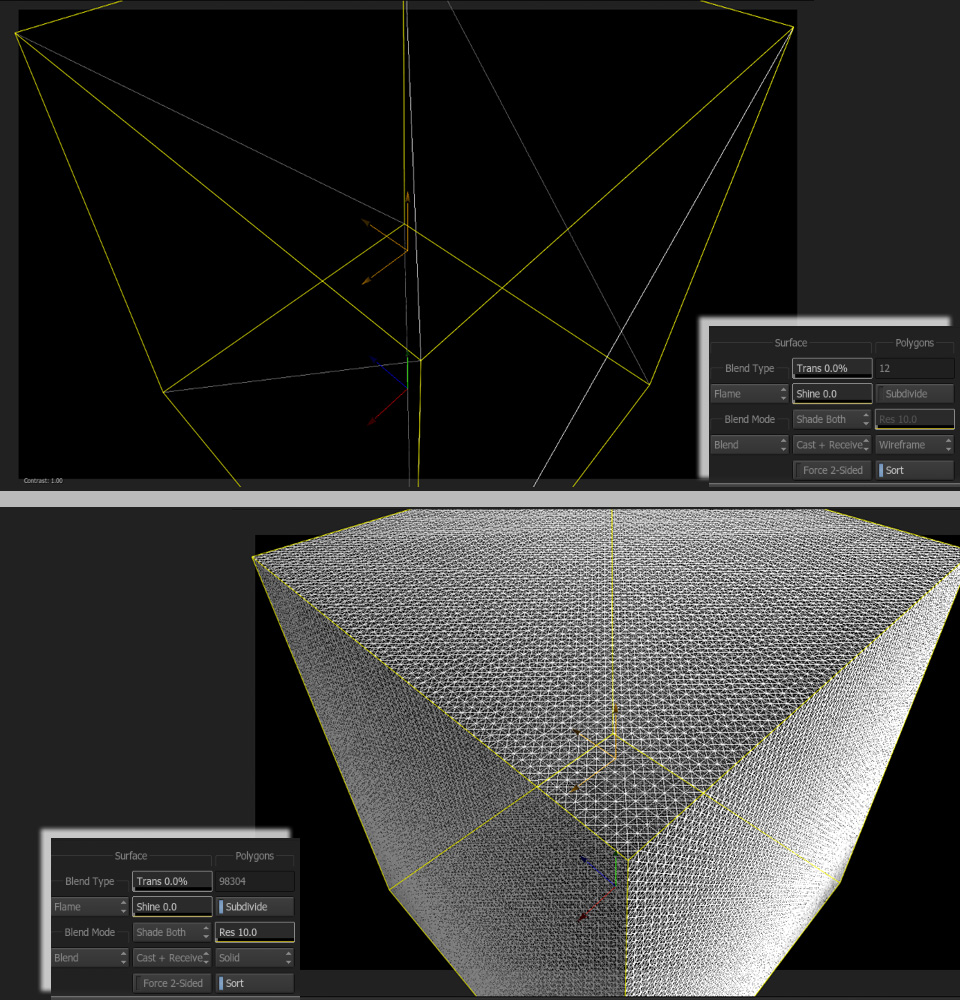
You may need to adjust the wireframe of the mesh. The default box has very few polygons. By subdividing and creating more mesh, you can get a bit more detail in the bumps.
Hopefully these tips and tricks will help you make better composites in ConnectFX and help you make them faster. Be sure to bookmark the Premiumbeat Blog and check back often for more Autodesk Smoke tips and tricks.


