

Smoke ConnectFX Nodes: The Color Corrector


The breakdown of ConnectFX Nodes in Autodesk Smoke 2013 continues as we being our look at the color tools with the Smoke Color Corrector.
Smoke has 2 main tools for color work, the original tool is the Color Corrector (CC). It is a primary color corrector, no secondary selections are possible. As Smoke matured it adopted the Color Warper tool from Autodesk Flame. With the Color Warper (CW), it is possible to use secondary selections. Both have their advantages and often you can toggle back in forth between the 2 tools as they are both available in the CC Timeline effect and inside of Action. You can only use one or the other in these menus, but as a node in ConnectFX you can link the two in your effects pipeline.
Autodesk Smoke’s Color Corrector

You can feed the Color Correct Node a Front, Back, and Matte. Normally these inputs are more for compositing one image over another, but in the Color Corrector, you can use the Matte to isolate part of the front image and only make color adjustments within the matte area (or outside the matte if inverted).
[Click for larger image]
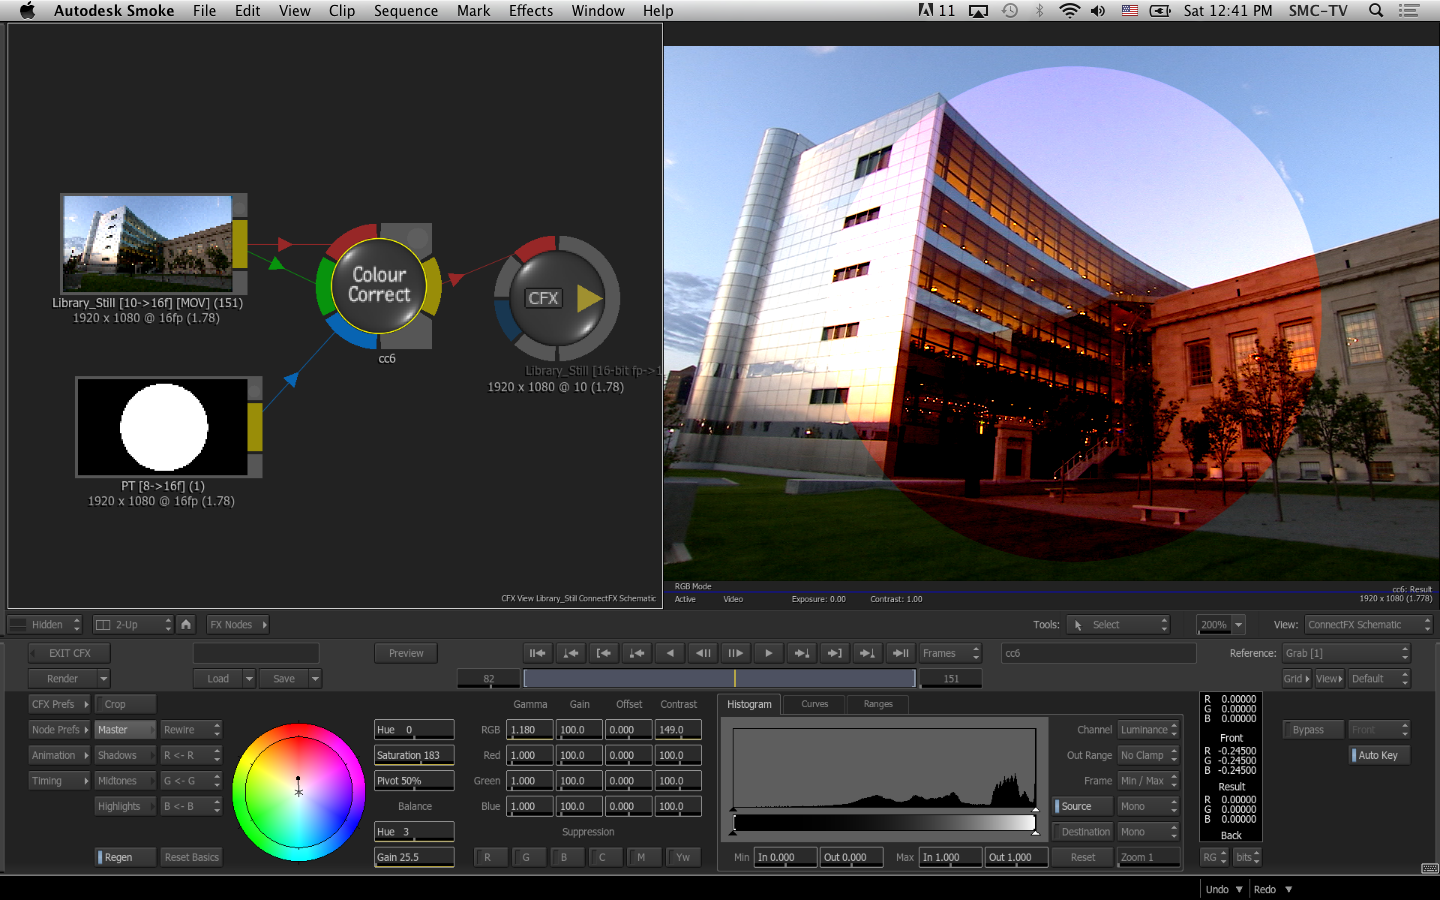
When a front and back are connected, you can use the sample tools inside the node to sample colors from the front and back and match them to each other. The front clip will always get matched to the back clip. I’ll explain the matching workflow later in this post, as I walk you through the interface.
One thing to be aware of when you are working in ConnectFX is that CFX will bump 10bit and 12bit clips to 16bit in the pipeline. 8bit clips will remain 8bit. This can sometimes cause issues when adding mixed res clips into a node, as Smoke likes frame size and bit depth to match.
[Click for larger image]
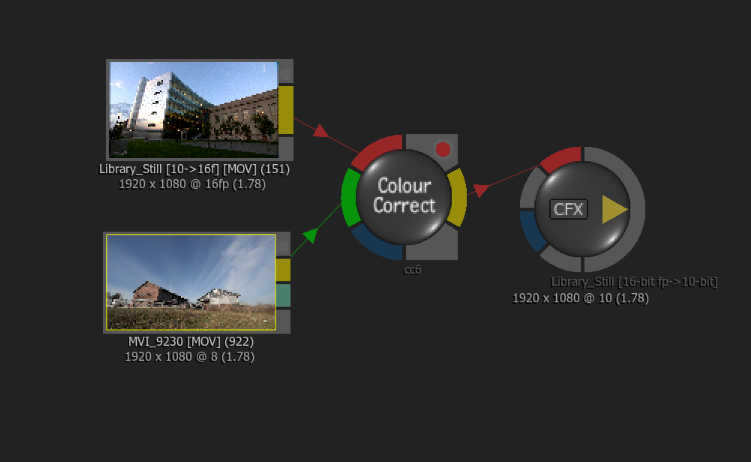
If your frame size is the same, and it’s only the bit depth that is different, you can use the LUT tools in CFX to make a quick adjustment. This keeps your schematic cleaner and eliminates the need to process through another node. Select the clip you want to apply the LUT to, and then select RGB LUT in the UI. Then, press the ACTIVE button to turn on the effect. You can then select the bit depth that you would like to convert the clip to as the destination.

In this case we are working with a 10bit clip that was promoted to 16bit automatically. We need to change the 8bit clip we are using as a back clip for color matching to 16bit. The resolution is the same , so it’s simple to use the conversion LUT in the CFX clip controls to make this happen.

When you look at the UI, it’s best to work work left to right as that is how Smoke will process the effects within the node. For example, Hue shifting will happen before Saturation, and Saturation will happen before the Histogram. So as you work left to right the items on the left get processed first and the tools on the right get processed at the end.
[Click for larger image]
![]()
On the far left you have buttons for Master, Shadows, Midtones, and Highlights. By selecting one of these items to work on you can move right along the UI and adjustments will only be done on that selection. For example, by selecting Shadows, you can adjust the color of the shadows in the color wheel, along with saturation, gamma, gain, offset, & contrast of the RGB channels individually or together.
Next to the the range buttons are options to rewire the RGB channels. This means you can send the Blue Channel to the Red Channel, or the Green Channel to the Blue channel. There is also a selection button to make an instant Mono or Negative image. When you choose one these options you will see how the individual RBG channels can get rewired to perform these actions. You can often achieve interesting color results by rewiring the B<R or G<R. Experiment with this on different images.

The single color wheel may seem odd when the standard now is to use more of a 3 color wheel system. The Color Warper node does provide the 3 color wheels or balls. In the Color Corrector the single wheel is shared and affected by the selection of Master, Shadows, Midtones, or Highlights. As you select each range you can choose different points for each in the color wheel. As you move and select points in the color wheel, you will see that the Hue and Gain values will automatically adjust in the Color Balance menu. You can enter values inside the boxes to make more precise adjustments.

The RGB channel adjustments, again are dependent on the range selection. You have full control over the Gamma, Gain, Offset(Lift), and Contrast.
Contrast is also affected by the Pivot setting. Adjusting the Pivot will change the point at which contrast pixel value is equal to that of the pivot value. Color values darker than the pivot are further darkened and colors that brighter than the pivot are further brightened.

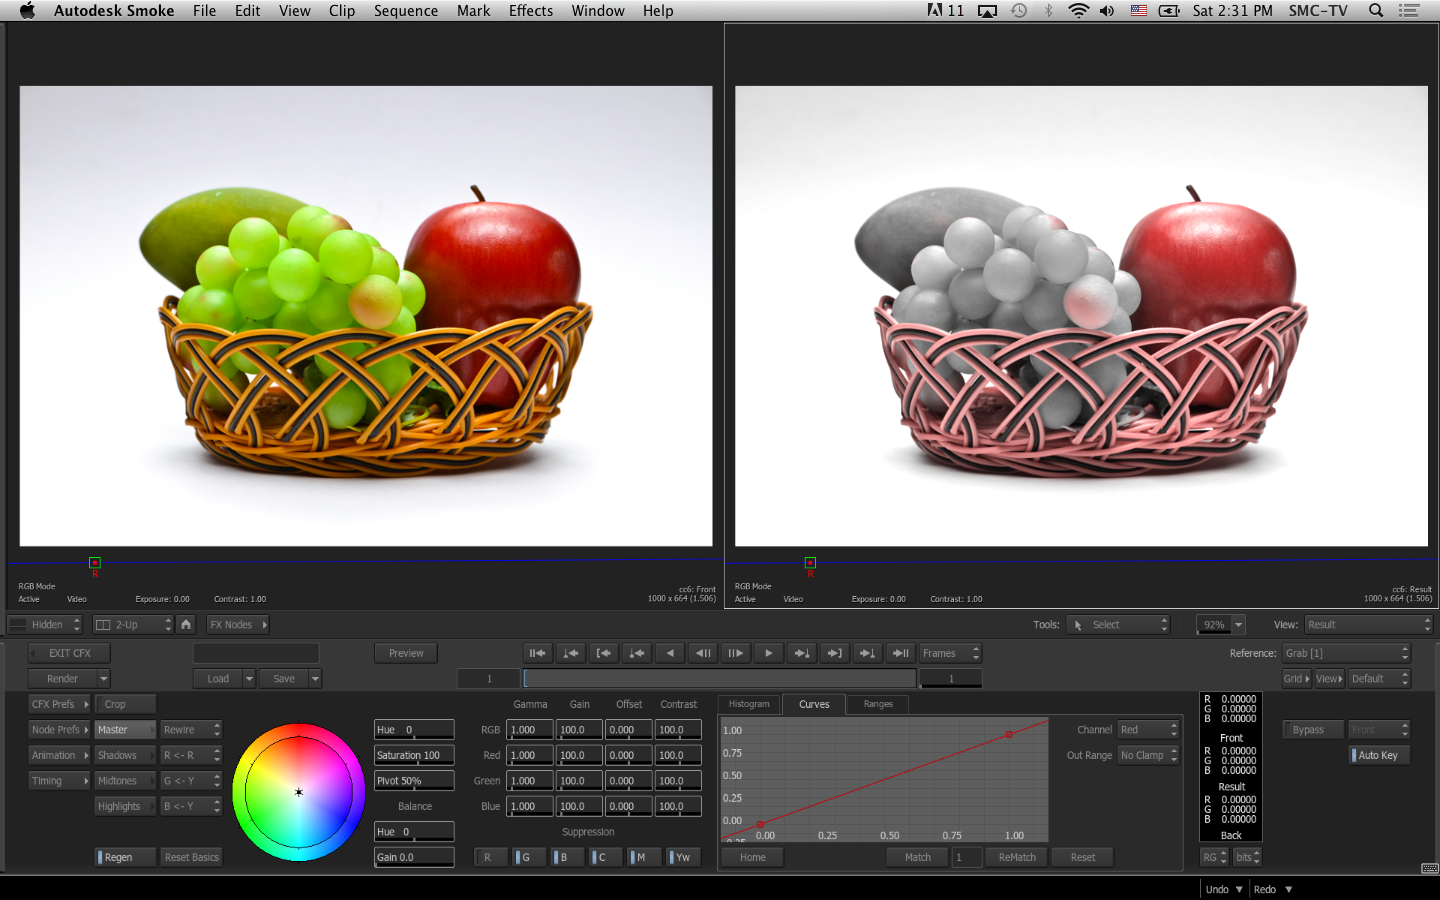
If you want to suppress a color channel in Smoke, there are buttons for that. These are pretty much brute force buttons and will suppress the RGB/CMY colors if activated. There is no softness or tolerance setting for these options, as you are simply turning the channel off (and not a range of say, blues in the image). For example, you can have an image of a fruit basket, and suppress everything but the red if you want to just make the apple in the basket remain in color. Depending on your image an effect like this is possible, but the colors have to be pretty pure. The Color Warper has secondary selections and matting, and it’s probably best to accomplish this effect in that node.
[Click for larger image]
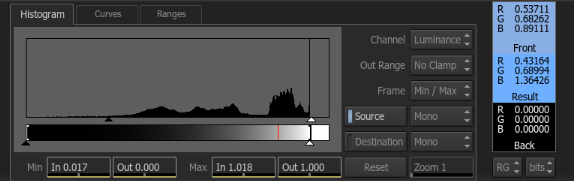
The 2D Histogram makes it’s way into the Color Corrector. This was one of the first tools we looked at in this ConnectFX series.
[Click for larger image]
You also have access to RGB and Luminance Color Curves, which work just like Color Curve adjustments in Photoshop or other color adjustment tools.
[Click for larger image]
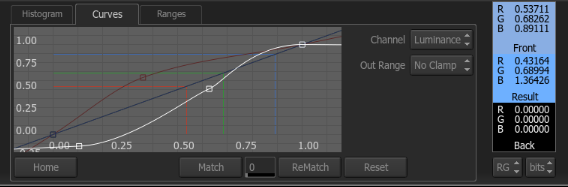
The only thing that bothers me about the curves UI is that the RGB channels are individual, and you need to manually select them in a menu button. Points can be added and deleted along the curve at any point.
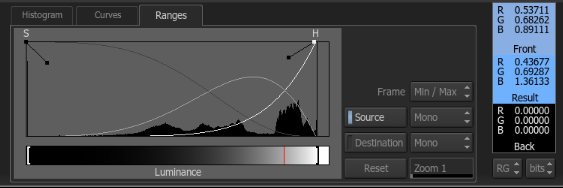
The last tab is the Range Curve adjustment menu. The Range Curves adjust the luminance levels of the Shadows (S), Midtones, Highlights(H). You can’t add points and you can only affect the Shadows & Highlights. The Midtones will react as you adjust the others. You can adjust with curves, the luminance levels within the tonal ranges. For example, adjust the Highlights color balance of your clip, now adjust the Highlights curve in Ranges. You will see how the result of your color adjustment changes.
[Click for larger image]
Color Matching in Autodesk Smoke
Back in the Curves Menu is where you can perform a color match of your Back Clip to your Front Clip.
1. Choose Curves Tab.
2. Press F4 Result View. Select the Front Color Patch, a color picker will appear, select the area you want corrected. The color will appear in the Front Color Patch.
3. Press F2 Back View. Select the Back Color Patch, a color picker will appear. select the area you want to match from your back clip. That color will appear in the Back Color Patch.
4. Press MATCH in the Curves menu controls. The Result Color Patch will change and the destination front color is now match to the back source.
[Click for larger image]
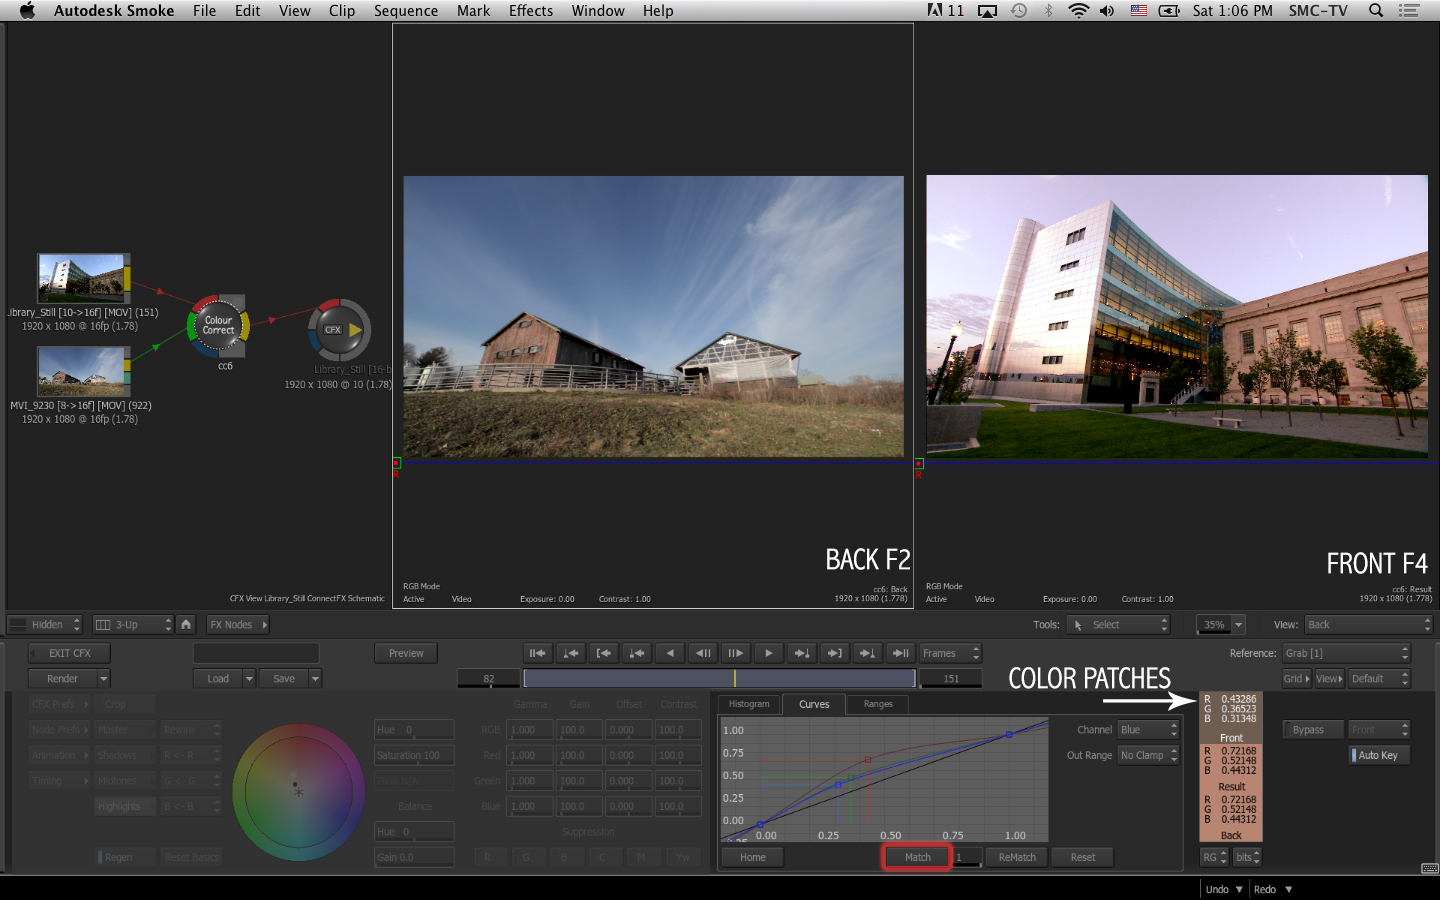
Next to the Match button is a numeric box that now displays a number 1. You can now perform a new match selection by sampling new colors on the front and back images. After the resulting match is complete this number increases. It is now possible to return to any of these match operations and rematch or adjust the colors. Now the color match can be a little heavy handed and make some harsh changes to other parts of the image when it matches. It’s best used to match Back & White levels.
In the VIEW options, you will find the controls to activate the Split Bar which you can use to display a split screen of your original source and your color changed result. Of course you can also toggle back and forth between Front and Result with the F1 (Front) and F4 Result keys. Use the frame grab buffers to grab still frames for reference from your back clip.

This ends our look at the basic Color Correct Node in Smoke 2013. I use the term “basic” loosely, as you can see by the feature set that this node has many tools to help you achieve a good primary grade on your clips. Often times the Color Corrector is all you need to enhance your video. In the next installment of Premiumbeat’s exploration of the nodes in ConnectFX, we will look at the Color Warper and Secondary color selection and correction.


