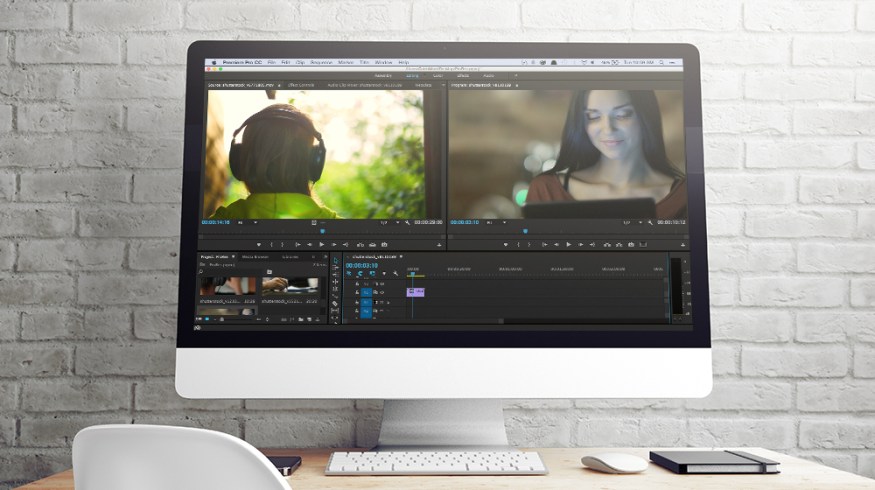
Should Editors Transcode AVCHD to ProRes in Premiere?

Do you need to transcode your AVCHD media when editing in Premiere Pro? Let’s discuss this highly debated topic.
Premiere question, transcode AVCHD to ProRes or leave it native?
— Dan Wolfmeyer (@dwolfmeyer) November 16, 2015
This simple question — should you transcode AVCHD media when editing in Premiere Pro or leave it native — sparked a very long and interesting Twitter conversation, with many different editors weighing in on the proceedings. Some advocated for transcoding to Pro Res, others for re-wrapping the files into a different container, and still others for leaving the files in their native format.
I thought I’d use this post to expand on the pros and cons of the different options. I’ve also previously posted on importing AVCHD into various NLEs. Also if you have C100 footage, whatever else you do, you’ll definitely want to rename the files to have unique file names. You can read about that in more detail on my website, but unique file names and timecode are the cornerstone of media management.
Transcoding AVCHD Media Before Editing
@David_Fabelo @dwolfmeyer @Adamski @dhepburn Biggest problem with AVCHD are TC/Clip name issues. Better to transcode in advance… — Ben Brainerd (@ben_brainerd) November 16, 2015
ProRes is an ideal codec choice when editing in FCPX or Premiere, and Resolve works well with it too. The benefits of transcoding into a format like ProRes is that you’ve got a less-compressed file that the computer can more easily work with, than say H.264 or an mpeg based codec. This leads to speedier editing response and less potential for visual bugs and glitches to work their way in. The downsides are that these new, duplicate files take up more hard drive space and it can be time consuming to do the conversion if you have a lot of files.
If you have lots of different file formats, codecs, and frame rates, you might want to transcode them all into one ‘mezzanine codec’ like ProRes, but as Premiere is designed to handle pretty much any codec natively, you might not want to do bother doing this —unless, when you’re finishing the film you need to deliver a more streamlined list of codecs upstream.
Edit Ready, Mpeg Stream Clip, and other programs will easily transcode your files for you. Or for a free option you can always use Resolve itself.
Rewrapping AVCHD Media for Editing
@dwolfmeyer @Adamski Use ClipWrap to re-wrap. Conversion to ProRes not necessary.
— David Hepburn (@dhepburn) November 16, 2015
This is my preferred method when under time or hard drive space limitations, because rewrapping is faster and requires less space than transcoding.
What Is Rewrapping?
Codecs come in wrappers, much like candy comes in wrappers. A wrapper is the letters after the .dot in the file name. Common video wrappers include .mov, .mxf, .mts, .mp4, .mpeg etc. Canon C100 shoots to .mts files and C300 cameras to .mxf files.
Incidentally, I’ve also previously posted about how to work with C300 .mxf files when the original camera folder structure is broken. So when you rewrap, you just take the candy out of one wrapper and put it in another. You don’t create a whole new candy. So in the case of C100, it will ideally be rewrapped from the original .mts wrapper, into a .mov wrapper, using something like Edit Ready or Clip Wrap.
Editing AVCHD Media Natively
@kyl33t @dwolfmeyer I’ve had no show stoppers on my last 3 features & long format shows using native. A good RAID and RAM helped ensure it.
— Vashi Nedomansky (@vashikoo) November 16, 2015
One of the major benefits of Premiere Pro is its ability to handle anything you throw at it. Editor Vashi Nedomansky has edited several feature films in Premiere Pro, including Sharknado 2, and you can read more about his feature film workflow here.
In the tweet above, he argues for leaving the files in their native format. As he’s so confident in Premiere’s native codec handling capabilities, and given the hours he’s put in, you should be too.
You will however need a decent spec machine — good graphics cards, lots of RAM, fast hard drives — to get the most out of Premiere’s native editing features and nippy playback response. This is also obviously the fastest way to get your footage in to your edit and out the door, as you’re not adding in any additional steps.
Using AVCHD Media in DaVinci Resolve
@westonWoodbury @JBowdacious @kyl33t @vashikoo @dwolfmeyer infra frame codecs will be ok. Inter, not so much. Dan gut is right, transcode.
— Juan Salvo (@j_salvo) November 16, 2015
Editor Dan Wolfmeyer’s question also included the caveat of wanting to finish the feature film in DaVinci Resolve. Here, colorist Juan Salvo suggests that transcoding the AVCHD media out of an interframe codec and into an intraframe codec is a better bet.
Codecs like ProRes, DNxHD, Cinema DNG are all intraframe codecs. Every frame is made up of just that frame. Popular interframe codecs include AVCHD (a flavor of H.264), H.264, MPEG-2 and MPEG-4, XDCAM etc. are created by looking at the previous and next frames, which allows for higher levels of compression. For a very detailed explanation of this topic, check out this post on Wolfcrow.com.
The upshot of all of this is that intraframe codecs are less intensive to process, and therefore provide better realtime playback and often cause less ‘hiccups’ along the way.
As you can see, there are many viable ways of working with AVCHD footage, and often the ‘best option’ actually comes down to the context of your project and the limitations you’re working around.
If you’ve got some insights that could help the rest of the PremiumBeat filmmaking and editing community, share them below!