Quick and Easy Compositing Tips for Adobe Premiere Pro
Join us as we explore how to use opacity blending modes to alter or enhance your footage by blending elements from one scene into another.
Opacity blending tools are some of the most versatile and useful tools in any NLE. All opacity modes, regardless of type, are fundamentally combining certain elements from one piece of footage with another. The different blend modes simply refer to the algorithm that determines which parts of one frame get blended with the other.
We’ll start with some of the basics before moving on to a slightly more involved method.
Basic Compositing in Premiere

Image via Columbia Pictures.
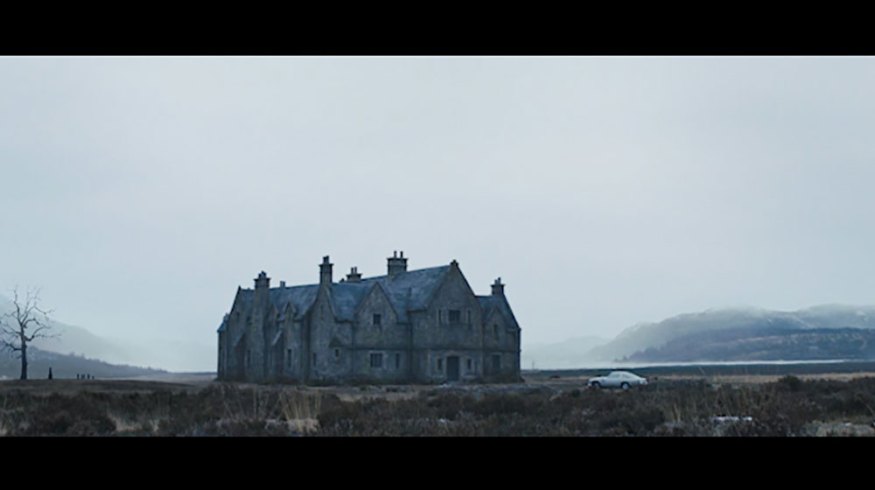
Let’s give Bond’s arrival to his Skyfall Estate a bit more of an eerie atmosphere. We’re going to composite a few details from a still from True Grit into Skyfall.

Image via Paramount Pictures.
This shot from True Grit has a beautifully silhouetted woman visiting a small cemetery with a looming, dead tree behind her. Because of the hard backlight of the sky, it should be easy to composite both shots together — assuming both are stationary.
To begin, put the dominant frame on a layer lower than the one you’re blending. In this example, we are adding atmosphere to the shot from Skyfall with elements from the one in True Grit, so Bond is on bottom and Grit is on top.
To start blending, simply lower the opacity of the top layer to 50% to begin adjustments to scale and position.

For my example, I like positioning the woman and tree on the left side of the frame. I pay close attention to try and match the horizon lines, whenever possible.
Once I’ve found a position I like, it’s time to mask. I’m giving as much space to the mask as possible, without overlapping key details in the main shot. I’ve opened up the mask feather a little bit before heading to the opacity blending controls. After a bit of experimentation, I’ve settled on hard light blended at 70%.
I really like how the hard light blend mode preserved the silhouetted features yet blended the misty haze from the Scottish Highlands into the deep shadows of the tree, woman, and headstones.

With a few small tweaks to the perspective, I’d call this one about done.
Now that we’ve got the basics of the process down, let’s look at a way to use blending that can come in super handy — and yield some pretty dramatic effects — on any project.
Sky Replacement with Opacity Blending

Image via Warner Bros.
We’ll be adjusting a shot from Gravity by replacing the background and sky with yet another still from Skyfall.

Image via Columbia Pictures.
For this shot, we’re blending the lower half of the Gravity still — over the misty mountains — into the one from Skyfall. So, Skyfall goes on the bottom layer with Gravity on top.

I’ve drawn a simple square mask around the bottom third of the Gravity frame, setting the boundaries at the edge, where the water line meets the mountains in the distance.
To fine-tune the mask, I punched out the mountains in the center of the Gravity frame to make the new composited mountain range feel a little more continuous.
For this shot, I duplicated the Gravity clip, added it to the top layer, and expanded the mask into the replacement range. I’m essentially trying to very softly and subtly feather my mask over the top of the new mountain range in order to blend the shots together a little better.

To further this, I extended the feather to about 85 and set the opacity blend mode to luminosity at 30%. Combined, I really like how the two shots fade into one another — the low luminosity blend helps to give a sense of distance and foreboding to the final composited shot.

3. Thoughts on Compositing in NLEs
When I first began experimenting with compositing in Premiere, I was pretty shocked by the quality of the results. On two or more blocked-off shots, with relatively similar perspective, you can quickly and effectively get really decent results with some experimentation (and the right opacity blend mode and ratio).
For shots with motion — or important elements or actors moving across the entire frame — this process will likely prove far more tedious than traditional compositing workflows. That being said, with enough contrast between the shots, the right blend mode might just surprise you.
Looking for more articles on filmmaking and video production? Check these out.