Video Tutorial: How to Configure The ADR Panel in Resolve 15
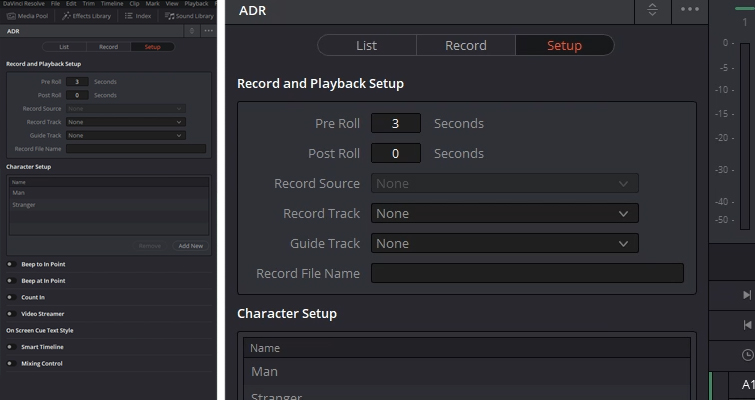
Resolve 15 includes a very useful ADR panel. In this video tutorial, we’ll take a look at what you need to know to configure it properly.
In Resolve 14, we all enjoyed the Fairlight page — a dedicated page with professional audios tools. At the time of release, Blackmagic said that the Fairlight page was not complete and that we would see updates and new tools as the software progressed — and arguably, the ADR tool is the most exciting feature we’ve seen in 15. In the following video tutorial, you can learn how to configure ADR panel to start your own ADR session.
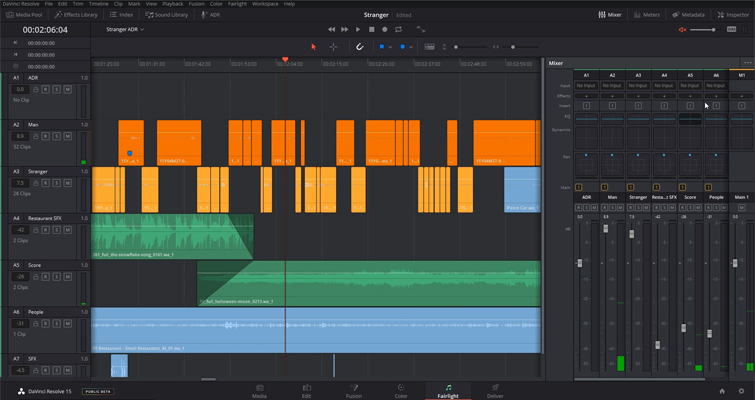
This is the standard UI layout for the Fairlight page, but before we start, we’re going to open the meters so we can see our video footage, which is integral to the process.
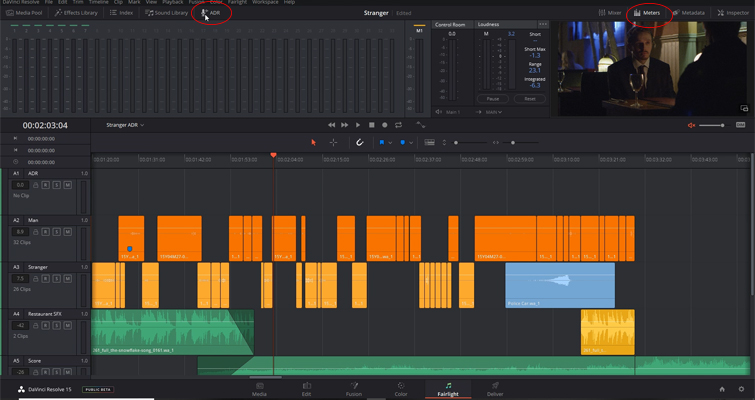
You can adjust the panels to increase the size of the preview monitor — or by clicking the pop-out button, we can have a floating monitor, which we can increase to any size. Hitting Escape on your keyboard will quickly return the preview monitor to its docked position. With that task completed, let’s open the ADR panel, which (you guessed it) we do by clicking the ADR button.
Using the ADR function isn’t difficult, but it does require some configuration, and I think this is the part where some users may trip over themselves. In the ADR panel, we have three sub-panels: List, Record, and Setup. I would have preferred to see them listed as Setup, List, Record, as that’s the way you would work through the menus until you’re ready to start recording.
The Setup Panel
We need to head to the setup panel to configure our ADR session. This is the panel where you will configure the recording and ADR guidance tools. Before you set the record track, let’s look at what we need to replace in the timeline. As you can see in my example, I have four clips that have been marked, and the marked clips require dialogue replacement. They are on track two, which is titled “Man.” Therefore, in the setup panel, I’m going to change the guide track to “Man.” This is the track that the talent will hear as a reference for their recording.
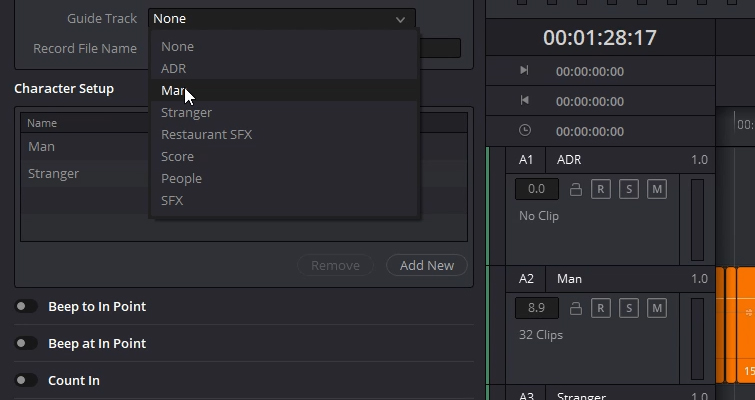
With the guide track selected, we now need to choose a recording track for the dialog replacement. Alternatively, you could also use the track that has old audio as a recording track, which the software will automatically overwrite. After selecting a recording track, you can now select the recording source (this will be grayed out until you select the recording track).
With the main recording settings configured, you can now set the individual parameters that will assist with the recording. First, let’s step back and look at pre and post-roll options at the top of the Setup panel. Adding seconds into this dialog box will specify how many seconds to play before and after the marked range in your timeline. For example, for my ADR session, I’m going to set my pre-roll to three seconds, and this will give me and the talent a three-second lead before the marked in point. The post-roll is for the end of the marked selection.
At the bottom of the setup panel, you’ll find a variety of options that can assist the talent, such as a beep at the in-point, or even a countdown that displays an onscreen timer. You could even pair the timer with a video streamer and have a beep; there are several variations of what you could do here, but ultimately, it should reflect whatever the talent finds easiest to work with.
The final parameter to configure on this panel is the character setup. If you’re working with only one actor, you may not need to use it. But if you have multiple audio clips to replace with several actors, then you can add character names to make the process more comfortable in the list panel. With the setup configured, we now can go to the list panel to enter the dialogue that we need to replace.
The List Panel
Before you enter your dialogue, you first have to mark the audio clip that you want to replace. As with the edit page, you use “I” to mark in and “O” to mark out. With that done, you can now hit “new cue” and write the dialogue in the dialogue box — along with selecting which character the line is for.
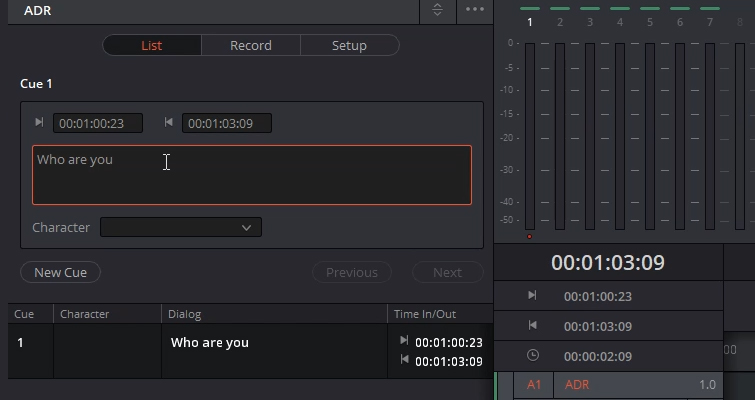
When you have the list panel filled with different cues, you’ll find that if you select a cue, you can skip directly to that point in the timeline. If you accidentally set a cue that isn’t where you need it, you can adjust the time in the time field above the dialog box. With the cues written, it’s finally time to head to the record panel.
The Record Panel
The record panel, as you might expect, is self-explanatory once you’ve gone through the other two panels. You select the cue, the playhead will jump to that position, and you hit record. Your countdown timer, or whatever function you have selected, will display on the preview monitor, and the dialog replacement from the actor will record onto your record track.
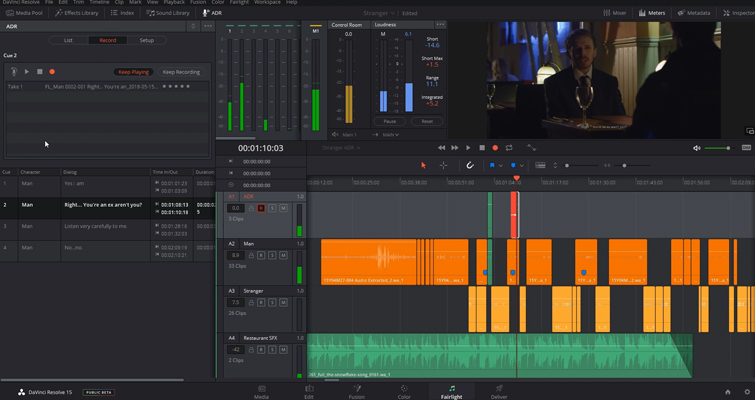
However, there are a few things to look at on this panel. One of them is hidden; therefore, you have to extend the ADR panel, and in doing so, you’ll find a handy checkbox to mark after completing the cue. So you can put away your notepad and pen — for the time being anyway.
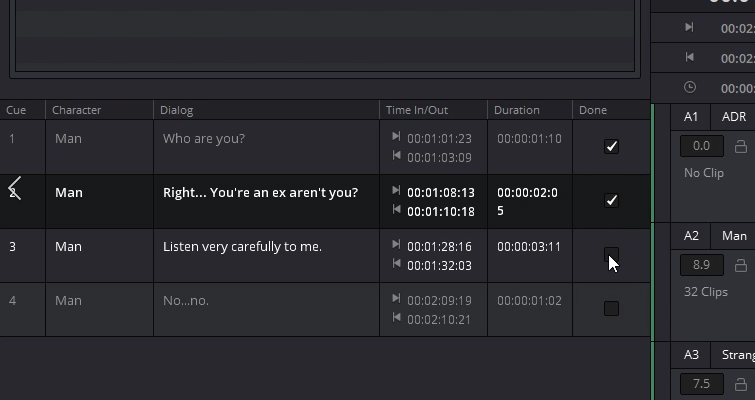
We also have a rehearse button; it makes Resolve act as if you are recording without actually recording. This will give your actor a chance to warm up and become familiar with the pre-roll. The final element of the record panel — and perhaps the coolest — is that after several takes, you can rate each take to evaluate later.
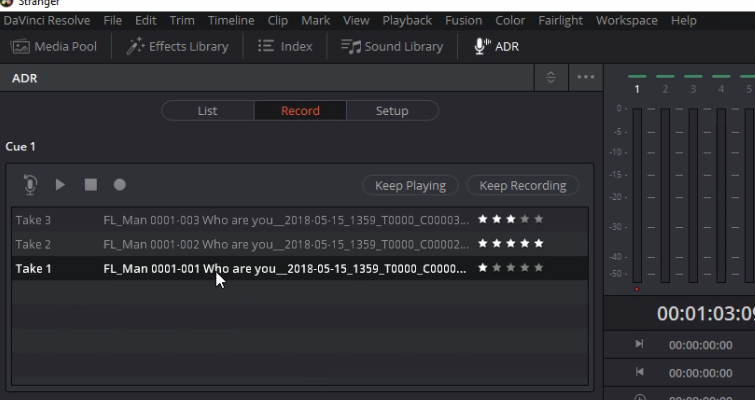
This is the ADR panel. It’s a fantastic addition to the Fairlight page, and I’m looking forward to seeing what’s next.
Looking for more video tutorials? Check these out.


