How to Create a Mid-’90s DV Camcorder Look in After Effects
Need that DV look for your ’90s-era project? Here’s how you can turn back the clock on your footage in Adobe After Effects
I spent the better part of my teenage years trying to figure out how to make low-cost DV footage look like expensive cinema footage. Now, here I am explaining how you can make HD modern footage look like inexpensive DV footage from the 1990s.
Filmmaking is bizarre.
If you’re a filmmaker born in the ’90s, it’s harrowing to realize that we’re actually almost closer to 2050 than 1990. Bewildering and scary! What further cements the distance of the ’90s is that we’re starting to see Hollywood productions tap into the ’90s time-space more often. Jonah Hill recently directed a film titled Mid90s, literally and stylistically set in the ’90s. Captain Marvel, released last week, is also set in the ’90s.
As a commentator said on the Mid90s YouTube trailer, “Have we moved on from ’80s nostalgia to ’90s nostalgia, already? Damn, I feel old.”
Yes. Yes, we have.
Whenever I think about making a short film that takes place outside of the ’10s, as soon as I start to think about the logistics of costumes, décor, props, and locations, I quickly talk myself out of it — primarily, because it’s expensive. However, and for the time being, the ’90s aren’t so far back in history that, with a couple of well-placed props, vibrant wardrobe colors, and questionable haircuts, you can film in most urban locations and pass them off as ’90s settings.
When online content creators (and advertisers) want to invoke the atmosphere of a specific decade, without props, a set, or costumes, they usually replicate the popular medium of that decade. VHS for the ’80s, 16mm for ’70s, then on back to 8mm. However, what short films and online campaigns often miss is how ’90s video looked. People regularly lump the VHS look in with the ’80s and the ’90s. Many forget the ’90s saw the launch of DV and MiniDV, which looks much different from VHS. It also has a more unrefined grit than HDV, which arrived in 2003.
This VHS “look” can technically apply to esteemed films like Saving Private Ryan and Scarface, since both films were originally released on VHS. However, MiniDV from the mid-’90s doesn’t necessarily have the aggressive scan lines you find with VHS tapes. There are slight line glitches, but the primary look comes from the harsh contrast, a lack of clarity, and how the color often bleeds from the edge.
The question, of course, is why on Earth would you make footage from a modern system look like something people try to forget? Well, there may be a time when you need to show footage from the perspective of a DV camcorder, as we see in the Mid90s trailer. Perhaps you want to make a ’90s found-footage film, without the limitations of older tech. Or, you simply don’t have a DV camcorder, or you don’t have the tools necessary for transfer. Well, in 2019, who does?
The following is a step-by-step guide on how to create the DV cam look (I can’t believe I wrote that), in After Effects, without any third-party plugins.
First, before filming, it’s important to note that most ’90s DV cams had a narrow aperture, and the dynamic range was terrible. Either shadows were crushed or highlights were blown. Therefore, make sure your aperture is set wide, and increase the ISO if shooting outside to get blown-out highlights. And, of course, if you’re using a zoom lens, be sure to throw in the occasional zoom in and zoom out.
The How
This is our before shot:
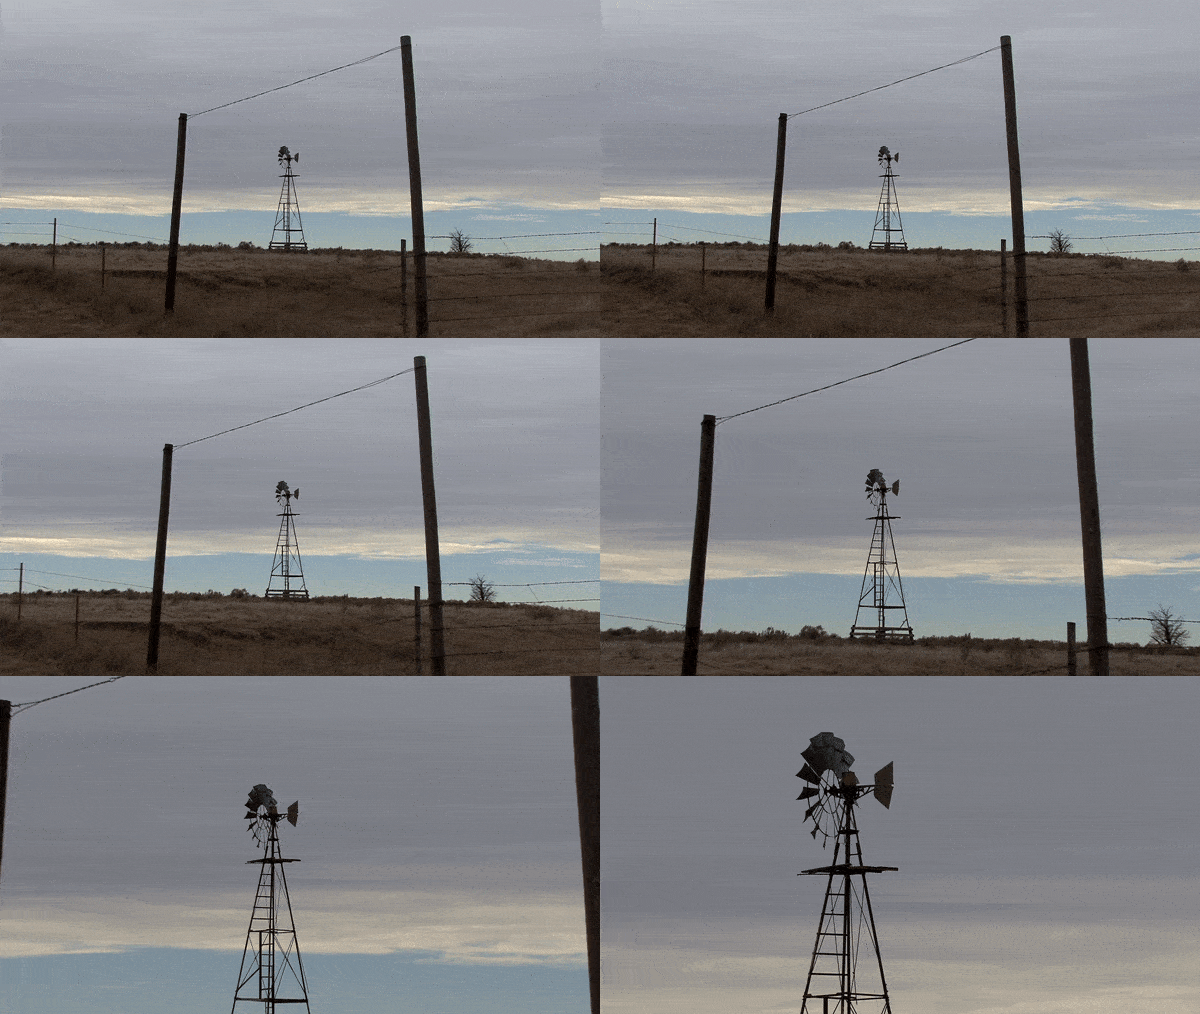
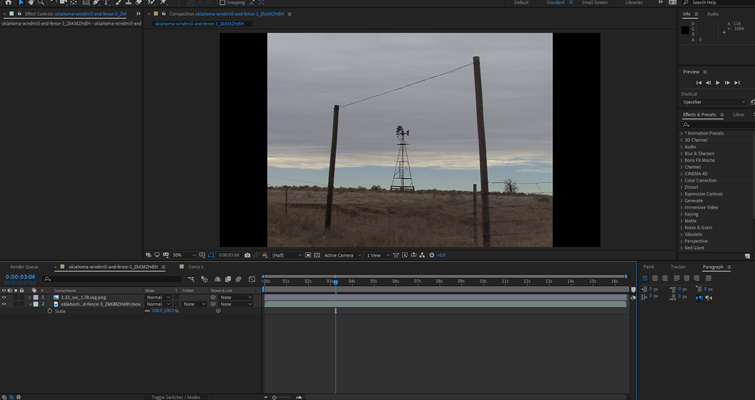
First, open After Effects, create a new composition in 1080p, and download this handy 1:33 letterbox. Place the letterbox mask above the footage, and lock it. The mask, at this point, is just a reference for how we want to render our footage later.
.
Next, we’re going to add an adjustment layer and begin adding the effects to destroy our footage. In the example clip, we can see the shadow detail on the wood panels, as well as the highlights in the sky. This won’t do. Therefore, we’re going to add a Brightness and Contrast effect — increase brightness a touch, and max out the contrast at 100.
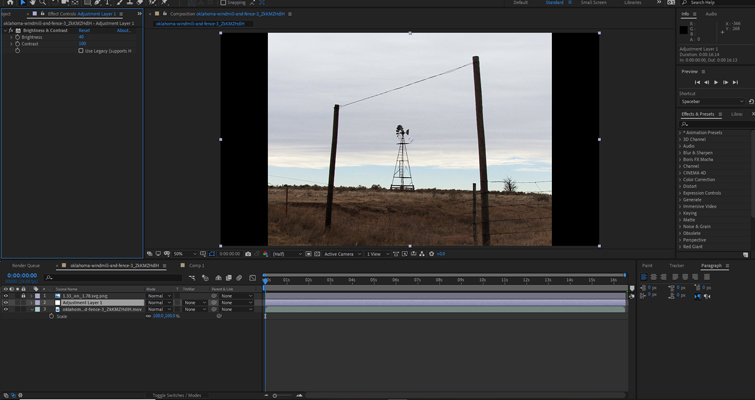
At this point, we’re going to add a Gaussian Blur and increase the strength to just three. DV camcorder footage from the ’90s is inherently soft, and it lacks clarity. So, using a Gaussian blur at only three may seem weak, but we’re going to increase the scale later.
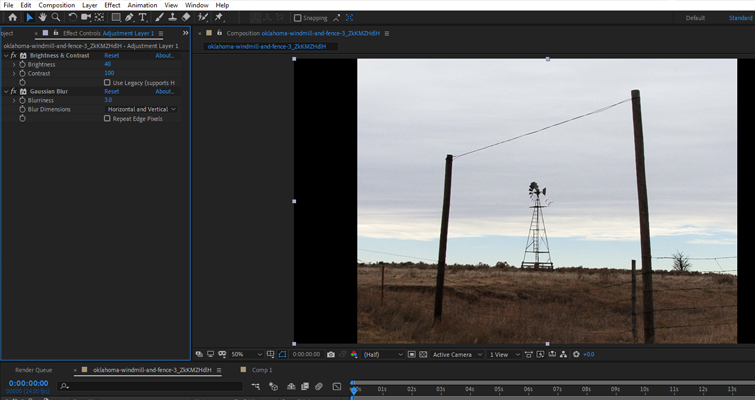
Then, we’re going to add a bit of chromatic aberration. We could add three separate channel mixers, slightly shifting the position and opacity. However, with the addition of immersive video editing in CC 2017, there’s an effect called VR Chromatic Aberration. While the the effect is intended for VR video, it’s a quicker way to get aberrant footage than duplicating channel layers.
We only want to apply the slightest aberration. The default (50) is far too much. I’ve set mine at red 5, green 0, and blue 5. Now, the effect is nuanced, but it is still apparent in certain moments.
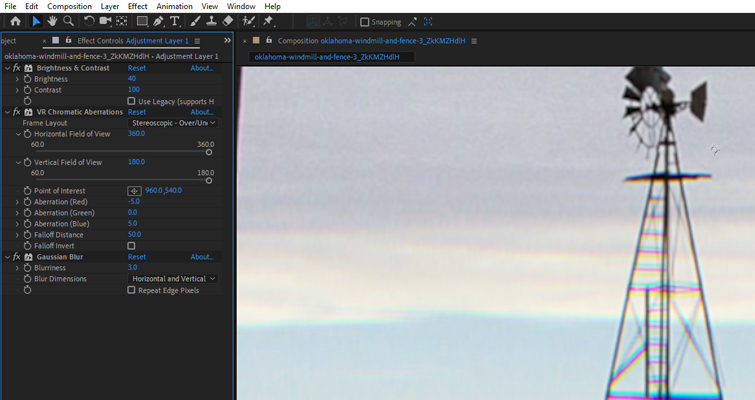
Next, we’re going to add the Posterize effect at 30. The preliminary effects are finished. However, we now need to export the footage out at a DV size and bring it back in and scale it up for a 1080p export because, at the moment, the effects are still applying to a 1080p file. Ironically at this point, it looks too clean. Please remember to unlock and hide the 1:33.1 letterbox before rendering. NTC DV 1 is ideal.
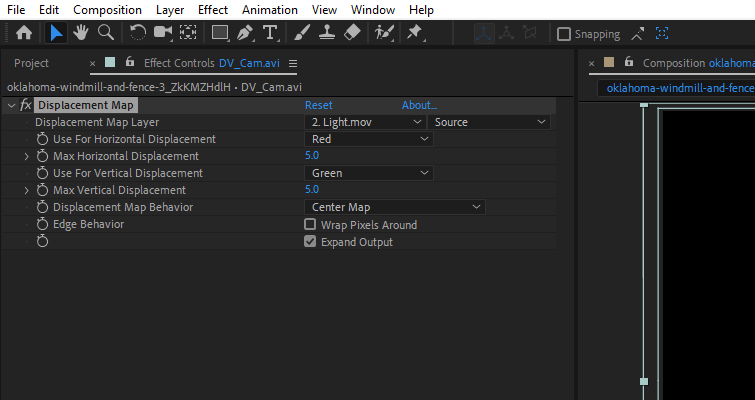
To finalize the effect, I’m going to add the magnetic tape glitches, which were prevalent in early DV camcorders. To do this, you first need to download this VHS overlay. Yes, I know I said that many people lump the VHS overlay with footage for a ’90s look, but we’re not going to be showing the VHS overlay. We only need the movement of the distortion. Once downloaded, and imported to the composition, hide the VHS layer and apply a Displacement Map to the newly rendered 4:3 clip. Then, change the displacement map layer to the VHS layer and reduce the displacement so that the displacement only comes through for the harshest movement.
This is the finalized effect:
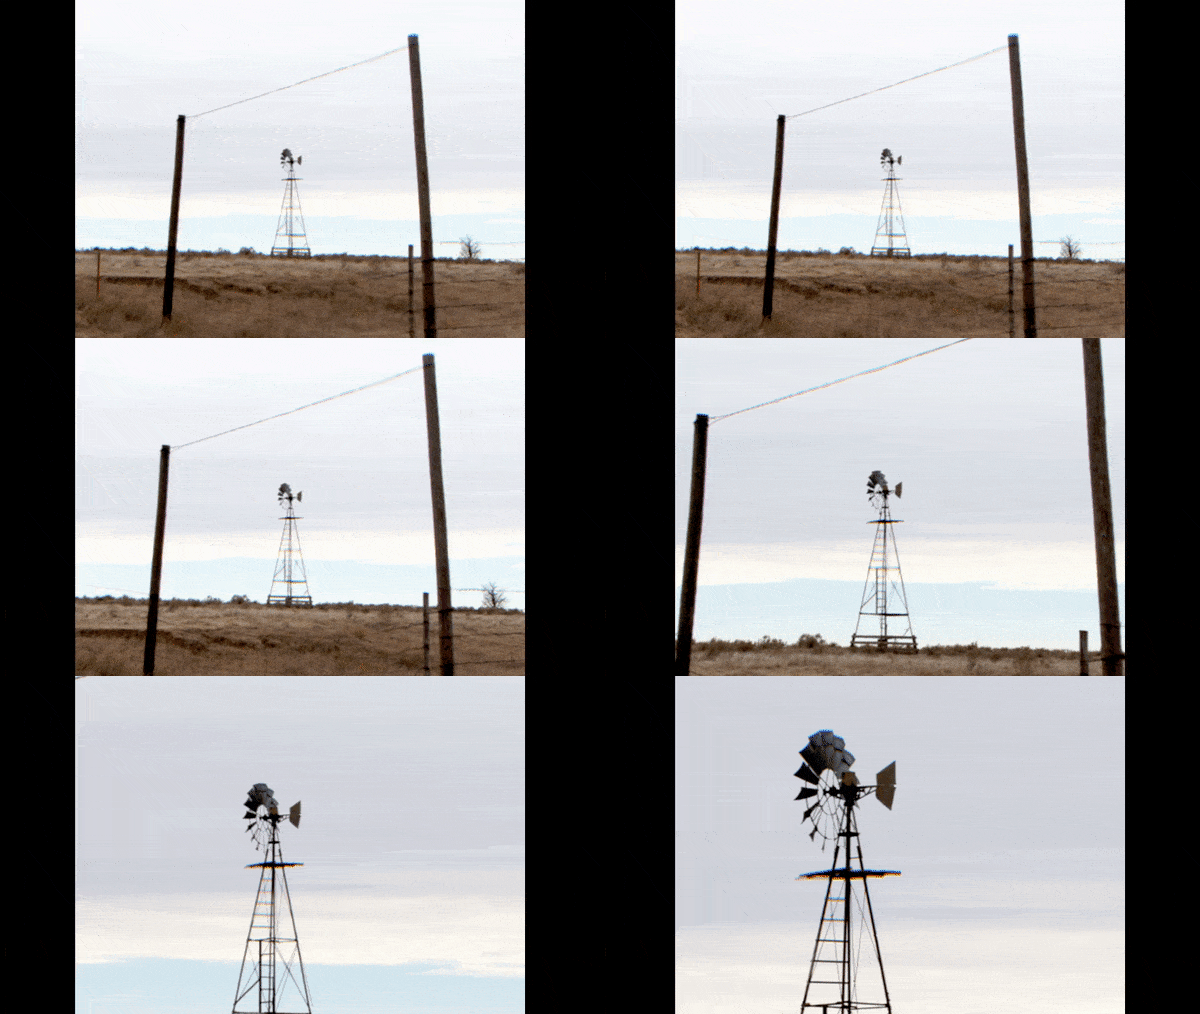
You could take it a step further and apply a Fisheye lens effect to emulate the look of your favorite skate videos. While the tutorial below is for Premiere Pro, you can get the same results in After Effects.
Cover image via Vivitta.
Looking for more After Effects tips and tricks? Check these out.
- How to Export with Transparency from Adobe After Effects
- How to Change the Color of Exterior Lights in After Effects
- Video Tutorial: Harness the Power of Presets in Adobe After Effects
- Video Tutorial: How to Create Karaoke Graphics in After Effects
- How to Create a Harry Potter-Inspired Flashback in After Effects


