Video Tutorial: How to Create Karaoke Graphics in After Effects
Need some Karaoke graphics? No problem. Learn how to customize your text and animation (and save yourself some time) in this video tutorial.
Whether you just want to boogie down and sing with your friends or you’re working on a creative motion graphics project, this technique can speed things up for you. The problem is that creating text graphics like this can be extremely tedious and labor-intensive. The beauty of this technique is that not only is it fast, it’s also versatile and customizable. Let’s take a step-by-step look at how to create these karaoke-style text elements.
Step 1 — Add the Text
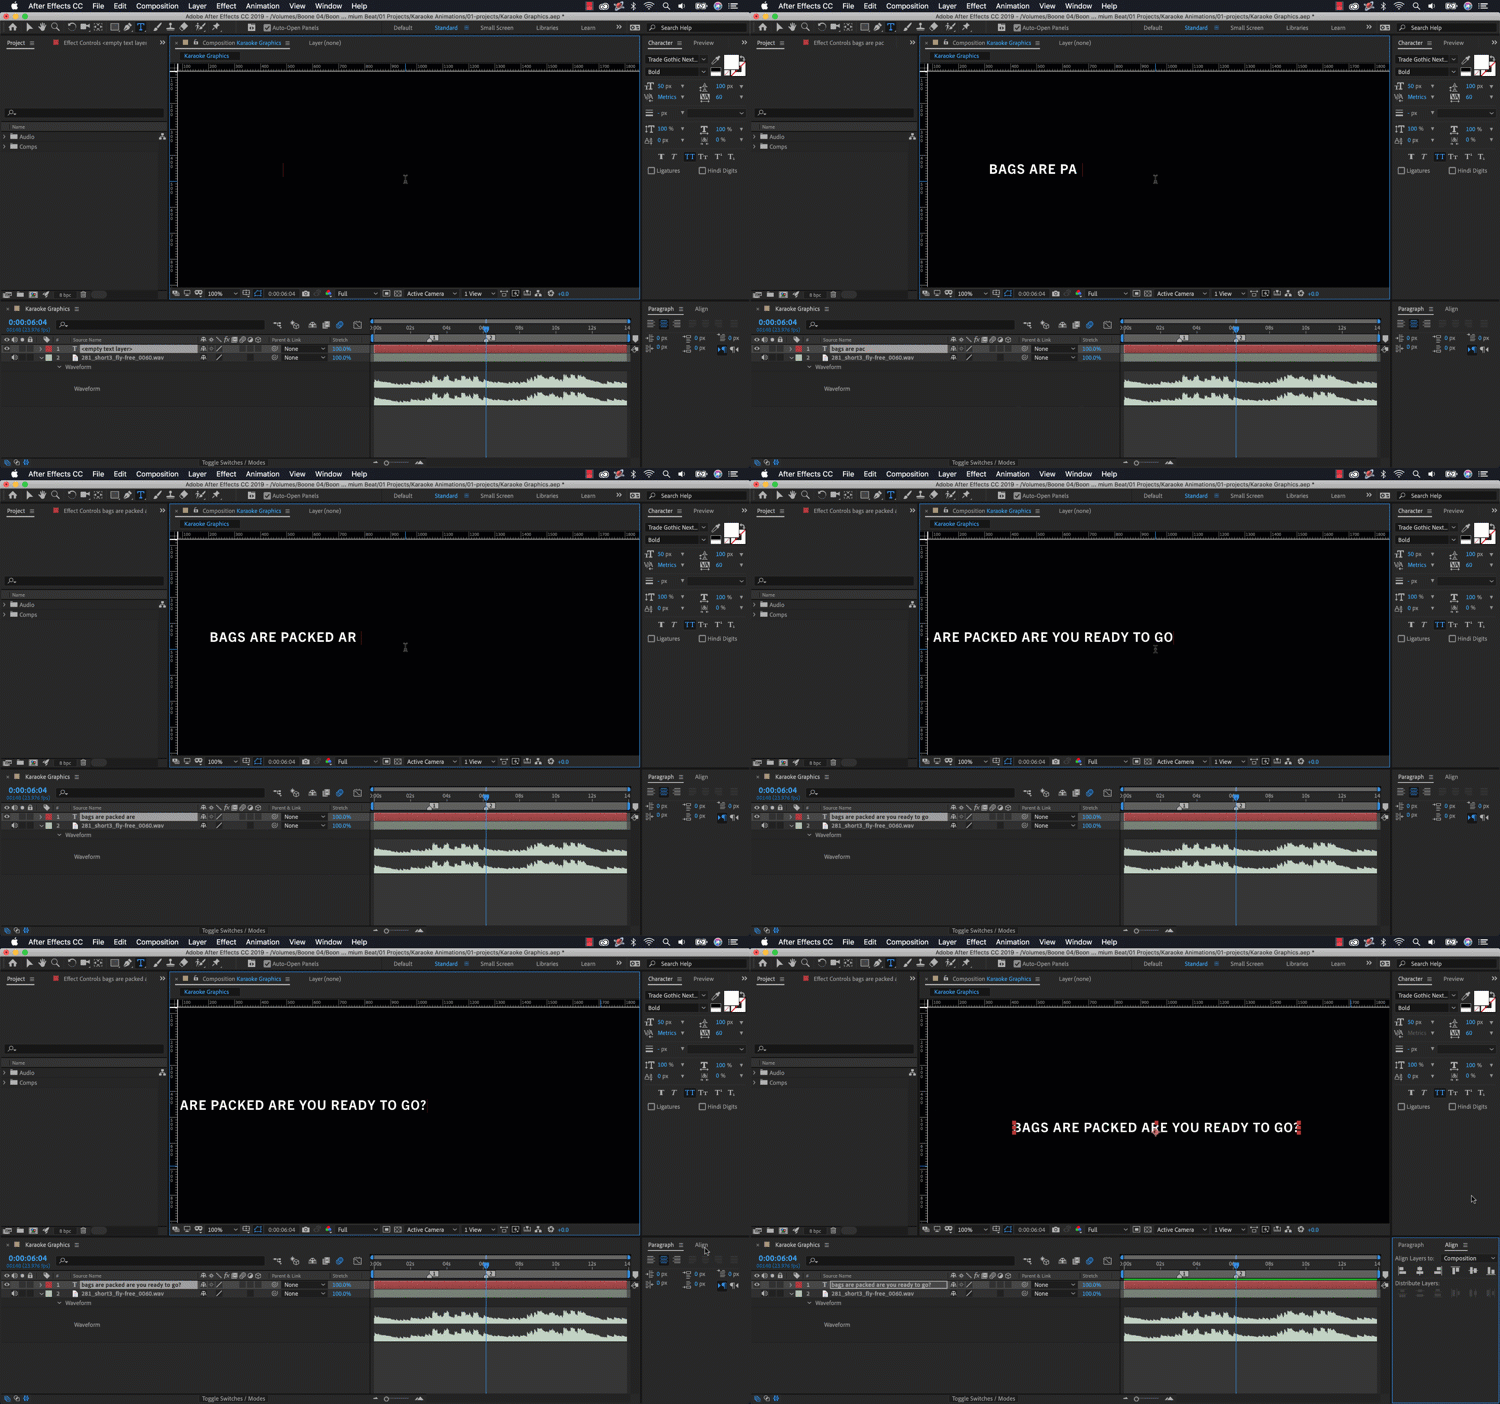
First, I’ll add a text layer using the Text tool. This project is going to be quite simple, and it will only consist of the song I’m using and the text layers. To view the waveforms of my song, I’ll select the layer and use the keyboard shortcut LL. When I can see the waveform, I’ll listen to the track and add markers to the comp. I want the markers to roughly surround each verse where I want to add a single line of text. This will serve as a visual reference when keyframing.
Step 2 — Add the Color Property
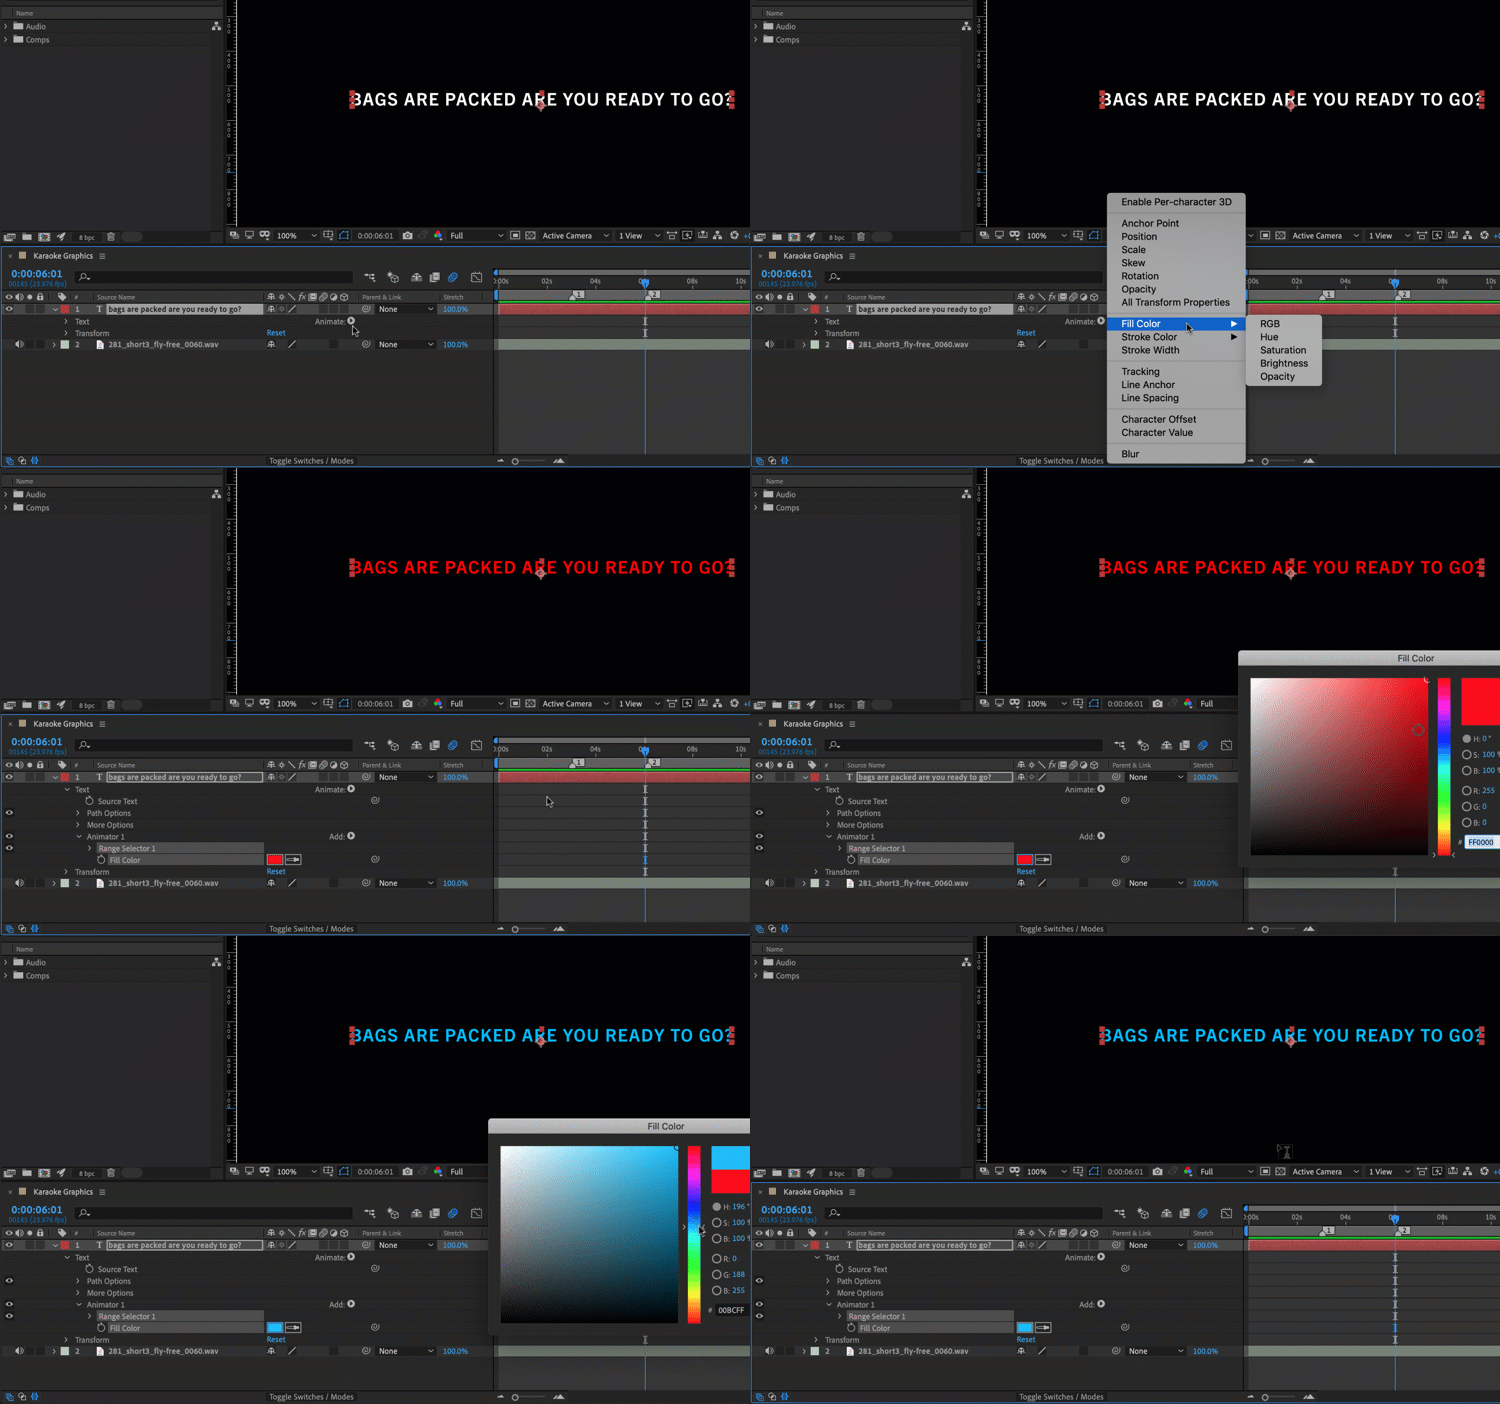
The secret to making this effect work is using Animators. To add one, I’ll click on the Animate drop-down menu just to the right of the Text menu of my layer. As you’ll notice in the menu, there are a number of attributes for which I can add animators, but I want to focus on the color of the text. For a color animator, I’ll select Fill Color > RGB and then change the color to whatever I like. Now my text is ready for animation.
Step 3 — Animate
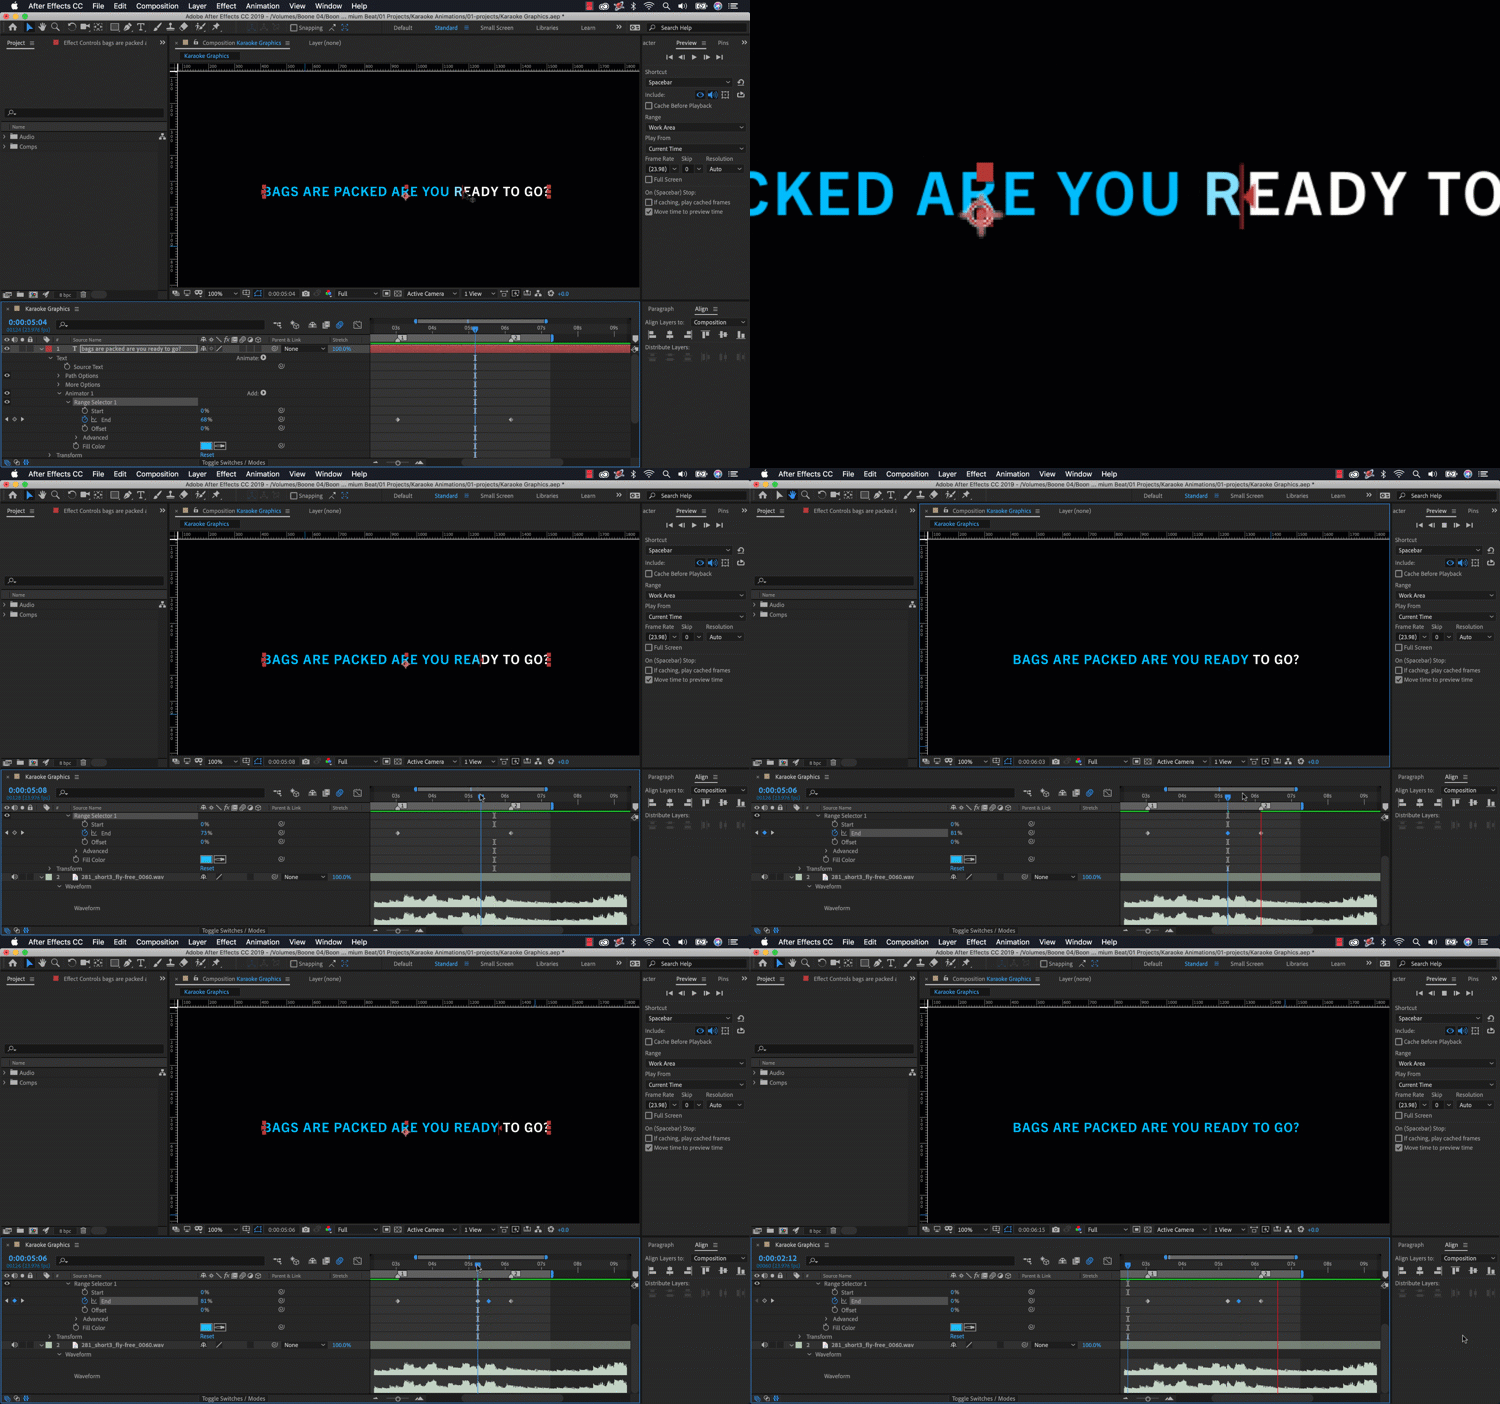
Text animators come with a Range Selector, allowing me to select a specific range to apply to my color effect. Range Selectors have Start, End, and Offset attributes, giving you precise control over the text animation. To create a simple right-to-left color wipe effect, I’ll animate the End attribute of the Range Selector from 0 to 100, lining up the keyframes to the markers surrounding the verse.
Once I have my beginning and end keyframes in place, I’ll go through and fine-tune the Range Selector’s location. To better match the wipe effect to each word, I can put my playhead over a specific area of the timeline and then manually drag the Range Selector in the Comp panel. This will add a new keyframe to my End property. Once I’m happy with the timing of the End property, I’ll grab all of the keyframes and apply Easy Ease via the F9 key.
Step 4 — Customize
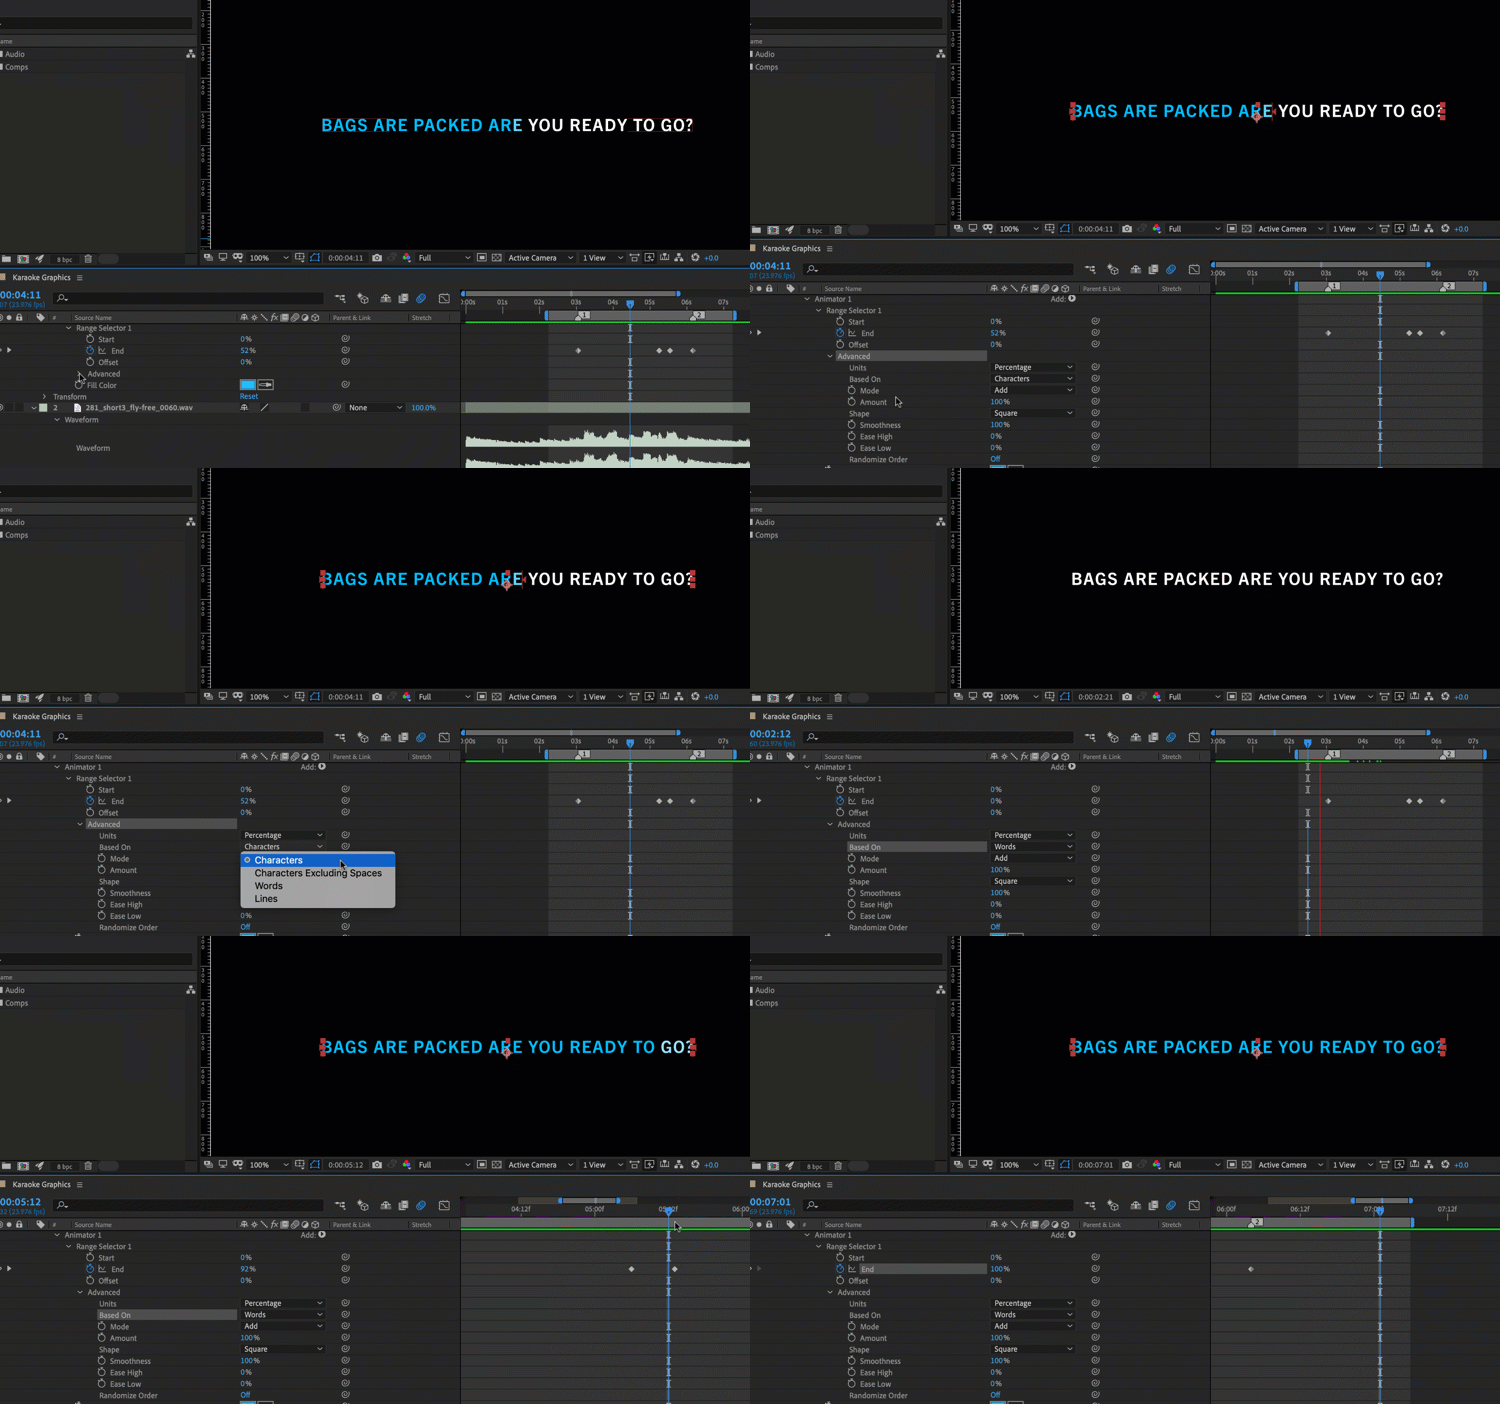
I can further customize the look of the color wipe via the Range Selector’s Advanced submenu. The animation defaults to animating each text character on screen one at a time, which might not be the look I want. I can switch this to exclude the spaces between characters, or I can have each word animate on (instead of individual characters). I like the way the words look, so I’ll change this and then retime any keyframes to make sure that the animation still looks good.
And there you have it. Time to party!
Cover image via Fer Gregory.
Interested in the tracks we used to create this video?
- “Lovely Travel” by Make Music
- “Fly Free” by Hartley
Looking for more After Effects tutorials? Check these out.
- Video Tutorial: Create a Callout Graphic in Adobe After Effects
- Video Tutorial: How to Create Anime Speed Lines in After Effects
- Video Tutorial: How to Fine-Tune Keyframes in Adobe After Effects
- Video Tutorial: How to Morph Graphics Using Adobe After Effects
- How to Create an Animated Circle Burst in Adobe After Effects


