How to Crossfade Audio Tracks in Premiere Pro and FCPX
Crossfading audio tracks is exceptionally quick and easy in both Premiere Pro and Final Cut Pro X. Here’s how to go about it.
Top image via Shutterstock
When you’re mixing sound effects, dialogue, or music, seamlessly blending multiple audio tracks is crucial for not distracting the audience. Whether you’re using Final Cut Pro X or Premiere Pro, each NLE software has several options for handling the task
Let’s take a look at some of the practical methods for crossfading audio in Premiere Pro and Final Cut Pro X.
Crossfading Audio Tracks in Premiere Pro
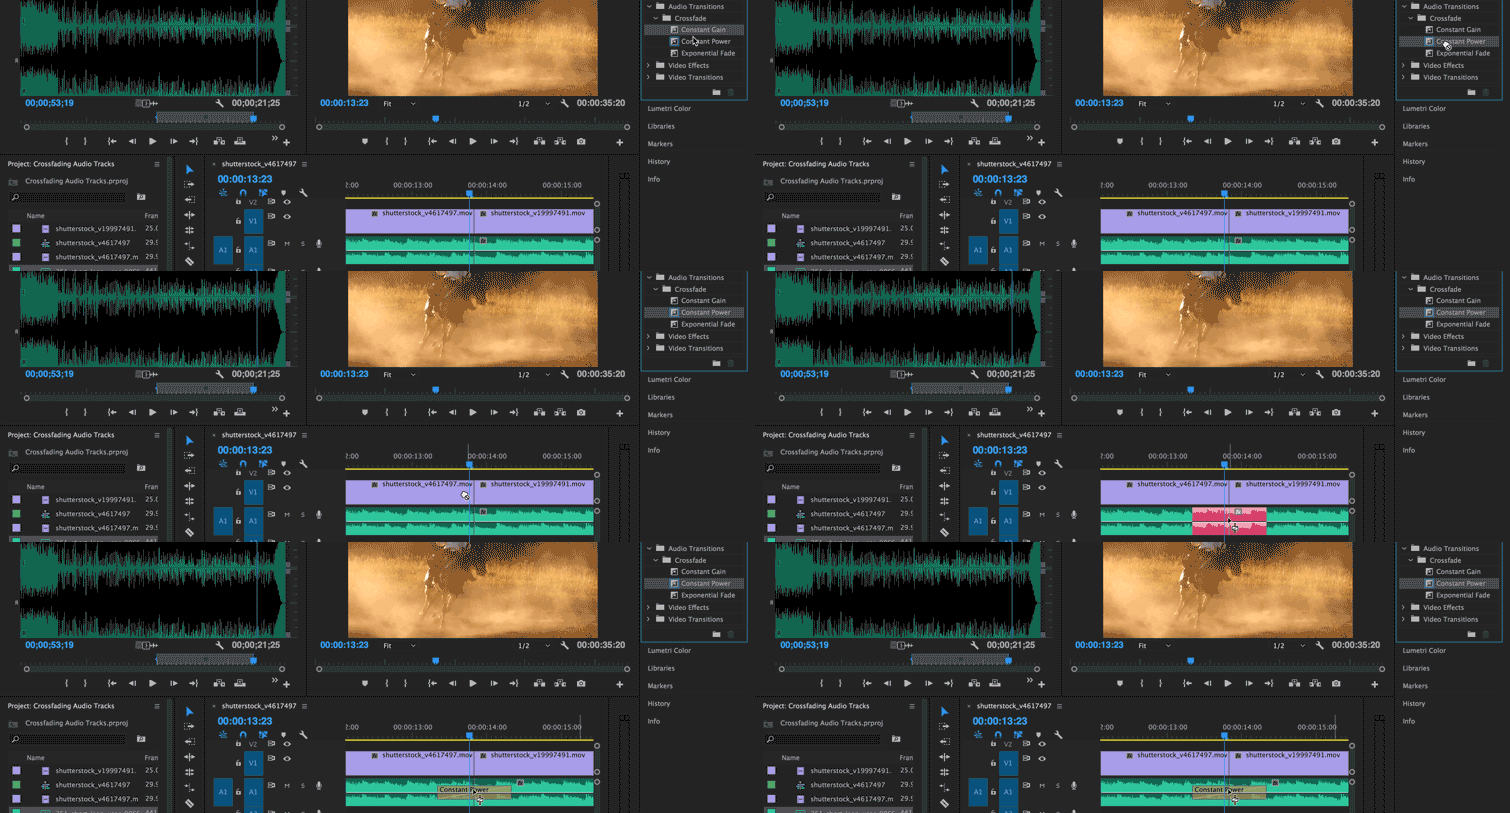
While editing in Premiere Pro, go to the Effects tab and click Audio Transitions > Crossfade. You’ll have the option to apply:
- Constant Gain (a quick fade out and in)
- Constant Power (an even dissolve between both tracks)
- Exponential Fade (a slow fade out and in)
All three choices allow you to tinker with the audio in different ways and generally act as tools for blending the two separate audio files together in order to avoid a rough sounding cut. Though not always immediately effective — some volume tweaking and beat matching is required — the blending capabilities nonetheless can help out a great deal.
Though dragging the effect to the desired clip (as seen above) will work just fine, hitting Sequence> Apply Audio Transition automatically adds Constant Power to the cut closest to your marker. This can prove to be a faster shortcut if your Effects tab isn’t open and you’re flying through your edit or performing last looks.
Crossfading Audio Tracks in Final Cut Pro X
Blending audio clips or fading in or out can be accomplished in a matter of seconds with FCPX. Each audio clip has a “fade handle” — mouse over the clip and look for the little object (at either end of the track) that looks like a guitar pick. Dragging it left or right determines the length of your audio fade.
As seen above, blending two tracks is literally as simple as dragging one track under or above the other and adjusting the amount of overlap they share. No problem.
These actions are not only quick, but also easy to remember. It’s a very simple process that can elevate the professional appeal of your project in no time at all.
Know of any other quick audio solutions in Premiere Pro or Final Cut Pro X? Let us know in the comments below!


