
DaVinci Resolve 15 Video Crash Course — The Media Page

In this first part of our six-part video series The DaVinci Resolve 15 Crash Course, we’ll get you started with . . . well, what you need to get started.
DaVinci Resolve is quickly becoming the hottest NLE on the market, which isn’t surprising since you can download a copy for free with access to 90 percent of its features. However, while most free versions of programs like this offer a simplified form of the premium version, DaVinci Resolve does not. As a result, loading up the software for the first time can be very daunting.
Enter our editing crash course.
To get the full benefits of the course, we recommend you watch the tutorial series. However, if you need to highlight a specific note from the video, you can find a transcript of the tutorial below the video.
Episode 1 — The Media Page
Nobody likes listening to an introduction to a tutorial, but there are two factors that need introduction. The first: I am a certified Resolve trainer, and what I’m teaching you is an incredibly condensed version of what Blackmagic taught me to train new editors on this platform. The second: this is an incredibly condensed crash course; I think it’s disingenuous to say that you will be proficient with Resolve after a 30-minute YouTube series. However, what you will have is the knowledge and the foundation of how things work and how to perform enough tasks to set you on your voyage to becoming a skillful Resolve editor.
For example, in episode one, we will be looking at the media page and importing media files. There are going to be several advanced options, such as importing based on EDLs or importing with a source code offset. However, I’m not including these advanced elements in the crash course because it would increase the overall length of the series dramatically.
In episode one, we’re going to look at creating a new project, importing media, organizing your media, and the metadata panel.
Creating a New Project
When you first load Resolve, you’ll see the project manager. This is where you’ll open, create, import, and export projects. Note: this isn’t where you’ll save projects in a folder-based sense as with Premiere. All of your projects save to a database, but we’ll look at that in our settings episode.

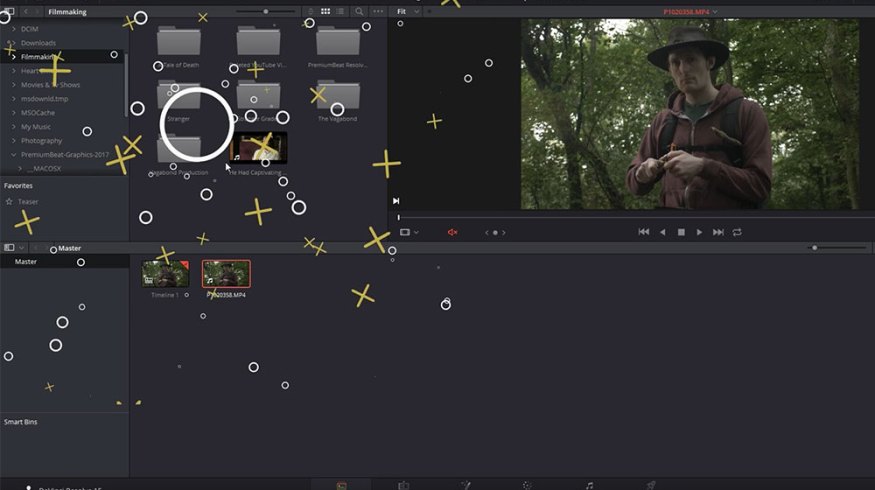
To create a new project, you can either hit the untitled project icon or right-click and select “create a new project.” Both methods take you to the same place: the media page. The media page is where you will import and organize all of your media, and with every iteration of Resolve, it’s become more and more user-friendly — to the point where you can now drag a file from your desktop and drop it into your timeline while on the edit page. Way back when, you had to import files from a specified media destination.

This is the media page, the first of six, and it was only two years ago that it was only the first of four. First, we’ll head to the media browser in the top left corner of the page.

This is where you’ll navigate your media drives to find your footage, music, stills, and so forth. Resolve’s interface is very user-friendly, and you’ll find that if you need extra space to view the panel, 95 percent of the time, you can extend it by either hitting the “panel extension button” here . . .

. . . or by dragging the panel edge. To say there aren’t many ways to import your footage would be an understatement, and you may think that it’s a bit ridiculous, but you’ll be surprised at how useful each method is.
Importing Media
First, let’s import a single media clip. I’ve navigated to my stock footage folder, and I need to import an aerial image of a forest. To find the clip, there are several ways that you can change the way you browse your media to suit your needs. We can increase or decrease the size of the icons, we can rearrange the order in which they display, we can switch to a list view (perhaps if you’re able to tell which file you need from specific metadata), and we can choose which metadata to display by right-clicking on any category titles. Of course, we also have the search bar, which is great if the file has already been named.

If you scrub your mouse over the thumbnail, you can see the contents of the clip. However, it’s rather small, right? Well, a recent and fantastic addition is the “live media preview,” which you can activate in the top right of the preview monitor by clicking the ellipsis. As a general rule, you can find these ellipses throughout the different pages, and they will always be tucking away an abundance of options. I’m going to activate the live media preview, and now when we come back to our clip and scrub over the top, you’ll see the clip appear in the preview monitor. You don’t have to click it or import it; you can scrub through the contents by merely activating the live preview function. (If you have a sub-par computer, perhaps leave this function off.)
Within the preview monitor, you can also display the audio waveform — either at full length or zoomed in. This is useful when you’re trying to find something specific in your clip that relates to a sound. With my clip selected, I can drag it from the preview monitor into the media pool, or I can right-click and choose “add to media pool.”
You can highlight several clips, or you can individually select multiple clips by holding control and then importing them using the previous methods. Browsing from folder to folder doesn’t have to be difficult either. There are going to be situations when it’s impractical to import the entire contents of a folder, but navigating the folder can become tedious because it’s deep within a folder ladder. If you have any folders on your desktop, like After Effects textures, stored in your After Effects folder, in turn stored in your composting folder, in turn stored in your filmmaking folder . . . well, you get the point.
You can favorite folders by right-clicking a folder in the media storage browser and selecting “add folder to favorites.” When you’ve done that, the folder will then appear in the favorites section, allowing you to quickly enter the folder without the annoyance of making your way through several folders.

And while we’re on the topic of folders, we should note that you can also import an entire folder and its contents by right-clicking on it and selecting “import folder.” And then there’s this option: import folder and sub-folders into bins, which takes us into the next section of the media page — bin management.
Media Organization
There’s no denying the importance of organized media for your edit. It makes finding content easier, and it will decrease the amount of administrative work you have to do. In Resolve, folders that will store your media clips and timelines are called bins, and you create one by simply right-clicking and selecting “create a new bin.” You can do this in the media pool or the bin panel. Like creating folders on your desktop, you can create an entire hierarchy of bins within your media pool to keep your audio and video clips organized.

Have you already gone through the process of organizing a folder hierarchy on your desktop? If so, don’t worry, because you import the folders and create bins at the same time. You right-click on a folder and select “import folder and sub-folder” (create bins). Resolve will then import all of your media and create bins based on the storage of the media files on your desktop or portable drive.
The way you can import and organize your media is excellent. Fantastic, for lack of a better word. But we can take it a step further with Resolve’s built-in filtration system: smart bins.
My favorite way to describe smart bins is that they are mostly like smart playlists in iTunes. You know the playlists where you could get songs automatically added depending on a number of properties, such as genre or date released? Well, Smart Bins are the same, but more powerful. So to create a smart bin, you right-click in the smart bin panel and, of course, select “smart bin.” The smart bin menu will pop-up, and now you choose what you want to filter from your media pool.

You can quite literally use any element associated with media files, from resolution to format to the bit depth. This is great when you’re working with many media files and they’re mixed format but indistinguishably named.
Metadata
The final panel on the media page we’re going to look at is the metadata panel. If it’s not visible, you guessed it: hit the metadata panel. And here you will find all the metadata associated with the selected media clip.
Now, if Resolve is your first non-linear editor, there may be little reason to open the metadata panel. However, throughout this episode, I’ve pushed a consistent theme: the media page is for organizing your edit. If your clips lack metadata, and most DSLR/mirrorless camera footage does, then here you can add data that will be helpful for when it comes to searching for that content in the edit.
At first, you may only see the clip details, which you cannot edit, but to get to all sections of the metadata, just click the icon below, and select “all groups.”

This shot was from an Ursa Mini, and I was able to add a few elements of data through the camera itself, such as the location properties and the name of the film. But here in Resolve, I can now add some extra elements, such as “best take but sound issues” — or something along those lines. Then when it comes to the edit, and you start to cut your footage, you’re not going to have to go through the entire clip to see if this was the take with lousy sound.

And that’s it: the media page. Now, you should be able to import your media in a variety of different ways and get it ready for your edit.
Looking for more on DaVinci Resolve? Check out these articles.
- Color Grading: Working with the Hue vs. Curves in DaVinci Resolve
- Revive Your Footage With Resolve 15’s Automatic Dirt Repair and Dust Buster Tools
- How to Use the Shared Node Feature in DaVinci Resolve
- Quick Tip: How To Use Optimized Media In DaVinci Resolve
- Remove Unwanted Shot Features With Resolve 15’s Patch Replacer


