
Quick Tip: How To Use Optimized Media In DaVinci Resolve

Is your machine struggling to play back media in DaVinci Resolve at the correct frame rate? If so, you may need to use optimized media.
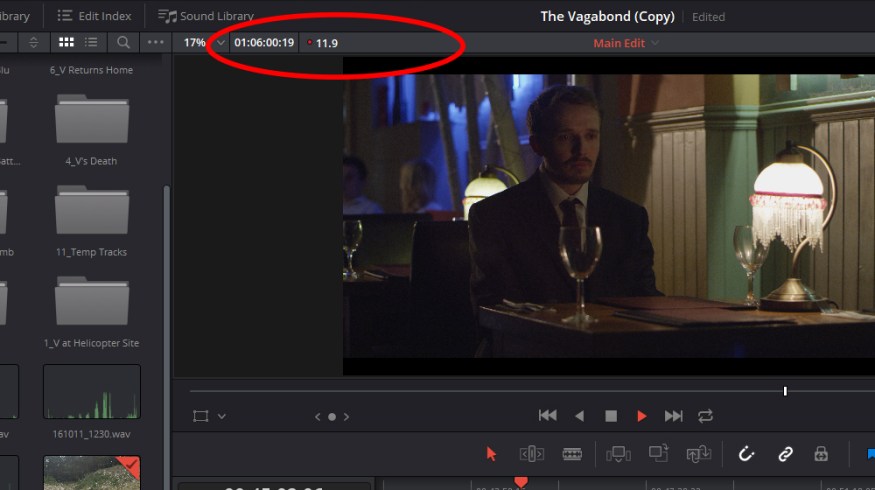
There may come a time when you’re editing on a sub-par laptop, or editing with RAW files, and you’ll see the frame rate counter in the top left corner of the viewer drop from green to red, letting you know that frames have been dropped — as Resolve cannot perform real-time playback. Of course, editing and reviewing media in this state is problematic, akin to recording sound without headphones. You could change the proxy mode to half or one-quarter resolution for smoother playback, or alternatively, if you’re unable to obtain real-time playback due to an extensive color grade and effects processing, you can hit the bypass grade button that will remove all grade features. If neither of these two options works, you will need to generate optimized media.
Using the optimized media function is Resolve’s method of creating proxy files. There are a few steps to follow to get your media optimized; therefore, if you’re a new Resolve user or a new editor in general, follow the tips below, and you’ll be back with real-time playback in no time.
Optimized Media Settings
You could probably skip this step since Resolve’s default proxy setting will work fine to transcode most media types. However, if you wish to adjust or double-check the settings, you’ll find the adjustment properties by clicking the Project Settings cog in the right-hand corner, and then halfway down the master settings panel, you’ll find an Optimized Media and Render Cache area. If you’re a Mac user, and you want to change the proxy to the popular ProRes proxy, you would do that here.

Once you have selected the appropriate settings for your media, return to the edit or the media page and in the media pool, find the clip or clips that you want to optimize, right-click, and hit “optimize media.” Depending on how many clips you have selected and the length and the format of the clip, you may have a few minutes to kill while Resolve generates the optimized media.

When the optimization is complete, head to the playback menu and select “Use Optimized Media If Available.” When you press play in the timeline, you’ll now see that the clip plays back at its correct frame rate with no stuttering or dropped frames.

After you’ve completed your edit, it isn’t necessary to uncheck the “Use Optimized Media If Available” setting for delivery; Resolve will automatically render the original file format. However, if you do wish to render the optimized media, you can find that checkbox in advanced settings on the video panel in the “deliver” page.
There are two essential factors to remember when using Resolve’s optimized media function. The first is that you will not have control over where the proxy files are generated. The optimized media will be produced in the same location as where the cache files are written. Secondly, remember to delete the optimized media! You’re not creating incredibly compressed files that use next-to-no hard drive space. You’re creating media files that are more user-friendly, and if the original media clip is a RAW file, they will still be a substantial size.
Need a video guide to help you through the process? In the video below, Casey Faris covers how to do this in Resolve 12.5. While some of the menus have slightly changed with the 14 and 15 updates, the process remains the same.
Looking for more information on using DaVinci Resolve? Check out these articles.


