
Methods for Debanding Your Footage in DaVinci Resolve

Try a few simple but effective methods to nullify banding in your footage using the Deband tool in DaVinci Resolve.
Banding. Ah, how I hate it so. Unfortunately, when dealing with images with a color gradient that spans multiple hues, it’s likely a factor that you’ll encounter if you’ve recorded with a camera that only has 8-bit color or you’re exporting to an 8-bit format.
If you’ve stumbled onto this article and you’re not sure what banding is or what it looks like this, it’s when similar colors appear “posterized” in your video image.

This is often the result of using a camera with a low bit depth, and filming or photographing a composition with various color changes. You’ll usually see this take place in the early morning or evening skies.
Blackmagic explains bit depth as the following:
The term bit depth describes how many colors are available in the color palette used to make up an image. The higher the bit depth, the greater the precision of color in the image and, therefore, the greater the color reproduction. The higher precision is most apparent in gradients with subtle changes. Lower bit depth gradients have noticeable banding artifacts, whereas higher bit depth images can reproduce more colors—so fewer, if any, banding artifacts occur.
– Blackmagic
In most cases, you’re not going to be able to completely remove the banding without doing a sky replacement. However, you can nullify the banding. Let’s look at a few methods.
Deband Filter
This shot was filmed at 8-bit. And, with the setting sun creating a gradient of colors from light orange to deep blue, it’s the perfect culprit to cause banding.

Due to the compression of the images on the blog, the banding may not be inherently visible, so I’ll dramatically increase the contrast for the sake of the tutorial.

With the contrast increased, we can really see how poorly the 8-bit footage holds up. When uploaded online and in motion, it’s incredibly noticeable. With that, let’s add the Resolve Revival tool.
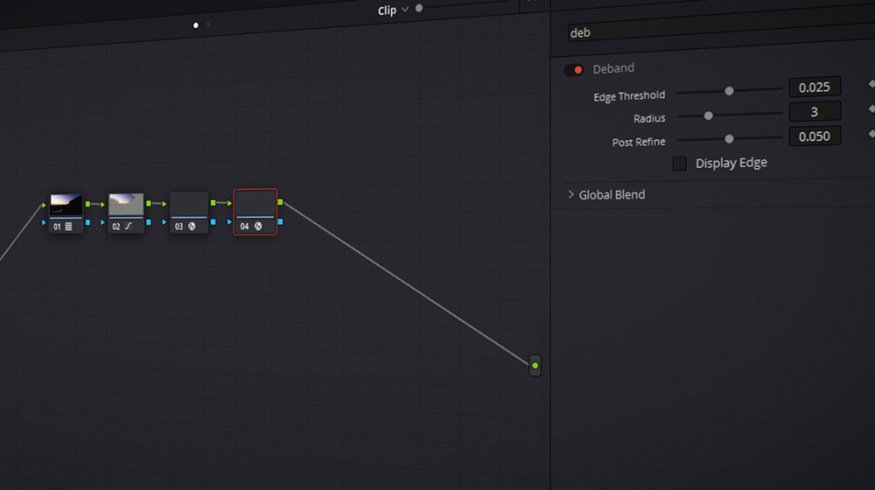
In the Effects panel—both on the Edit page and the Color page—you’ll find a Deband effect you can apply to your media. As always, I recommend using any form of image and color manipulation effects to a node on the Color page.

Upon adding the effect to a node, a filter will be applied to isolate the edges of the color banding, and then minimize them by dithering pixels from either side of the banding. This will soften the patchy area of transition.
You may find that when initially adding the Deband effect, the entire image looks like it’s been attacked by a primitive Photoshop filter. This is because Deband doesn’t automatically find the banding. As a result, it’s best to first isolate the sky, or where the banding exists, with a qualifier or window.

Here, I’ve quickly (and somewhat poorly) isolated the sky and added the Deband tool, and straightaway, we can see that the transition between the colors is a bit more soothing. It’s not the perfect fix, but just in the default state, it’s a lot better and less of an eyesore.
There are then four parameters you can adjust to further refine the deband:
- Edge Threshold: This adjusts how well-defined the edge needs to be to be affected by the plugin.
- Radius: Lowers or raises the intensity of the dithering.
- Post-Refine: Narrows or widens the areas affected by the dithering.
- Display Edge: This will display the affected edge.
However, like all settings that affect an image property, I find you need to adjust the sliders until you get a good result—there’s no one go-to setting to use.
Now, I did state that this effect is only for the premium version of Resolve. So, let’s look at a method you can employ at no cost.
Adding Grain
A few years ago, I wrote a piece here on The Beat about how adding too much grain to your YouTube videos can sometimes be a detrimental attribute.
In that article, I shared a video by Tom Scott and discussed his approach:
Tom explains why videos that feature an abundance of small moving objects, such as confetti or snow, revert to lower quality playback. For a full demonstration, be sure to watch Tom’s video. In brief, Tom explains the basics of online inter-frame compression—how only the difference between frames gets stored, how the lack of bits will affect your video, and how multiple, small, moving objects will make your image fall apart.
As a result, YouTube refines the grain into a mushy texture with less than optimal clarity. In general, this isn’t good. But, when it comes to masking banding, the loss of clarity works in our favor. The mix of grain and online compression dilutes the hard edge of the digital banding and, instead, somewhat returns it to a preferable form of color transition.
Using the image from the first example, we can see that upon an H.264 export, and then the online compression from YouTube, the banding is noticeable in the sky, especially above the cliffs.

Whereas with the added grain, after the compression we can no longer identify (at least straightaway) the banding above the clifftops.

It’s still not entirely perfect, but it’s a lot better than the default. Of course, in this instance, you’re inherently going to be adding grain to your footage, which may look out of place if neither of your other shots have grain added.
Export Options
Okay, let’s say you have been filming at 10-bit or 12-bit. Your footage shouldn’t natively have banding issues, as the color depth is far greater than 8-bit, therefore, it can handle the smooth color changes where the banding usually exists. As such, it can become irritating to see that your export and online upload still has banding—you spent the money on better tech to avoid these issues!
Primarily, the reason why your footage still has banding when it was shot at 10 or 12-bit is that you’ve exported to an 8-bit format. The primary culprit is H.264. The H.264 codec is one of the most widely accepted codecs for online uploads and is even the recommended codec for YouTube. However, at 8bit, it’ll break down those gradient colors that your camera sought hard to protect.
The fix, of course, is to also export at 10-bit. But, there aren’t many 10-bit [Windows] options available within Resolve that are acceptable for online upload.
However, we do have H.265, the successor to H.264, that has a 10-bit profile. It’s not active by default, so you’ll need to drop down to the encoding profile and select Main10. This will change the encoding profile to 10-bit.

Now when you hit render, the export will be banding-free. Of course, this practice doesn’t account for those who filmed with 8-bit footage.
As stated in the article, fixing footage with noticeable banding is like adding a bandaid to a flesh wound. You’re never going to be able to fix the problem without filming at a higher bit depth completely. However, the above suggestions will at least subdue the banding.
For more tips on DaVinci Resolve, check out these articles:


