
Video Tutorial: How to Create a Seamless Foreground Transition

By adding in a foreground transition, you can make smoother edits and add some interesting dynamism to your video project.
The foreground transition is a simple technique that can help you move between shots, scenes, and locations. If you execute the transition properly, viewers won’t even notice it. This method is a great alternative to straight cuts, and it gives editors another way to immerse viewers in a story. (The foreground transition can also help avoid the pesky jump cut.)
Let’s take a look at how to create a foreground transition in just a few simple steps.
Step 1 — Capture the Foreground Object Shot

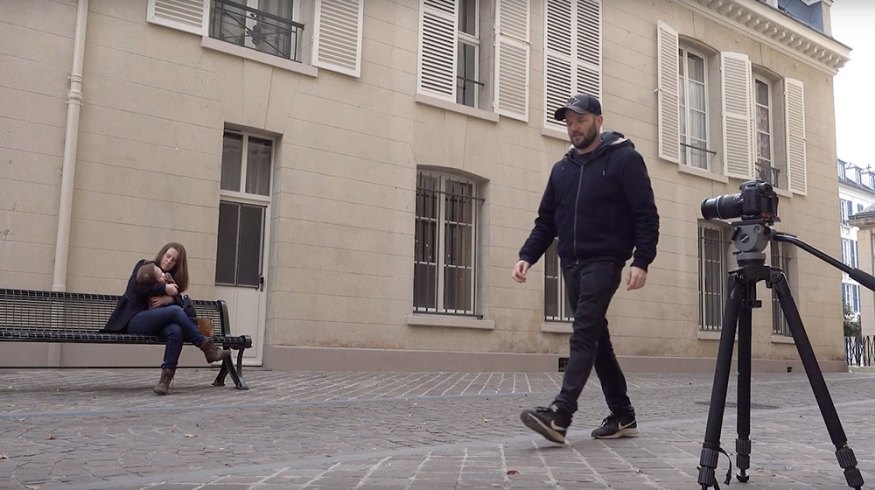
Naturally, a transition occurs between two shots. In this example, I’m going to transition between a wide and close-up shot of my subject sitting on a bench. First, I’ll capture the wide shot. At the end of the shot, I’ll walk in front of the camera, making sure that the frame is covered from top to bottom by my body. Next, I’ll grab the second shot of my subject sitting on the bench — this time as a close-up shot.
Step 2 — Layer the Shots

Now that I’ve captured my two shots, I’ll bring them into my NLE. I’m using Adobe Premiere Pro for this tutorial, but you can pull off this technique in many other popular NLEs. All you need is a mask that is keyframable.
Now I want to transition from the wide shot to the close-up, so I’ll stack the two clips on my timeline, with the wide shot on video track 2 and the close-up on track 1. With my shots in place, I’m ready to bring this effect to life.
Step 3 — Animate a Mask

You create this transition by masking the top layer to reveal the footage underneath. The key is to mask the edge of the foreground object (me) as it moves across screen, adding keyframes to the Mask Path as you go along. To make sure your composite looks good, adjust the Mask Feather. Feathering can be especially helpful when your foreground object has a lot of motion blur. You’ll most likely need to change position of each clip to time the transition perfectly.

Advanced Foreground Transition
If I really want some versatility, I can mask both edges of my foreground object, completely isolating it from the background. Once it’s isolated, I can now bring it up to track 3. This will give me more precision when timing the transition, as I’ll be able to adjust both the wide and close-up shots on tracks 1 and 2. I could even export this with an alpha and reuse it on future projects.
So there you have it — a smooth foreground transition. Now I can use this technique to smoothly bring my viewers into a new location, change the composition of my shot, compress time, or just avoid an unnecessary jump cut.
Interested in the tracks we used to make this video?
- “Success Story” by Vincent Tone
- “Aesthetics Trap” by Cymatix
Looking for more video tutorials? Check these out.


