

How to Export Videos in DaVinci Resolve: A Simple Breakdown

Exporting video correctly is essential to professional-level editing. Learn how to export videos in DaVinci Resolve with this simple approach.
Exporting can be a perplexing task if you’re new to editing, even more so when the software presents a brand new interface for when you need to render your footage.
In the tutorial below, we break down the basics of exporting a video in DaVinci Resolve.
Don’t have time for a video? Not to worry, you can read the transcript below. However, some sections may specifically call back to a moment within the video.
Edit Page Layout
With our edit completed, sound effects added, and grade implemented, it’s time to go to the Delivery page. Unlike other software that may have a pop-up box, Resolve has an entire page devoted to rendering your content.
This is the edit page.

To the left, we have our render settings. In this panel, we’ll set all the parameters for how we want our video to be rendered.
In the center, we have our preview monitor where we can watch the edit one final time before hitting render. (It’s important to note that, unlike the editing page where the scrubbing tool scrubs through the entire timeline quickly, it only scrubs through the clip. So, please take note that it operates slightly different.)
On the right, we have our render queue where the selected clips put out to render will be placed and where we’ll finally hit render.
Underneath is our timeline, which mirrors the timeline found on the edit page. However, we can’t make any adjustments whatsoever. We can’t mute the tracks. We can’t disable a clip. It’s merely for reference.
Let’s head to our first pit stop, the render panel. If you’re brand new to editing and still feel unsure about adjusting the parameters, Resolve will help you streamline that process with a set of one-click presets.
Whether it’s a YouTube upload or Audio-only, the presets are perfect for quick exports.
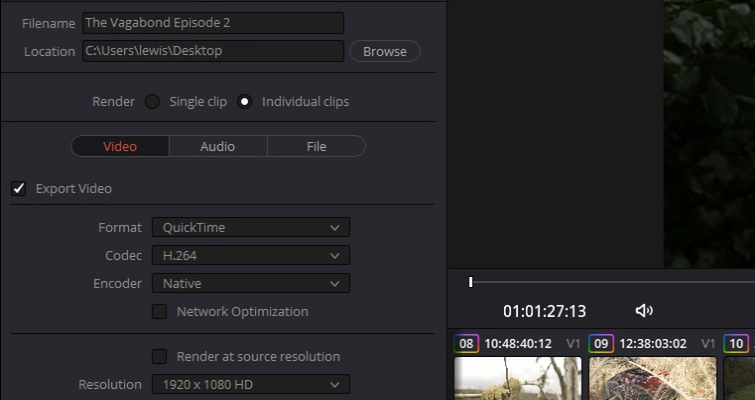
First, we have our Filename and Destination Location. This is where you’ll name your file and where your file will be rendered.
Next, we have an individual clip or single clips. Our timeline comprises numerous clips, and the idea of exporting is to combine all of this into one large video file.
However, there may be circumstances where we want to render out low-resolution files to render on our laptop and need to export each clip individually.
Sometimes, you might be asked to deliver the footage of individual clips that have been graded, which is something a client just asked for. Do I recommend doing this regularly or making it a standard practice? No. But, this is where the Individual Clip option comes in handy.
When selecting Individual Clips, Resolve will render each video clip (instead of one large video file). If you’re looking to create playback-friendly files, it’s worth jumping to the File sub-menu found here:
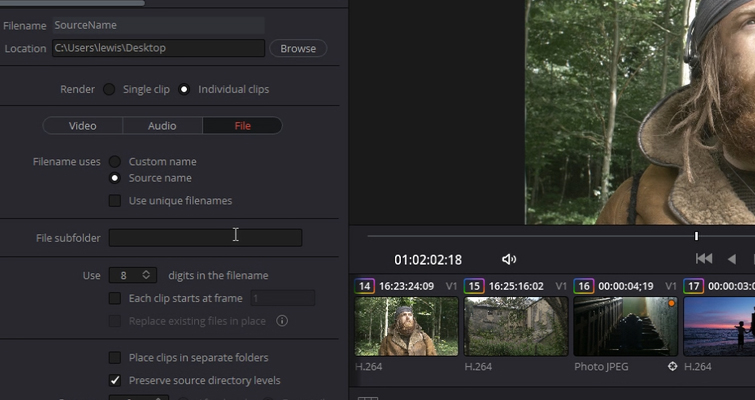
In this panel, you can then select Filename Uses Source Name. In doing so, your low-resolution files will render with their original file name, which makes them easier to replace when utilizing high-resolution files.
You’ll also see an option for Chapters from Markers, which allows you to split up the video into chapters. This feature is for YouTube and helps people see how your video is structured.
This can also be helpful for clients if you need to give them a quick guide for their own reviewing sake. This is just one way NLE platforms cater to the modern filmmaker, offering chapters in the export.
Underneath, we have the format and codec. These parameters aren’t something you typically recommend, as each project may require a different form of encoding.
But, for online encoding, the preferred format is Quicktime with an H.264 codec. You could also push for the even friendlier H.265. I tend to stick with H.264, however.
You can also choose your Encoder, or whichever GPU option you’re working with.
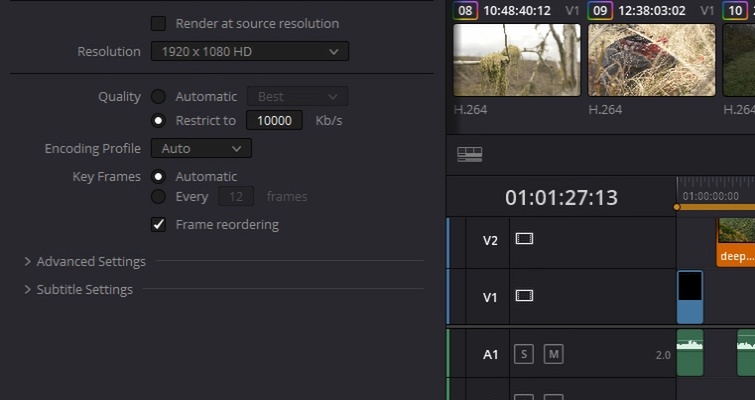
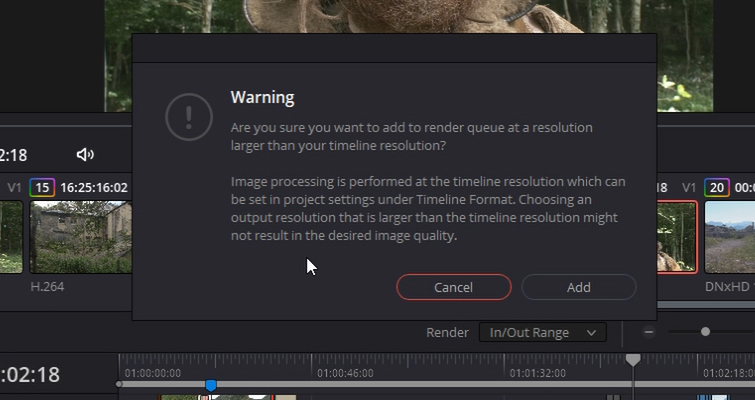
Next, we have Resolution. You’re going to want the resolution to mirror the size of the timeline. You’ll get a warning message if you try to render at 4K when you have a 1080 timeline.
When you start editing in Resolve, your timeline will default to 1080, so sometimes I’ll forget if I’m editing something quickly. Therefore, if you’ve been editing 4K media in a 1080p timeline, to make the files play easier, you’ll need to revert the timeline settings.
To do this, go back to the Edit tab and change the timeline to 4K under Project Settings.
And, of course, we want our frame rate to correspond to our timeline settings. Again, quality (like the codec) is going to depend on the requirements of the platform you’re rendering for.
However, between you and me, I just like to stick it at “Best” and deal with the larger-sized video files. I’ve actually never exported something not at “Best.”
Primary Functions
These primary functions—the filename and location, the format and codec, the resolution, frame rate, and quality—dictate the core components of your render and, I’d argue, are the only aspects you’re going to need to touch if you’re here watching this video.
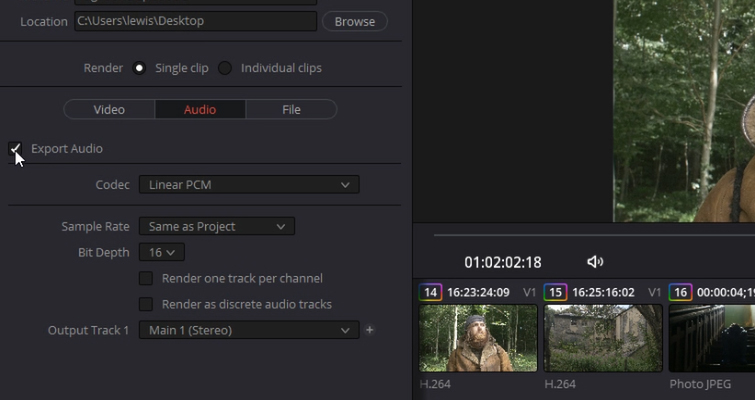
If you need to change the audio or file settings, you do that by hitting the audio or file button, which will swap out the sub-panel here.
If you want to render your video without audio at all, instead of going back into the edit and muting the tracks, we could just deselect this checkbox.
Every once in a while, for some reason, Resolve will de-select the Export Audio feature. So, I make sure to always check that this option is enabled.
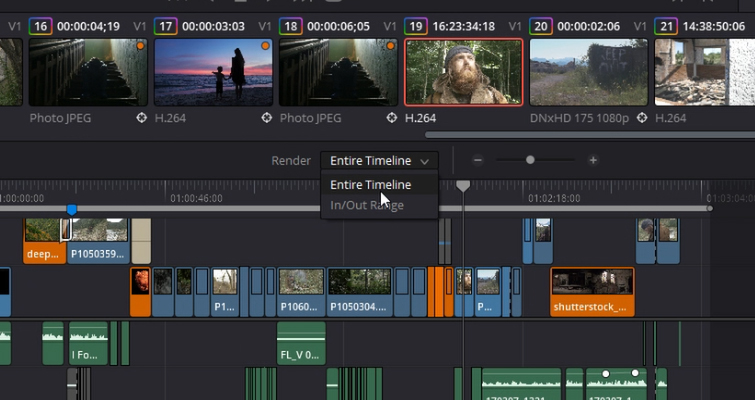
For the final setting to discuss, we’re going to head to the timeline and focus on this drop-down menu. Instead of rendering the Entire Timeline, we can select Render In and Out Range.
Using the same keyboard shortcuts as we use on the edit page—I and O—you can create a shortened area to export, perhaps if you need to send just one scene to an actor for their showreel.
And, what’s great is when you do add this to the render queue, you can create various in and out points and add them to the render queue. They’ll all render separate to one another.
A real world example of this is: Sometimes on my timeline, I’ll have different edits scattered throughout. So, when I’m rendering, I just set this In and Out point over the specific edit block that I want rendered. I’ve been doing this when I have multiple videos due at once for the same client.
When all is said and done, you can hit Add To Render Queue in the Render Settings panel. Then, over on the render queue panel, we’re ready to hit Start Render.
Remember, choosing where you export the video to is up to you. Resolve does offer several “straight to” options that will export and upload the final video to whichever platform you’d like—YouTube, Vimeo, or Twitter.
To recap:
- Enter the Delivery page and review your footage one final time using the timeline viewer, if you haven’t done so already.
- Set the Filename and Destination Location.
- Adjust the format, codec, and quality to best suit the delivery location, and ensure the resolution and frame rate matches your project settings.
- Press Add to render queue.
- Then select Start Render.
From this point, your video will start rendering. Resolve displays the percentage and time estimate until the export is finished.
We did it! Good editing!
If you want another deep-dive into this subject, check out Casey Faris’ walk-through of what to expect when rendering out your next Resolve project.
Okay, one last thing, if you want a complete look at what to expect with Resolve, look no further than another brilliant Lewis McGregor tutorial. Check it out below:
Looking for more on Resolve? Check out these articles next:
- Using DaVinci Resolve on the M1 vs. a Beefy PC
- How to Add YouTube Chapters Directly from DaVinci Resolve
- One Year After Giving up Premiere Pro for DaVinci Resolve
- How to Effectively Reduce Noise in DaVinci Resolve
- How to Stabilize Footage in Post-Production Using DaVinci Resolve
License this cover image via aileenchik.


