How to Organize a Feature Film Edit Like a Pro

Organize your feature film edit like the editor of Mission Impossible: Rogue Nation, Eddie Hamilton.
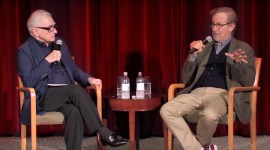
Editor Eddie Hamilton has worked his way up the Hollywood blockbuster editing ladder to what has to be the top spot — cutting a summer tent pole franchise hit, Mission Impossible: Rogue Nation.
I recently put together a little round up of some of Eddie’s best interviews on the topic of editing director Christopher McQuarrie and producer/star Tom Cruise’s latest adventure over on my own blog, but I thought it would be a great idea to draw out some of the fine-grain detail of how Eddie organizes his edit in this post.
Eddie shared some of his workflow tips in this fantastic interview with PVC writer Steve Hullfish, which provides some of the detail in this post, as well as other interviews with Eddie that I’ve read or heard over the years. Eddie’s essential philosophy is that everything should be so clearly labelled and logically laid out that any other editor could sit down in his chair and quickly find anything they needed.
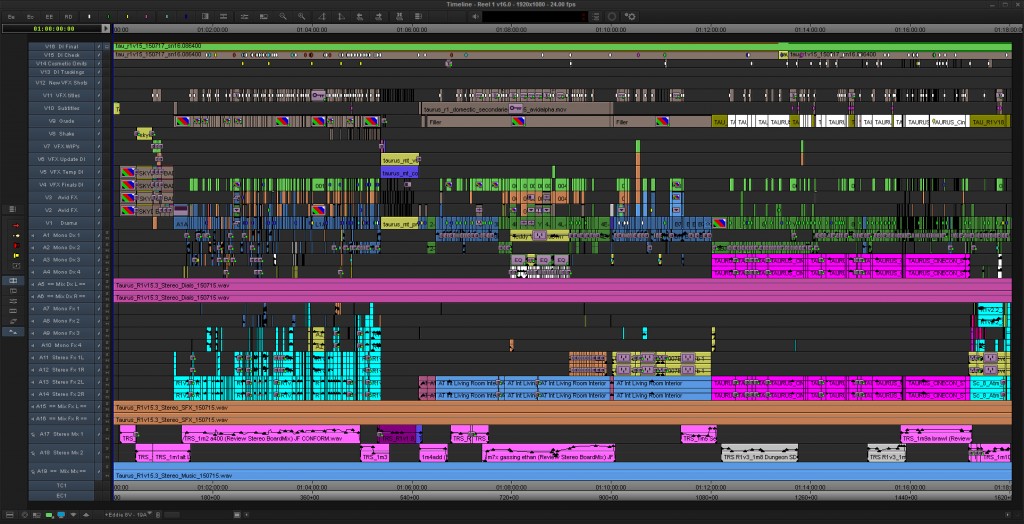
The image above is a screenshot of Eddie’s Avid Media Composer timeline for the first reel of Mission Impossible: Rogue Nation.
Organising a Feature Film Edit
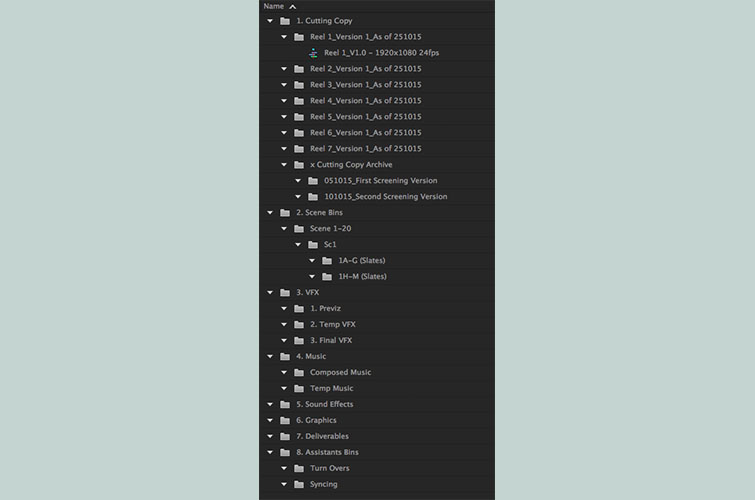
Organization of your edit begins at the project level with your Bin structure. In the interview with Steve Hullfish, Eddie walks through his preferred structure which I’ve visualized for you in the above image.
So what’s going on? Well, films were traditionally broken down into reels which were about 11 minutes each, due to the practicalities of handling 1000 feet of 35mm film. This is the way in which Eddie breaks the film down into manageable chunks. It also helps everyone keep tabs on which reels have been signed off or need more work. These are stored in the Cutting Copy bin.
The cutting copy archive allows Eddie to keep track of every version of the film that’s ever been screened or delivered to someone, organized by date. The scenes are grouped and all of their slates labeled and organized in bins, which will sort in the correct alphabetical order.
It should be noted that Eddie cuts in Avid Media Composer, which allows multiple editors to work on the same project with the same media and open and lock specific bins while they’re using them and then update for every editor globally. The image I’ve made above was created in Adobe Premiere Pro.
Labelling a Feature Film Timeline
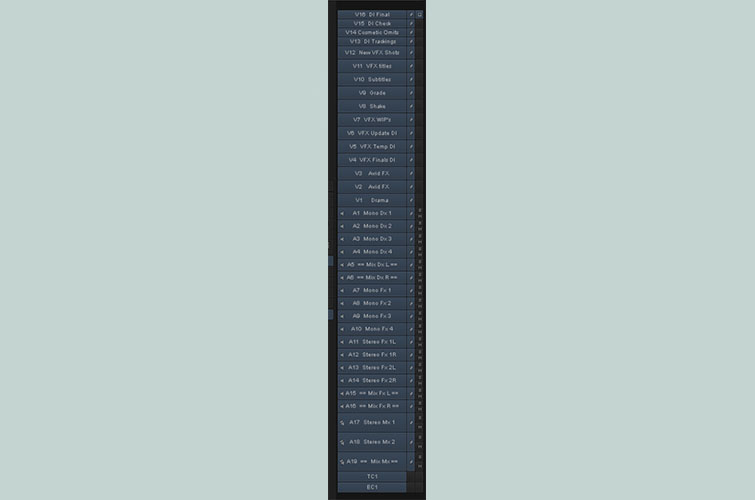
In this screenshot from the image at the top of this timeline you can see how Eddie labels his Media Composer timeline to keep track of what is on each track. The important thing to do when using a naming system like this, is to be diligent with the placement of each element of your sound mix so that everything stays where it should. Something like Roles would achieve the same result in FCPX without having to be careful about where things are physically.

The mono dialogue tracks allow Eddie to work with the sound recordists original recordings for that microphone and he prefers to add in the audio keyframes to dip each line of dialogue he uses to create the best sounding version of the film he can in his edit suite. This is instead of using the supplied ‘Editor’s Mix’ from the location sound recordist, which are intended for dailies.

One of the most obvious things you get from looking at a picture of Eddie’s timeline is the copious amounts of color coding he does. In the video presentation below, Eddie mentions that he color codes odd-numbered scenes in green and even-numbered scenes in blue so that “when you’re pacing out the movie you can see how long the scenes are relative to each other.”

Another timeline tip that Eddie shared was his process for choosing takes. Eddie’s assistant editors create a huge selects timeline of every single line of dialogue and they lay them out in chronological order. Also each camera angle, or presumably multi-camera angle, is then organized by track with all wide shots on V1, all Over the Shoulders on V2, all medium shots on v3 and so on. This allows Eddie to very quickly watch through all takes of a line and pick his favourite. It also makes it very efficient to allow the director to see alternatives if they wish to swap something out.
Editing with a Gaming Mouse
In this excellent NAB 2012 presentation, Eddie shares some valuable technical tips on how we approached co-editing X-Men First Class with Director Christopher Nolan’s go-to editor, Lee Smith.
One of the tips he shares is his use of the Razer Naga Ergonomic Gaming Mouse to speed up his workflow. I’ve pulled out his programmable mouse mapping from the video so you can make it your own. He skips past a couple of numbers so I’ve inserted my own suggestions. If you’re interested in this kind of thing, check out this post on editing keyboards, controllers, mice and more.

Think you might incorporate some of these tips into your workflow? Let us know in the comments below!