Everything You Need to Know to Shoot Professional Interviews

It’s easy to learn but extremely difficult to master. The interview setup is the bread and butter of any cinematographer’s repertoire.
Interviews are an interesting conundrum in the cinematography world. They aren’t necessarily that difficult, yet they always seem to cause issues and create confusion. There are a million variables, and you can scrutinize every little thing. The audience is staring at an image of someone talking, and there is nothing else to distract them from how you shot and lit the interview.
As such, it can be one of the most frustrating things to shoot when you’re starting out. Interviews are all about very subtle details and, first and foremost, making the subject look as good as possible. When an interview subject sits down to be in a video, their entire appearance (and in many ways the credibility of what they’re saying) is in your hands. You need to treat that with respect.
So, how do you shoot an interview? How do you light it? Where should the subject look? What gear do you need?
Getting Started
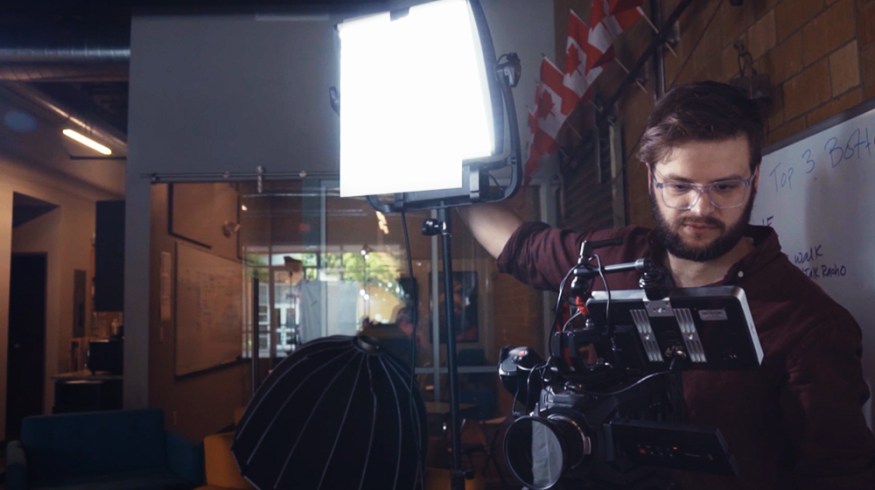
As someone who has shot quite a bit of documentary-style interviews, my video above is meant to be a little info dump of things that I’d suggest or recommend — and some basics of interview lighting: the gear I use, the way I like to light, etc.
If you take one thing from the lighting portion of that video, take this: three-point lighting (as it’s classically described) is just a suggestion. There are no rules in filmmaking. Except “feed everyone” — you need to do that. As it relates to interview lighting specifically, feel free to play around with the classic approach to three-point lighting.
For instance, instead of setting up your lighting like this . . .

. . . perhaps try it like this:

Of course, the only real difference here is the placement of the fill light. You can fill from the key side or from the opposite side. Both work, but both also create different looks — and different perceived meanings from a storytelling perspective.
Interviews can be more subjective than nearly anything else in the filmmaking world. Nobody can really quantify what will make a good one or a bad one, but if nothing else, it’s important to consider every interview setup with just as much intention and creativity as that long gimbal shot with the birds flying through the foreground and the lens flares in slo-mo. Your interview will likely get much more screen-time than that will.
The details count — more than in most other types of shots. Get creative with it, and understand the motivation behind your decisions. Think about subject matter, and light and shoot accordingly.
The Tools You’ll Need
In my experience, the most critical thing to consider with your interview lighting is diffusion. Other than the placement of the lights, this is going to be what will determine whether or not the light on your subject is flattering.
Time and time again, I’ve learned that really understanding diffusion and how it affects the look of my lighting is what separates professional-looking work from beginner material. You can use the best piece of lighting gear on the market, but if it’s not diffused properly, it’s going to look amateurish. There are no two ways about it.
You don’t need a giant, expensive 10x ultrabounce to get the best light — in fact, you can get away with an $8 shower curtain and a C-stand. Just make sure that your diffusion is as big as possible, and as close to your subject as you can get it.
The specific interview-lighting instruments that you use are way less important than you may think. Time and time again, Caleb Pike from DSLR Video Shooter has shown us fantastic and affordable LED fixtures on many different budgets. All you really need is something bright, which can help you compete with bright windows and the like in your locations. In my experience, I usually end up needing daylight-balanced fixtures more often than tungsten (it’s much less often that I’m lighting in tungsten environments). In the video above, you’ll find multiple extremely bright and affordable LEDs (not to mention the stands you’ll need).
You’re going to need a good shotgun mic. You’ll usually get the best interview audio by placing your shotgun mic over your subject’s head.
The video above is a comparison of the RØDE NTG2 microphone to the beloved industry-standard Sennheiser MKH 416. Why did I share this video? Well, this video is the one I watched a while ago before I went ahead and purchased theRØDE NTG2 shotgun mic for my interview work. To me, it sounds fantastic for the price (about $250 or so now) compared to anything else in that range. RØDE has since released a few other more updated versions in the NTG line, but I still prefer the sound of the 2 (call me old-fashioned), and it’s cheaper.
You might not be able to get your shotgun mic into a position that will get you the best sound, or the quality of the sound in the environment you’re in will need some backup. In these cases, you’re going to want use a wireless lavelier mic setup.
The all-time, industry-standard, entry-level wireless lav setup is the G-series by Sennheiser. I’ve used a G3 pack for about as long as I’ve been in the industry. It’s always nice to have them as a backup in case your shotgun audio isn’t turning out great, or to have the option to use a mixture of the two to add a bit more body to the interview sound in post-production.
Capturing Good Sound
On the subject of lavelier microphones: hide them well. Nothing is more distracting in an interview setup than when the shooter leaves the lav mic visible on the subject’s collar. This does generally provide the best sound, but in my opinion, it’s generally unprofessional and distracting.
Watch the video above for some tips on hiding your lavelier microphones.
While this video is directed more at narrative-style film audio, the same rules apply for interview audio.
Make sure that you’re always riding the knobs and checking the levels as you shoot. Each interview subject is going to have a different timbre to their voice, so leaving the levels at the same settings as your last project will not always yield the greatest signal-to-noise ratio.
How To Line It All Up
When thinking about the best ways to shoot interviews and choosing the right lens, one source of info we can always look to is the one and only Roger Deakins (Papa Deaks as we call him around the office). In this video, he mentions his affinity for the more personal feel of the 32mm lens for an interview — getting much closer and more intimate with your subject, rather than shooting from much further away on an 85mm.
Another important thing to be fully on top of creatively is the eye line. There are quite a few different styles of eye line, but the main distinction is whether or not your subject is looking directly into the lens or off to the side at the interviewer. If your subject is looking into the lens, it will read as if they are addressing the viewer. Some famous documentary filmmakers such as Errol Morris use this eye line. More often, however, you see the subject looking to the side at the interviewer. The benefit of this approach is that the interview feels a bit more conversational.

So, experiment and decide which methods you like to use when planning your lighting, placement, and eye lines. Just make sure that your decisions support the overall goal — telling the story.
Looking for more film and video tips and tricks? Check out these articles: