
Learn From the Pros: Reverse Engineer an After Effects Template

If you’re looking to improve your After Effects abilities, an easy way to learn is to break down an After Effects Template.
Whether you are learning After Effects for the first time, or an experienced user trying to improve your skills, one way to learn from other professional motion graphics artists is to break down their work and see how they’re making the magic happen. Now, you can do this with a keen eye and a lot of experimentation as you try to mimic reference material — such as a cool trailer, title sequence or animation — but you still need to know what you’re doing in order to recreate their techniques.
An easier way is to simply buy a copy of their work and open up their After Effects project file and see exactly how they did it. How can you do this? Through sites like RocketStock.com, where you can get free and paid After Effects templates like the one below.
What You Can Learn Breaking Down an After Effects Project
One of the benefits of breaking down another motion graphic artist’s project file is that you can not only learn from what they have done, but the way in which they have done it.
For example, they might have a shortcut to achieving an effect you’ve been taking the long way around with. You can also learn how to structure and organize your projects in a more professional manner, or at the very least you can learn to replicate specific techniques with ease.
How to Reveal the Hidden Magic

Before we go any further you’ll want to make sure any investigation work you do – which might also involve messing things up by accident – is done in a duplicate of your project. So just make sure you save a copy of the original project file for safe keeping.
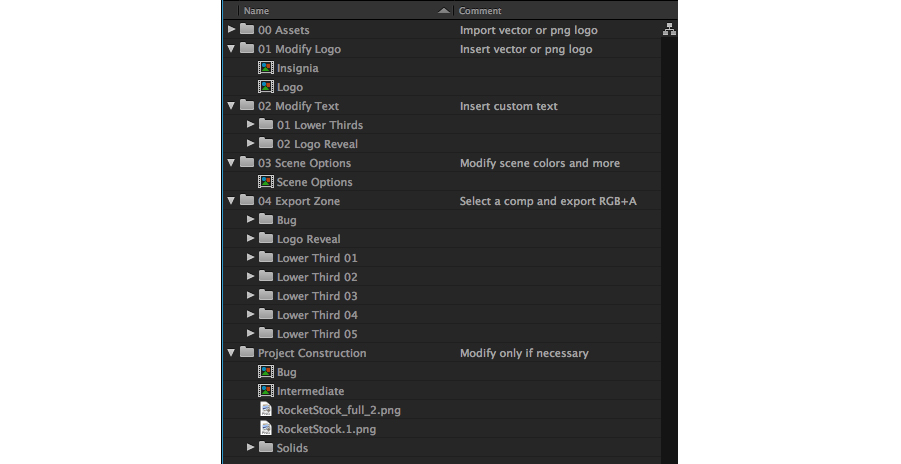
One of the good things about RocketStock’s After Effects projects is that all the inner workings are normally hidden from view. So for simple use — update the logo, change the text, adjust the colours — it’s very straight forward. But for our purposes, we need to see what’s really happening under the hood.
To do this you simply need to click on the ‘Shy Guy’ icon to reveal every layer that has been set to hidden by the creator. The image before shows the project as it is when you originally open it.

As you can see, this reveals everything that’s going on to make this lower third function. Another useful keyboard shortcut to use is ‘U’ which reveals all of the animated parameters in a selected layer. Even more helpfully a quick double tap of ‘UU’ will reveal all animated layers in the composition. In the image below, you can see all the animated properties for the first layer.

Understand the Connections

Another useful thing to check out, in order to understand how all of the compositions are connected and working together, is to open up the ‘composition mini flow chart’ from the tool bar in the top of the timeline for a quick view, or click on the main flowchart panel via Window > Flowchart.

How To Change the Frame Rate of an After Effects Template
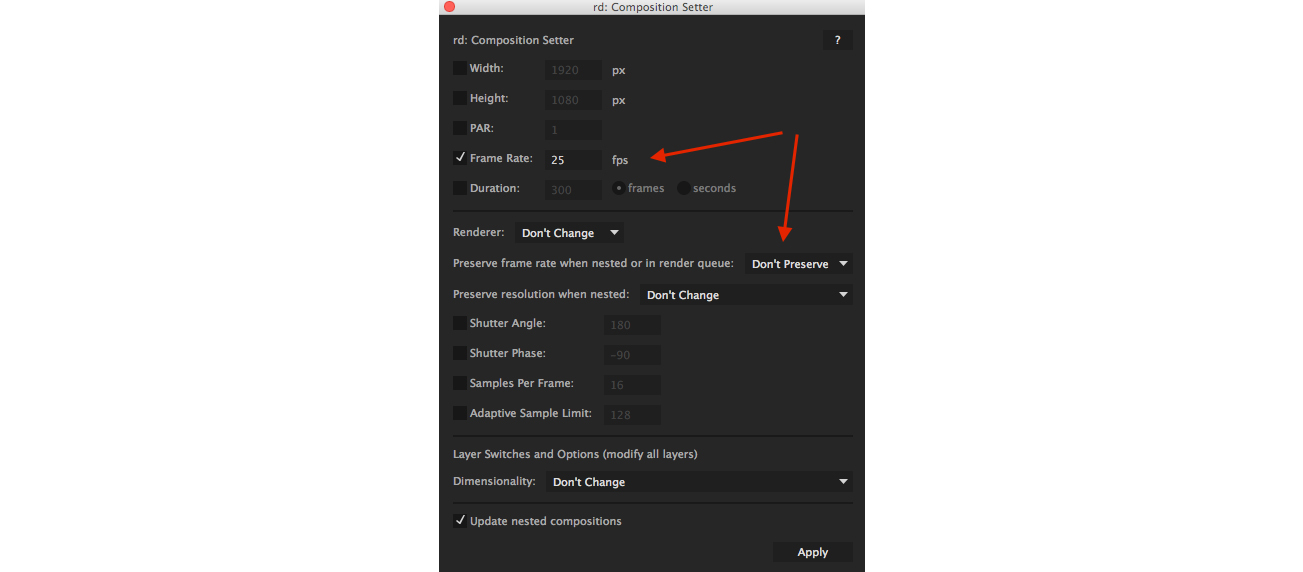
One of the things you might want to change in your purchased template is the frame rate. Many templates are created at 29.97 frames per second, which is fine for US customers, but if you’re in Europe you might want to adjust them to the PAL 25pfps. An easy way to do this all in one go is to download and install a free script from redefinery.com, called rd_compsetter. This is actually one of 50 free scripts you can grab in this bundle.
To install a script, simply drag and drop the rd_compsetter.jsx file into and restart After Effects if it’s already open.
- Mac = Applications > Adobe After Effects CC 2015 > Scripts
- Windows = Program Files\Adobe\Adobe After Effects CC 2015 \Support Files\Scripts
To run the script, first select all of the folders in the project panel and then hit File > Script > rd_compsetter
Adjust the frame rate to whatever you need it to be, and every composition in the project will be updated at once. If you have a template that also includes some video elements, and not just After Effects graphics animations, then you might want to use the interpret footage function as well.
Learning Point – Fonts Matter Most

The most obvious thing that you can learn from looking at someone else’s motion graphics work is that good design is a LOT about choosing a great font.
In these lower third layouts in the lower thirds package Venue, you can see two fonts at work in the capitalized title and lower case subtitle; Monserrat and Myriad Pro. The take away here is that although there are two fonts at work, they actually look very similar, which helps to keep the design looking clean and the legibility high, making it easy to read.
A good design principle is to have one font and vary the weighting (bold, italic, thin etc) to create visual contrast, rather than chucking in too many random fonts. Although sometimes you are simply lumbered with the clients terrible font and have to make do. If you’re after some free fonts for motion design, this previous PremiumBeat post is a good place to start.
If you’re looking to learn more about what makes for good design – including font selection, layout, and much more, then I would highly recommend this series on lynda.com, which breaks down some simple design situations and unpacks the essential principles. Absolutely worth a watch.
Ever reverse-engineered someone else’s After Effects work? Share your experience in the comments below!