
Lessons Learned from My First 30 Days Using Blender

Here are a few takeaways, tips, and tricks from my experience while learning Blender. Remember, patience is a virtue.
Blender has a notoriously steep learning curve. You’ve heard this before, right? I always see this statement, but it’s never quite clear why so many people think this.
For years, this rumor kept me from diving into the world of 3D, as it always seemed like such a heavy time investment. However, I’d received so many inquiries about Blender over the past year from clients that it was clearly time to make this a priority.
That’s why I spent the last thirty days tinkering away inside Blender, just to see how much I could learn in several short weeks. Here are my takeaways . . .
Have a Plan
Blender does a lot of things. It’s important to pinpoint what you want to create so you don’t waste time going down a rabbit hole of trying to learn tools that you may never use.
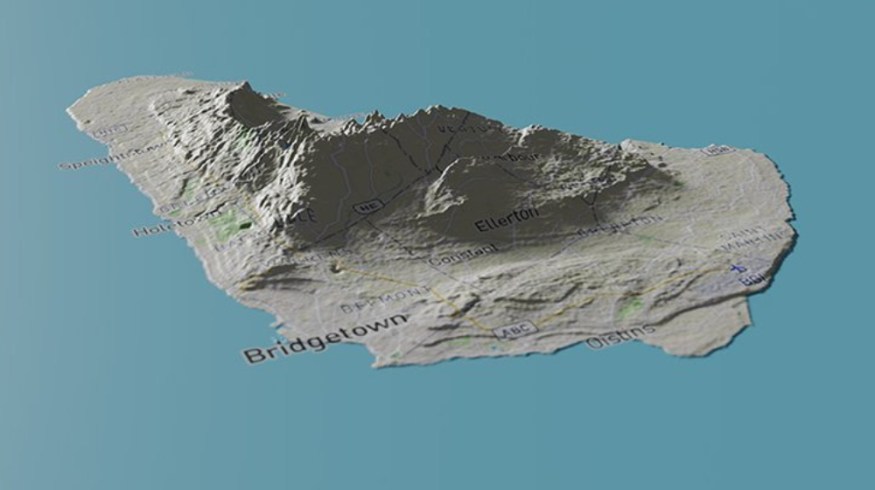
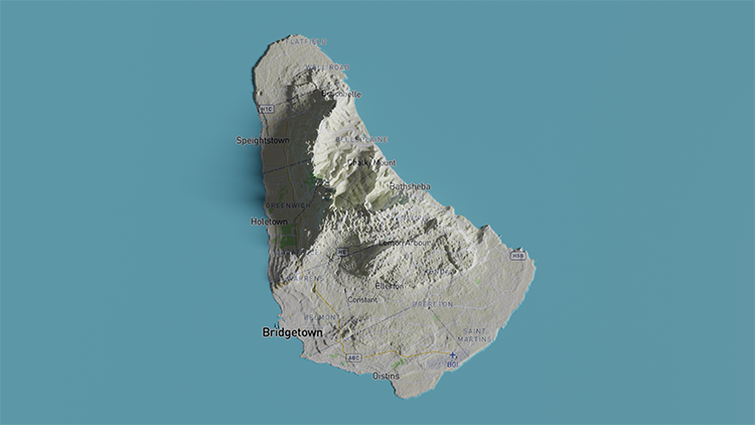
For example, I create map animations in Adobe After Effects, and clients have been requesting specific 3D scenes. They want terrain maps, buildings, animated routes, and even flood simulations.
Since I’m a newbie and want to keep my motivation up, it was important to make things simple during these first few weeks of learning.
I decided to set aside two hours a day for thirty days. At the end of this period, I wanted to accomplish two things:
- To be comfortable navigating the interface using hotkeys.
- To create a top-view terrain map with texture, lighting, and animation.
Simple enough, right?
Find a Good Beginner’s Series Course
It’s important to learn the fundamentals before jumping into project-specific tutorials. I’d watched several map-related tutorials in the past and always quickly gave up due to the number of tools I just didn’t understand how to use.
It’s one thing to know how to follow along with a step-by-step tutorial, but another thing entirely to know your way around a program.
Once again, learning Blender is a serious time investment. Picking the wrong tutorial series can result in a lot of wasted time.
There’s nothing more frustrating than trying to follow an instructor who’s going too fast, not explaining what they’re doing, or simply skipping steps. And, unfortunately, there’s a lot of that content out there on YouTube.
Here are four good places to start:
Pro tip: If you get lost or stuck in a tutorial, check the comment section. Nine times out of ten some friendly person has solved the problem and shared the answer with everyone.
Learn the Basic Vocabulary
The world of 3D comes with a lot of specific, complicated vocabulary. This can be intimidating for newbies, and also feel like an insurmountable hurdle.
While learning the basics of Blender in a beginner’s course, it helps immensely to learn key vocabulary terms as you go along.
You don’t need to devote time for deep-diving into every aspect of the program, but it helps to have a good sense of the terms for various tools and techniques.
I used the Blender support documentation as a reference to quickly read summaries of tools and techniques as I made my way through the intro tutorials. This helped me quickly hone in and plan what areas of the program would be most useful for making map animations.
Set Aside (a lot of) Time
I initially planned on using Blender for two hours a day over the course of thirty days. After starting Blender Guru’s Donut series, however, I quickly changed the plan.
This series consists of twenty-four videos that are each roughly fifteen minutes in length, giving a total run time of six hours. Seems like you could knock this out in one day, right?
Wrong.
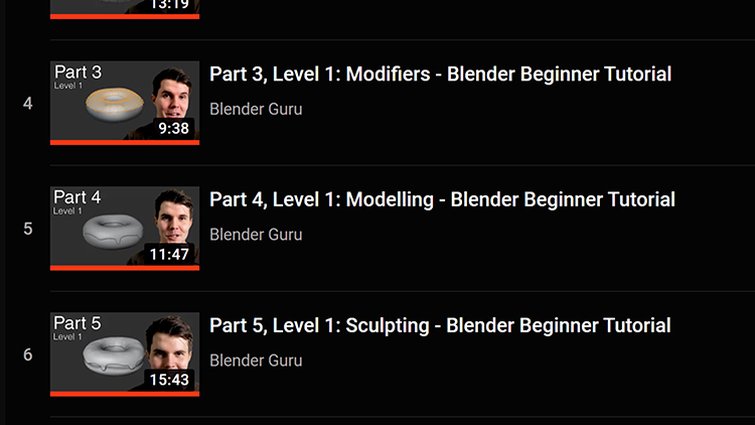

I saw in another video that the Blender Guru recommends allotting two to three full (eight hour) days of work to get through the Donut series properly.
At two hours a day, I was looking at spending most of my month just working on a Donut. Clearly, I needed to set aside more time. Again, this is a huge time investment.
Go Slow
The first two weeks of my thirty days were surprisingly slow and clunky. Even simply following a tutorial step-by-step required so much pausing and backtracking. Finally, I decided to watch a tutorial all the way through, and then watch it a second time to pause and follow along.
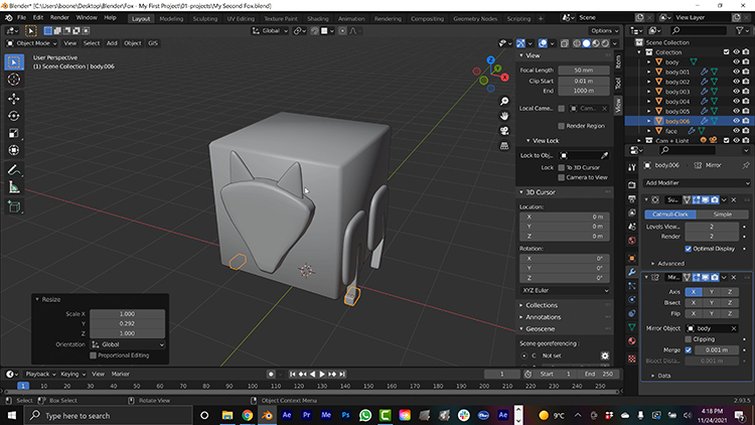
During one of my first attempts at modeling, I found myself moving a little too fast. I was trying to create a basic low-poly fox. Before I knew it, I was spending hours trying to make the ears look realistic. This quickly led to a burnout. So, I decided to come back and stick to the initial plan of simple low-poly primitives.
It’s easy to fall into this trap of trying to run before you even know how to walk. It’s easy to waste so much time trying to perfect some random aspect of a model.
Learning the fundamentals of Blender is a slow process for newbies. It can be frustrating when you continuously get unpleasant results. So, take it slow.
Find Project-Specific Tutorials
Once I learned the fundamentals and got comfortable navigating the interface, it was time to find some tutorials specific to what I wanted to accomplish. The Blender community is so huge and helpful, it’s quite easy to find content on nearly any topic of 3D art.
A few keyword searches led me to a plethora of information. This included tips on the best add-ons for map-making, as well as helpful techniques. I also got a good glimpse of what areas of Blender I’ll want to do deep dives on as a map maker.
Repetition Is Key
Practice indeed makes perfect. One technique, in particular, that I found helpful was repetition. Simply repeating a few simple steps really helped to solidify things for me.
For example, I created several plates while doing the Donut tutorial series. Each time, I would start from scratch with a new project, and create the plate with slightly different modifications.
With this process, I quickly became comfortable with various hotkeys, as well as how to navigate the interface.

Everything Is Connected
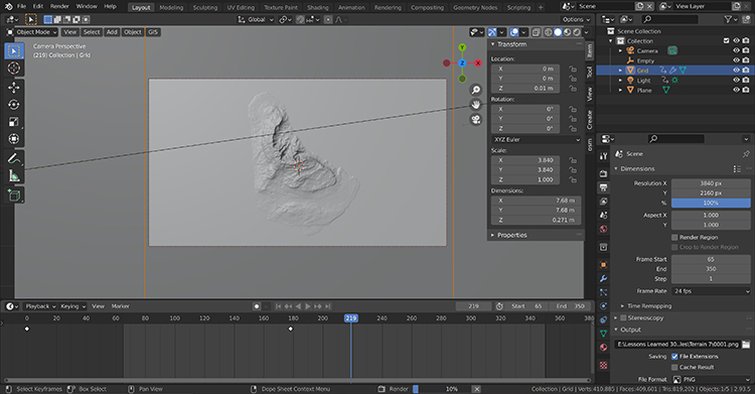
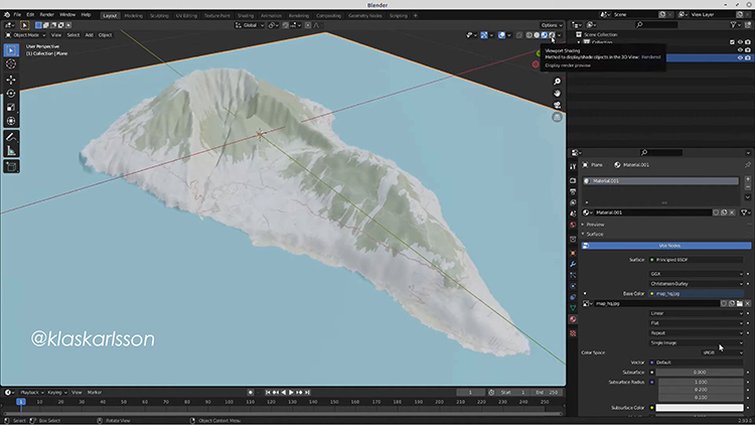
During the last two weeks of my Blender training, I really started to get into the details of making my desired terrain animation.
While trying to light my terrain, I began to realize how so many aspects of Blender are connected. Trying to figure out which renderer, light type, and material settings to use turned out to be quite complex, in the end.

I imagine that this is a main cause for such a steep learning curve. You have to be ready to learn so much before you can get a particular look that you want. This information overload probably causes many people to quit in those first few projects.
Don’t Get Discouraged – It Gets Easier
After thirty days of playing around in Blender, I can confidently say that I achieved my two goals. I’m now comfortable navigating the interface, and know a number of useful hotkeys. I was also able to create several animations of my terrain map, which look quite good.


There’s obviously still so much to learn, but I feel like the biggest hurdle is now behind me. It’s certainly exciting once you get the hang of the interface and learn your way around.
The next thirty days are going to be much more fun.


