

8 Things I Learned by Creating the Donut in Blender
Take a look at what I learned by completing the iconic donut tutorial series in Blender, and whether or not it’s right for you.
If you have ever researched the free 3D software Blender, you’ve likely come across many renders of delicious-looking donuts. This is because the most popular tutorial series for getting started with Blender is the free Donut Course by Andrew Price, also known as Blender Guru. As a complete novice to Blender, I decided to give the course a try, and share what I learned. Hopefully, this will give you some insight if you’re thinking about taking the course, too!
1. Clean Blender UI
Your first impression will likely come from Blender’s user interface. In the past, Blender’s UI always looked overwhelming for new users like myself. However, in 2018, Blender totally revamped the UI with version 2.80. Now the UI has a more natural structure and feel, and looks right on par with other 3D programs—like Cinema 4D and 3DS Max. Tabs and panels appear much more cohesive, and it’s easier for a beginner to get their bearings.
2. 80/20 Rule
One of the first things Andrew explains in the series is about what aspects of Blender you’ll use the most. He mentions the 80/20 Rule, which states that you’re going to use 20% of the features 80% of the time. This was immediately something I could relate to from my work in programs like After Effects. This helped me take a step back and breakdown the intimidation that comes with learning a new program, such as Blender.
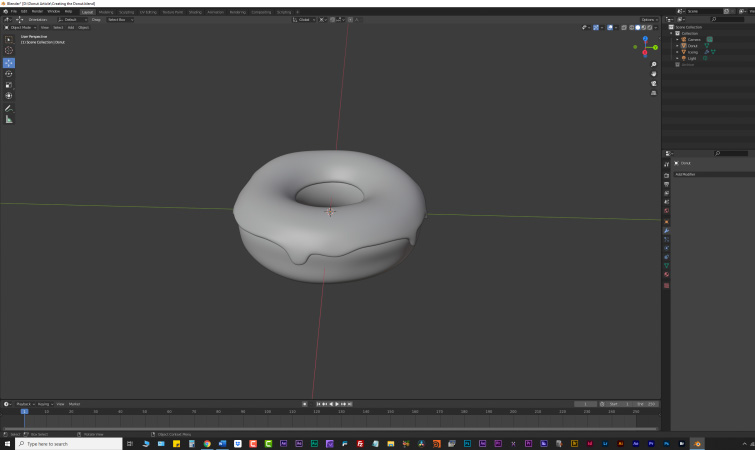
3. More Than Just a Donut
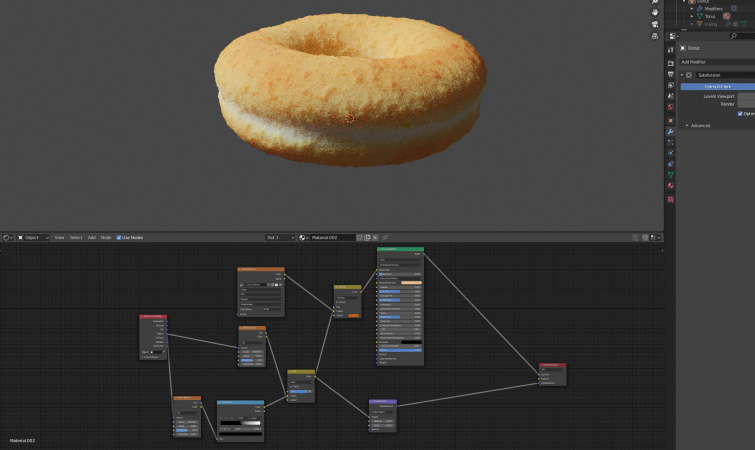
The donut tutorial series covers a lot more than just modeling a donut from scratch. You’ll learn about many of Blender’s features, such as using nodes to create textures, keyframing animation, rendering settings, and more. Aside from creating the donut, you’ll also get to create a glass cup filled with coffee, creating some nice contrast with the organic styling of the donut, compared to the more rigid design of the glass cup.

Because of this, you’ll want to set aside a few days to complete the course. It really is a full-fledged introductory course to Blender. The tutorial series took me about four days, working two to four hours each day. The course is twenty-four videos long, with each tutorial averaging about fifteen minutes. With that much information thrown at you, you’ll want to give yourself some time to soak it all in. Andrew breaks the course down into four different “levels.” Going through a level each day was the best approach for me.
4. Hot Keys
Upon using Blender, because of how many different features it has, you’ll definitely want to learn some of the hot key shortcuts throughout the series. These almost become necessary for completing the course. You likely won’t be able to memorize them all, and for that, Andrew has created a Blender Shortcut PDF that users can download for free. Some of my favorite shortcuts are “.” on the numeric keypad to zoom in on the selected model, and “0” on the numeric keypad to toggle the scene camera view.

5. Check the Comment Section
I quickly discovered that the comment section of each video can be extremely helpful. This is because, as new updates get implemented into Blender, some features Andrew uses may be slightly different. Or, some settings may be set to different defaults in later builds. This is where the comment section comes in, with many users upvoting comments with solutions to parts where you might get stuck. I can’t stress enough how helpful this was!
6. The Power of Sculpting
As an outsider looking in, I’ve always been fascinated by “sculpting” in 3D programs. And, that’s one of the areas of Blender you get to explore during the tutorial series. You’ll get to sculpt the donut and the icing to give them a more “true to life” shape. Cooking flaws and all! This was an extremely fun part of the series that didn’t disappoint.

7. Save Often
Regardless of how powerful your computer is, you’ll want to save your work often during each tutorial. This is partially because 3D programs require a lot of processing and graphics power, which can make any computer susceptible to mishaps or crashes. But, also because the latest builds of Blender are always considered experimental. (From my experience, this is really true with any newly-released production software.)
However, you can download previous builds of Blender—such as version 2.83 LTS—which is aimed at more long-term stability for your projects. Throughout the entire twenty-four video series, I only had one crash.
8. Experiment
One of the best ways to learn any new program is to jump in and start playing with settings. This is actually encouraged throughout the series, to help make your donut scene more your own. I found myself experimenting quite a bit after each “level” of the course. That is how I created the cover image for this article. I duplicated the donut I’d created several times, and then changing the floor material to a dark, reflective surface. In doing so, I learned a lot about different material settings in Blender!

What to Check out Next?
Once you’ve completed the Donut Course, you might be wondering what to do next? Well, there are quite a few other Blender creators worth checking out on YouTube, as well. Some of the more popular ones I noticed would be: Ian Hubert, Dedouze, CG Masters, Derek Elliott, Josh Gambrell, CrossMind Studio, and Gleb Alexandrov.
If you want to check out some more free tutorial series from Blender Guru, check out his Lighting for Beginners and Beginner Modelling courses.
For more fun, software-related tutorials and tips, check out these articles:
- From Zebra Lines to False Color: 4 Ways to Monitor Exposure on Set
- Using the Pick Whip for Motion Graphics in Adobe After Effects
- Will Real-Time Digital Sets Replace Green Screens?
- 10 Top Audio Editing Tutorials Every Video Editor Should Watch
- Comparing the Performances of Premiere Pro vs. Final Cut Pro X


