Mixing Tips for Professional Sounding Audio

Is your audio not as crystal clear as you’d hoped? Use these tried and true mixing tips to elevate your audio like the pros.
Audio, in all its wonders, is a complex phenomenon. On top of recording audio, it’s important to understand the essentials of mixing audio.
Audio mixing is the process of combining multiple sounds and balancing them into one or more audio channels. During this process, there are crucial editing steps, like EQ shaping, stereo panning, applying reverb, and adjusting gain levels that come together to create your project’s distinctive soundscape.
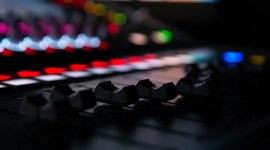
High-Quality Audio Gear
Having high-quality audio starts with having the right equipment, specifically that of good quality.
Recording audio in any capacity requires both a microphone and an audio interface. Then comes the additional accessories, like a boom arm, shock mounts, windshield, and headphones, that help capture whatever sound you require.
You can find many budget-friendly options but, in comparison to more upmarket gear, the audio quality will dwindle. Plus, these tend to be less durable due to being made of cheaper materials.
More expensive gear tends to have a more complex infrastructure. So, the build quality around the mechanics is much stronger, which racks up the price.
Opting for cheaper microphones and interfaces will unfortunately generate more audible self-noise. More expensive gear will consider this, thus resulting in lower self-noise, better for more accurate recordings, without the presence of any noise whatsoever.
When it comes to monitoring the audio, investing in a good pair of headphones and monitor speakers will allow more details to be heard.
It’s best to look for monitoring equipment that has a flat frequency response. This is to ensure no frequency regions are artificially boosted or attenuated, and that the audio is coming through the way it should originally sound.
While this isn’t necessarily a mixing tip, investing in better-quality equipment will help substantially in the mixing stage.
EQ Shaping
Audio can be adjusted by playing around with the frequencies using an Equalizer (EQ). This is one of the first stages in the audio editing process, as an EQ can cut away any unnecessary frequencies, such as low-end rumble or harsh high frequencies. If your audio is lacking body and warmth, EQ can help by boosting those frequencies.
The most common type of EQing in audio is applying a High Pass and Low Pass filter. These help tame the extremely low-end and high-end regions, as these are areas that can pick up unwanted noise (low-end rumble and hiss).
While they may not be audible, this can hinder the final mixdown, as it may cause phase issues and in a thin-sounding signal.
EQ is a must in your mixing stage. On the master channel, it’s recommended to apply EQ here to do final touch-ups, like taming low-end or boosting high-end. The subtle changes make all the difference.
Creating Depth with Reverb
The recording stages require us to capture audio as cleanly as possible—no noise, no room reverb.
However, applying a clean sound effect in a scene that takes place in a location with an obvious reverb effect is going to sound out of place. Applying some digital reverb gives recorded sounds a spatial identity that can closely match the given location.
In any context, reverb brings a sense of space to audio, as well as adding some life to your sound. The aim of using reverb in this context is for it to sound realistic.
In your chosen NLE or DAW, there will be a stock reverb plug-in. It will include the essential types of reverb: room, hall, and chamber.
These reverbs are digital emulations of a variety of indoor spaces that are created through algorithms. You can adjust the parameters (e.g. decay time, early reflections) to your liking to achieve your desired sound.
Some sound editors like to use the exact room reverb that you have a scene in for other sound effects and ADR. This is achieved by using Convolution Reverb, a type of reverb that uses samples (known as impulse responses) instead of algorithms to generate reverb.
Sound crews may choose to record an impulse response of a location and use this as their reverb sample, rather than a pre-made digital one. This creates a much more accurate reverb representation.
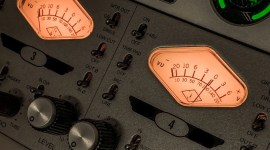
Gain Levels
Looking at the overall sound picture, it’s likely that some audio channels will need to be reduced or increased for a balanced mix. Adjusting gain levels can take time, but makes a considerable impact.
Filmmaking audio is made up of diegetic sounds (dialogue, ambience, foley) and non-diegetic sounds—the film score.
Generally, the dialogue needs to be comprehensible amongst the other sounds, unless a creative decision calls for other types of audio to overpower the dialogue.
There’s nothing worse than having dialogue that you can’t hear as the score music is too loud!
The general rule is that the master channel should never go above 0dB, the red zone. This causes distortion which will tarnish the audio.
The overall combined audio should sit between -10dB and -12dB. While this is quite low, this does provide more dynamic range for much louder sounds, like explosions, to stand out. There isn’t a hard and fast rule for this—as long as there’s enough room below 0dB, you’re good to go.
It’s recommended for:
- Dialogue levels to sit around -15dB to -12dB (can go up to -10dB).
- Sound effects to sit from -20dB to -8dB (a little louder for occasional spikes).
- And music (which will be the quietest) to be set between -22dB to -15dB.
Monitor levels on monitor speakers, as well as headphones. It’s easy to get fatigued from using headphones for too long.
Furthermore, use references (other video projects to compare your work to) to hear whether it sounds right. As long as it sounds balanced, the job is nearly enough done!
Stereo Field and Automation
For most visual media, the audio will be played through a stereo format—playback systems that use two speakers. In comparison to mono, there is a lot more sonic space to play around with.
By panning sounds around the stereo field, in correlation to what’s happening on screen, it creates a much more immersive experience for the viewer.
Other than stereo, sound designers may incorporate a 5.1 surround sound configuration, which is used in many blockbuster films. In comparison to stereo, 5.1 has channels from slightly behind the viewer, as well as channels in front. Panning sounds in 5.1 can create a hyper-realistic sensation, especially with foley sounds.
To make sounds move around the stereo (or 5.1) space, you need to use automation. This is a process where your workstation (NLE or DAW) performs tasks over time automatically.
It’s most commonly used for adjusting volume or panning. If you have a sports car going from left to right, you can dial in the panning automation so it does this over time.
Automation can be applied to most audio effects. For example, you can automate the decay parameter of reverb to get longer over time, or apply automation on a low pass filter on an EQ to decrease over time, for an underwater-like effect.
Using automation is a great way to get creative with sound. In conjunction with the stereo field, you can craft unique soundscapes with activity across the entire sonic space, adding more depth and absorption for the viewer’s experience.
All of these tips take patience and practice. Starting small will allow growth and understanding of the sonic activity in filmmaking.
Before you know it, you’ll be a pro at audio mixing.
License this cover image via guruXOX.