What Can Video Editors Do with a Raspberry Pi?
The Raspberry Pi is a solid, low-cost computer with several uses for professional video editors — from storage servers to portable editing workstations.
Though the sound of a Raspberry Pi (RasPi) may conjure images of a flaky crust and sweet, slightly tangy fruit, the Raspberry Pi is actually a computer — albeit one that can fit in your pocket. Unlike most computers, however, the RasPi costs between $10-$50, depending on the model. This single-board computer (SBC) has spawned several similar devices, but the original is still widely considered the best by computer enthusiasts, tinkerers, and curious minds.
Designed over a decade ago, in England, by the Raspberry Pi Foundation, this tiny computer has been at the heart of many enthusiast projects. In fact, there are a couple of RasPis on the International Space Station, which are used from Earth by children learning to code.

Across the world, children have used the Raspberry Pi for coding and robotics projects, such as the one pictured here. Image via Bogdan Vija.
The Versatility of a Raspberry Pi
While the device is used by many schools and educators to teach children to code, it’s much more than an educational tool — it’s a tiny workhorse. For instance, the RasPi Zero, which is the smallest and least powerful version, is now being used in new ventilators to combat the shortage of the life-saving device during the COVID-19 pandemic.
I’ve used an old RasPi 3 as an ad blocker for my network at home, and I recently got a new RasPi to use as a desktop computer. The best thing about the RasPi, apart from its convenience and versatility, is how affordable it is and its ability to transform into another project quickly. Projects vary by difficulty, but the skills learned — whether it be soldering, coding in Python, or navigating the Linux command terminal — might make the time spent indoors more productive in the long-term.
Whether you want to build a media server for your home network or a low-cost desktop computer with basic editing capabilities, the RasPi is a useful tool for any curious video professional, with some spare time.
Which Raspberry Pi Is Right for You?
The first RasPi was a novel device, unlike anything the tech world had ever seen. To keep the device from ballooning in price, the founders cut a lot of features and expensive components that appeared in later models. That was then. These days, the RasPi 4 is a worthy pocket-sized computer. The Raspberry Pi foundation has spent a decade refining the RasPi, with each model having distinct features, which is why no one model is the best. It all depends on your budget, the project, and availability.
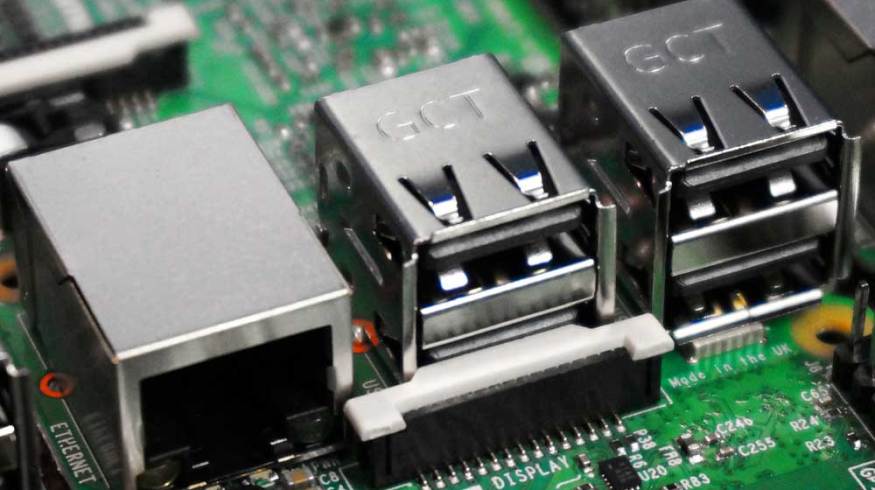
The Powerhouse: Raspberry Pi 4 Model B

The new and improved Raspberry Pi 4 Model B is the first to feature dual-HDMI (micro) outputs and RAM higher than 1GB. Image via Raspberry Pi Foundation.
The Raspberry Pi Foundation’s latest release, the RasPi 4 Model B, is the most powerful iteration of the Raspberry Pi to date. It comes in either one, two, or four gigabytes of memory (RAM). The RasPi 4 starts at $35, but the 4GB version sells for around $55 (due to high demand, prices may vary on Amazon). With 4GBs of memory, the RasPi 4 is your best bet if you’re looking for raw computing power, especially since it has a four-core 1.5GHz processor.
Other features include:
- Wireless 2.4 and 5.0GHz internet
- Gigabit ethernet
- Bluetooth 5.0
- H.265 video decoding at 4K resolution and 60 fps
- H.264 video decoding at 1080p resolution at either 30 or 60 fps
- Two micro HDMI ports
- Two USB 2.0 and two USB 3.0 ports
- USB-C power connection
There’s no lack of features on the RasPi 4, however, some are more technical than others. Simply put, this SBC is powerful enough to serve as a fully-functional web-browsing, email-checking, and document-writing desktop. What’s more, thanks to the powerful processors and H.265 codec, the RasPi 4 can function as a dual-4K monitor setup without breaking a sweat.
An Oldie, But Goodie: Raspberry Pi 3 Model B+

The Raspberry Pi 3 Model B+ is an older model, but it’s no slouch. While it lacks the dual-HDMI outputs, it still has a decent CPU and wireless functionality. Image via Raspberry Pi Foundation.
The RasPi 3 Model B+ may look like its newer sibling, but it’s actually an older model. Despite its age, the RasPi 3 Model B+ is still powerful in its own right, and more affordable. For more straightforward projects, or ones on a tight budget that don’t require many computing resources, you could go with the older RasPi 3 Model B+ or the RasPi Zero W (wireless).
Just because some of the components are outdated relative to the RasPi 4 doesn’t mean this device is useless. I breathed new life into a dust-collecting RasPi 3 Model B+ last year, and it’s now an excellent network ad blocker — I don’t even remember what internet ads look like anymore.
The RasPi 3 doesn’t make for a snappy desktop experience, as it’s limited by a respectable (yet slow) 1GB of RAM. Still, the RasPi 3 is nothing to scoff at, and it’s more than capable of handling most projects. What it lacks in features it makes up for in price.
Tiny, But Fierce: Raspberry Pi Zero W

The Raspberry Pi Zero W is the tiniest, least expensive Raspberry Pi. This is the wireless version, which sells for $10. Image via Raspberry Pi Foundation.
If the RasPi 4 Model B is the size of a credit card, then the RasPi Zero W is roughly the size of a stick of gum, and yet, it packs quite the punch. For one, the W at the end of the name signifies that the RasPi is fully wireless, capable of connecting to the internet and Bluetooth devices. The previous version didn’t have this feature.
Starting at only $10, this smaller computer is ideal for experimentation. From the RasPi, hobbyists have built retro game consoles, digital cameras, MP3 Players, Digital-to-Analog (DAC) audio converters, and portable desktop dongles. Sure, it lacks many of the ports the other RasPis have and it’s not as powerful, but it costs next to nothing. You could purchase a few at a time and try your hand at different projects.
What Do You Need?
Once you’ve chosen the right RasPi for your needs, you’ll need a few simple accessories to get it working. Fortunately these are easy to find and also inexpensive. Below is a list of the necessary components. However, it’s worth noting that several online merchants (including Amazon) sell pre-made RasPi kits that include the computer and all necessary components, sometimes saving end-users a decent amount of money. The Raspberry Pi Foundation sells an official kit that comes with the RasPi 4 4GB, power supply, case, keyboard, mouse, and other accessories.
I tend to buy the accessories separately since I sometimes disagree with the quality of certain included accessories, but your mileage may vary. In any case, you may not need a kit at all if you have some of the accessories lying around — such as a keyboard, mouse, or spare MicroSD card.
Required Accessories
- Power Adapter: The RasPi 4 uses a USB-C connection, while older models use a Micro USB connection. A 5V/3A power supply is recommended for the RasPi 4, but a 5V/2.5A power supply should be enough for older models. Since the power supply depends on the model it’s best to consult the official device page on the Raspberry Pi Foundation’s website.
- MicroSD Card: The Raspberry Pi Foundation recommends using an 8GB MicroSD at the very least. The RasPi is compatible with cards up to 128GBs or larger.
- SD/Micro SD Card Reader: You’ll need one of these to hook up the memory card to a computer to download an operating system.
- Access to Windows or Mac computer: Before you can use the RasPi, you’ll have to download an operating system onto a MicroSD card. Alternatively, you can buy a MicroSD card that comes pre-loaded with NOOBS — i.e., new out of the box software — which includes several operating systems to choose from. You can also download NOOBS onto a MicroSD card and then choose your OS.
Optional Accessories

While there are many third-party cases available on Amazon and hobbyist sites, the Raspberry Pi Foundation’s official case is a classic. Image via Raspberry Pi Foundation.
- Case: The case isn’t necessary, but I highly recommend it. Though the RasPi is inexpensive, there’s no need for it to break down due to dust, water, or whatever else. A case is also one of the few ways you can customize your RasPi’s look. The white and raspberry red cases from the Raspberry Pi Foundation are distinct and a favorite of mine.
- Heatsink(s): To prevent your RasPi from overheating, you’ll need a heatsink, or even (depending on the model) multiple heatsinks. The RasPi 4 uses heatsinks in three different sizes. You can find the necessary heatsinks in RasPi kits, but they’re also sold separately in a bundle. Heatsinks for the RasPi are incredibly inexpensive, so just buy a few and protect your RasPi.
- CPU Fan: There was no need for a CPU fan until the RasPi 4 came along. But it’s worth having one, even more so if you’re using it as a desktop computer. The fan connects to the RasPi’s GPIO ports, which is very easy to do. There are two modes: full power or quiet.
- Monitor: Not all projects require a monitor, but some may. If you don’t want to buy a new monitor, you can hook up the RasPi to any TV with HDMI input.
- HDMI/Micro HDMI Cable: If you do need a monitor for your project, then you’ll also need an HDMI or Micro HDMI cable. The RasPi 4 uses the latter, while older models use the former.
- Wired Keyboard: It’s possible to use a Bluetooth keyboard with the RasPi, but you’ll need a wired one (at first) when you’re installing the OS and getting through the setup.
- Wired/Wireless Dongle Mouse: Any wired mouse will do, but if you have a mouse with a wireless dongle, that should work as well.
That’s pretty much all you need to get started, but I’ll briefly mention how grateful I am for the Raspberry Foundation and their many forums, blogs, and, of course, their awesome magazine — The MagPi. All the articles, blogs, and forums are free to access, and their magazine issues are too. The MagPi has tons of tutorials, user guides, and community projects. It’s been an invaluable resource to me, one that has given me tons of awesome project ideas.
Project Ideas
With a RasPi in your hands — one that’s inside a case, hopefully — I’m sure you’re ready for a project. Thankfully, there’s no shortage of fun, useful projects out there, so now it’s time to choose which one is worth your time. I’ve picked out a few projects that relate to video editing in one way or another.
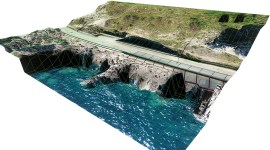
Network-Attached Storage (NAS) Server
 Server")
A 4-Bay NAS server, such as the one pictured, can cost between $300 and $500. One made with a Raspberry Pi and a couple of external hard drives costs a fraction of the price. Image via slawomir.gawryluk.
Got a ton of video files in need of editing and nowhere to put them? Simple. Create a Network-Attached Storage (NAS) server. To be clear, you can just buy a NAS server online, but where’s the fun in that. Instead, why not roll up those sleeves — or, in this case, lift up those glasses — and get to work. In the end, you’ll have a fully-functional storage server for all your high-resolution video files, for a fraction of the price.
You can find detailed instructions on this project from The MagPi, and you’ll only need a RasPi 4, a couple of hard disk drives (HDD), and a fast internet connection. To prevent file loss, you’ll have to use RAID (Redundant Array of Inexpensive Disks). For the purposes of this project, the drives will be configured in RAID-1, which means that all files on the first drive will be copied onto the second drive. Thanks to a RAID-1 setup, you can replace a failed drive and not lose a single byte of data. It all sounds complicated, but it isn’t. When it’s all done, you’ll be able to quickly access and store any file, freeing up space on your editing rig. If you want to access the files on your NAS server, you can figure the RasPi to do that, also.
Media Player
There are tons of similarities between this project and the one above, but this one is easier to accomplish and more affordable. While the above project is for storing large files securely, this project is best for those who want convenient, quick access to their media files from anywhere. By installing Plex Media Server onto a RasPi, you can access your movies, videos, music, and anything else via the Plex app.
Plex has an intuitive UI that’s much easier to navigate, and it’s easy to set up on a RasPi. You’ll only need a RasPi — preferably the RasPi 4 — and an external drive. A Solid-State Drive (SSD) will result in much faster downloading and streaming, but it may also go over your budget — SSDs are considerably more expensive than their hard disk counterparts. This project doesn’t implement RAID, so it’s best to frequently back up any important files stored on your Plex Media Server.
While you won’t be able to store as many files with this setup, there are a few upsides. For one, you can access any file remotely from almost any device, including smartphones and tablets. Second, you can finish this project in one sitting, and it doesn’t require much. If you plan on working away from home, you can set this up and have access to any large files on the off-chance you need them. And, here’s the best part, you can connect Plex to a NAS server, if you want. Plex states it’s only compatible with certain NAS servers, so here’s a list — connecting a RasPi NAS server may not work.
Desktop (Editing)

The Raspbian OS’s desktop environment looks and feels familiar. The latest Raspbian update, Buster, is better looking and more intuitive to use. Image via Alejandro Medellin.
There’s no universe in which a $55 computer could compete with a high-end editing rig, but it doesn’t have to compete. It’s something of a technological miracle that a sub-$100 computer could even attempt to surf the internet, let alone edit video. But, before you can start dropping clips onto the timeline, you’ll need accessories. To start, you’ll need the most powerful RasPi, which is the 4GB memory version of the RasPi 4 Model B. Remember the list from earlier with all the optional components? Well, they’re not optional for this project. Because editing video uses up a considerable amount of computer resources, which causes the computer to heat up, you’ll definitely want to install heatsinks and a fan to prevent overheating.

OpenShot is a free, open-source video editor that’s lightweight and easy to pick up. Admittedly, it won’t have the same features as Premiere Pro or DaVinci Resolve, but it’s still a functional video editor. Image via Alejandro Medellin.
The Operating System (OS) that makes this all possible is the Linux-based Rasbian Buster OS — you can also use Ubuntu and other Linux-based operating systems. To do that, download the Raspberry Disk Imager from the Raspberry Pi Foundation onto your computer. Next, select the MicroSD card you wish to use, pick the version of Raspbian Buster you want — I recommend the full version, which comes with loads of software — and write the image onto the MicroSD card. Finally, place the MicroSD card into the RasPi and boot it up. There’s a whole setup process to get through before you can download your video editor of choice, and you may want to read this as well to get up to speed on the Raspbian Buster OS.
Installing Video Editing Software
After you set up the RasPi, you’re free to use Raspbian Buster and install new software. Kdenlive and OpenShot are two video editing softwares compatible with the RasPi, so give them a shot. Installing software works differently in Raspbian, and there are two ways to do it. You can open up the terminal and type sudo apt-get install kdenlive or sudo apt-get install OpenShot. When the terminal asks if you’d like to continue, hit the Y key, then the enter key. Alternatively, click on the Raspberry Pi icon on the top left corner and head to preferences>add/remove software, which is where you can search for and install new software.


Using the terminal to install new software can be intimidating at first, but there’s another option. Open the Add/Remove software, which acts like an app store. The graphical user interface may not be as sleek as the Apple App Store, but it’s much better looking than the terminal. Image via Alejandro Medellin.
Though it won’t replace your dedicated editing rig, it’s possible to do light editing (1080p, 30fps) with the RasPi, and you can take it anywhere. When you’re not editing video, the Raspbian OS offers a great desktop experience capable of more than just video editing. You can surf the web (Chromium), edit images (GIMP), write and run Python code (Thonny), and it comes with a full suite of office apps (LibreOffice). Not bad for less than $100. It also plays a Raspberry Pi edition of Minecraft.
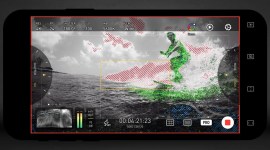
Security Cam/Livestream
Web-based security cameras are all the rage these days, but they can do more than keep a watchful eye on your home. With the addition of a Raspberry Pi Camera Module, which roughly costs $25, your RasPi can be made into a security camera or livestreaming feed.
I completed this project recently, and although there were several moments of frustration, it turned out okay. Take a look at the comments section if you run into trouble. When the RasPi is turned on, I can see my living room — and spy on my mischievous cats — by simply typing a specific URL on any browser. I can even configure the device to be accessible outside of my home network.
This project uses a piece of software called Motion, which records clips whenever it senses movement. You can configure the resolution, orientation, and fps of the recordings. If you don’t want to spy on your pets, this handy camera is also perfect for nature shots. The No IR — No Infrared (IR) filter, hence the name — version of the camera module is excellent at capturing footage in low-light conditions, which makes for spooky, Blair Witch-style shots. With the camera installed, you can also use the command line or Python to record video. Maybe it’s not the most portable, high-end camera on the market, but, on the other hand, it costs less than a 4K MicroSD card. If you value privacy and security, this is a better option than buying an intrusive security camera from a large tech company.
Tinker Away
It’s hard to believe that such a tiny, inexpensive machine can be a NAS server, a desktop, a security camera, an MP3 player, retro game console, weather station, and so much more. Now more than ever, as we run out of things to watch and read, it’s worth learning something new even if it’s just to pass the time. If you have an old RasPi collecting dust somewhere, give it a fresh purpose and learn something new.
If you’re serious about it and want to make more wonderful RasPi projects, it’s worth picking up a soldering iron to learn how to solder, learn to use the Linux terminal, and code in Python. With those three skills, you can make any idea come to life. When the world gets back to normal, you can say you learned about the Raspberry Pi, but maybe not the one people will assume. After all, it seems everyone is a baker these days.
Cover image via mattcabb.
Want more tips on finding affordable video gear? Check these out.