

Smoke ConnectFX: Degrain and Denoise

Noise in your video? Autodesk Smoke 2013 has a few nodes that can help clean up those shots. Check out how to use the Degrain and Denoise tools in Smoke.

With film you have to deal with grain when compositing. With video, even when you are just video editing, noise is the enemy of good looking images. There is a fine line between grain and noise. Grain is often welcome and adds an earthy quality to your images. Noise on the other hand is an unwanted artifact created from low light situations, poor camera sensors, and use of electronic gain. Autodesk Smoke has some great tools to help denoise and degrain your images.
Smoke’s Degrain Node:

Film is slowly dying. Kodak and Fuji have pretty much ceased selling film stock. Now, there is still some film out there, and if you are working with images transfered from fill you might have the need to degrain that film. The main reason for using degraining images would be in compositing and in chroma-keying. Often times film grain can make pulling a key a challenge due to the movement of the grain. When degraining for keying, you would degrain your front image to produce a clean matte, then use that matte in keying the original “grainy” fill.
[Click for larger image]
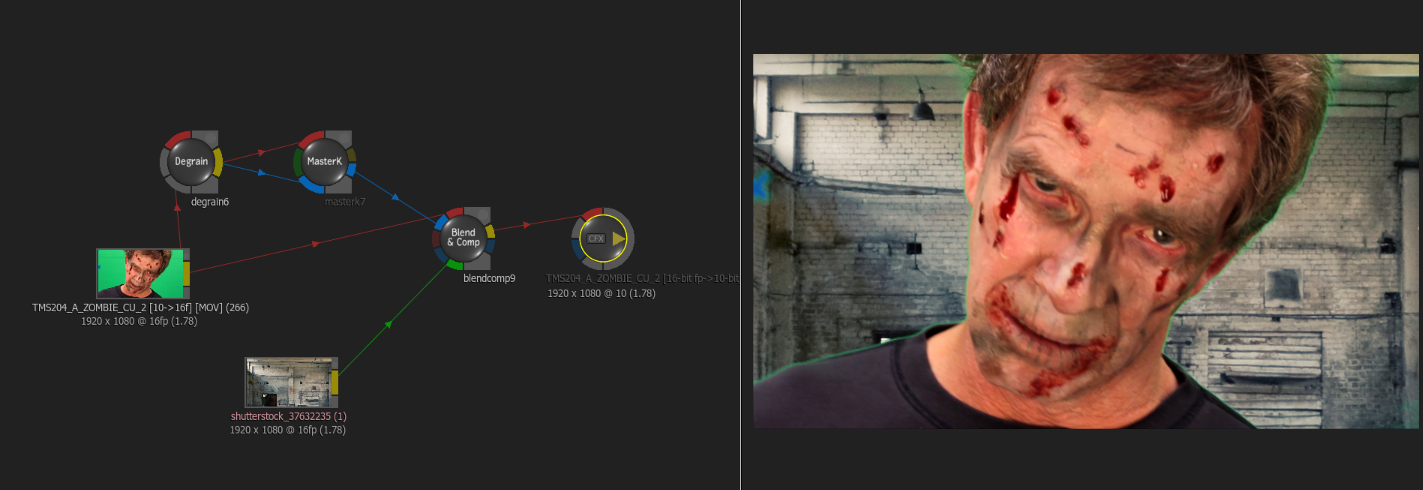
Another reason would be if you are mixing film elements with video elements, you can degrain the film clips to better match the clips from shot to shot. Let’s take a look at how to degrain your video footage in Smoke…
The first step in degraining your clip is to tell the node whether your clip is Progressive or Interlaced. There are 2 groups of sliders. RGB Average and RGB Sharpen. You can adjust the sliders independently for the RGB channels or you can activate the proportional button which will move them together.

More than likely the amount of grain is not uniform across the color channels, so adjusting the RGB channels separately is your best bet. It’s a delicate balance between degraining and maintaining the integrity of your image. You don’t want to over soften your image. The next set of sliders are for sharpening your image. The sliders work the same, as you can individually add sharpening to the RGB channels.
So how can you tell how much grain is in each channel so you know how much to adjust it? With the VIEW Options, use the R, G, and B buttons to control the display of the corresponding channels. Enable Exclusive and then click R, G, or B to view each channel exclusively as a greyscale representation.

As you view each channel separately in grayscale, you can better lessen the amount of grain in that channel. Setup your screen in 3 up view to see the 3 channels together.
[Click for larger image]

Obviously after you degrain your image, and process it further, you may want to add grain back in to the shot. This would be done with the Regrain Node.
Smoke’s Denoise Node:

There are a lot of good denoise plugins for cleaning up video. Premiumbeat blogger Danny Greer highlighted a few in this previous blog post. Smoke has a denoise node that works very much like the others. If you are familiar with Neat Video, you will find the denoise node works in a similar way.
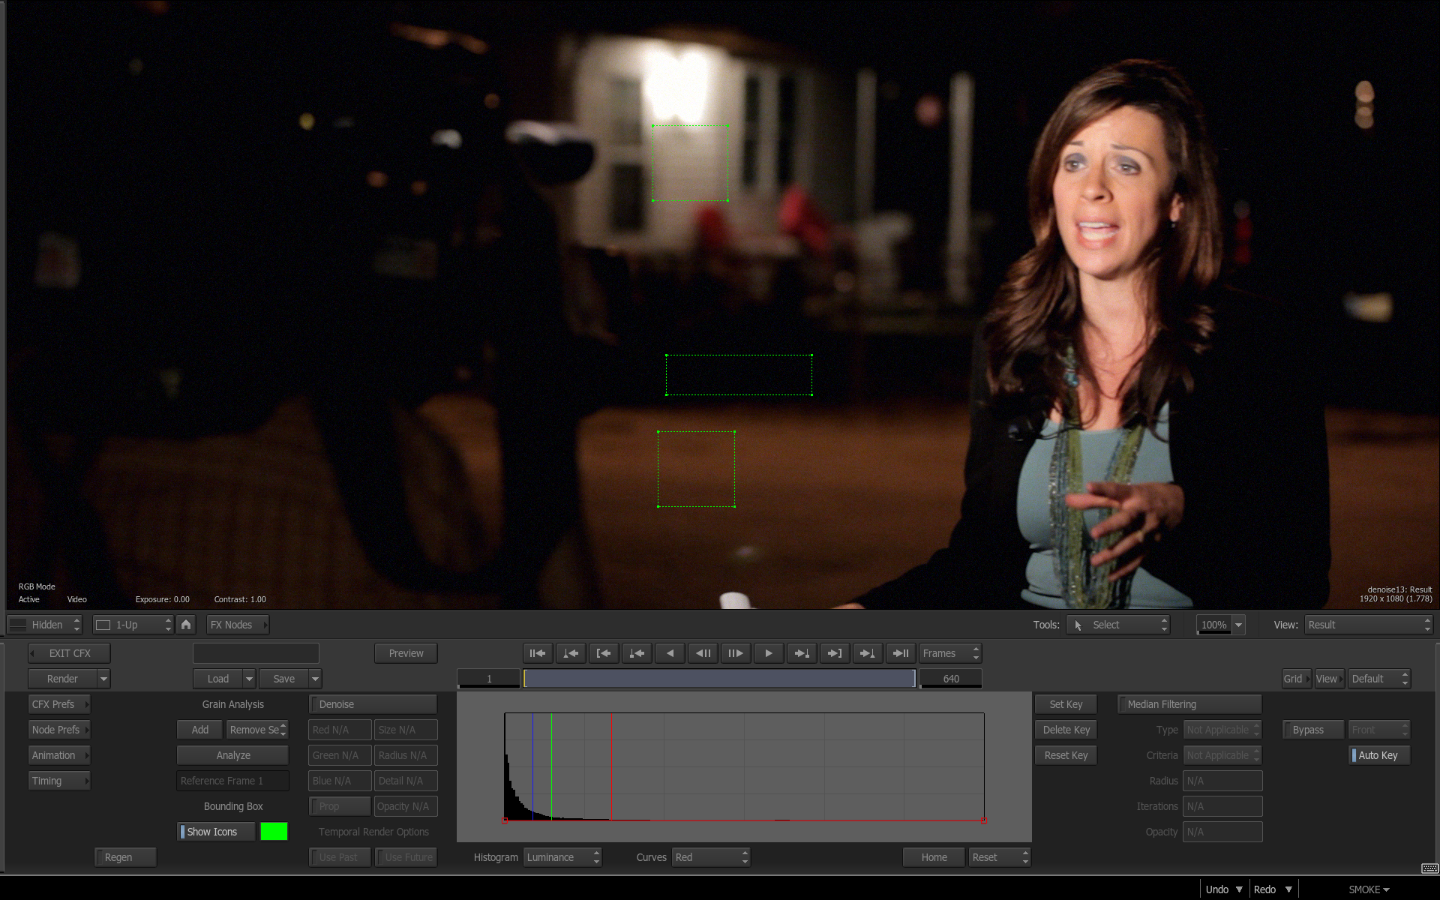
To denoise your video in Smoke, you’ll first need to analyze your clip with the denoise node to tell it what noise you would like to remove. You can add as many analyze frames as you need. Click the ADD button and you can then positon the box, resizing as needed, over an area of your clip that contains the offending noise. You can also remove the boxes with the “remove selection”. If you need to, you can change the color of the analyzing frames to better see it over your image. Once you have your noisy areas selected, simply press the ANALYZE button.
[Click for larger images]

After the analysis, you can make adjustments. You can easily toggle the “clean up” on and off by clicking on the “denoise” button. The Red, Green, Blue level adjustments will increase the amount of the denoise in that channel. The default is 1, while a value of 0 will nullify the denoise effect. Increaseing the value above 1 will create more denoise effect in that channel. You would then make adjustments to the Grain Size field. This setting would be the pixel size of the grain you are trying to remove.

The grain size default is 3, but for 4K images it might need to be higher. The Radius value is the blur radius. A higher value will add more pixels to the blur and increase rendering time. To sharpen the image back, much like with the degrain tool, you can make small adjustments to the Detail field. It is recommended you enter 0.05 to 0.15 as an initial value. If you want to further bring back detail you can adjust the Opacity level. This will perform a mix between the orignal source and the denoised result.
[Click for larger image]

The Past and Future Frames selections will allow the analyzer to see how the noise moves between frames to give you a better analysis. This will also increase rendering times. One great use for the Denoise Node is to use it to smooth skin. If you place an analysis box on someones face, you can add youth and beauty to your talent, as the denoise tool will soften just the skin tones.
[Click for larger image]

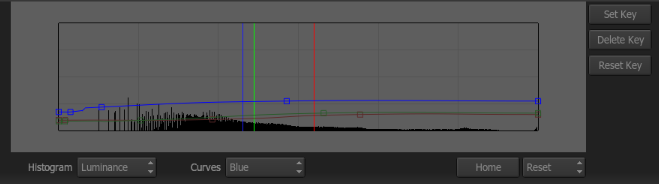
Our friend the Smoke Histogram returns again in this module, but this time the curves relate directly towards the amount of denoise applied in the RGB channels.
When you add an analyzer box you will see the RGB plot points in relation to the histogram. As you add more boxes, and select each one, the plot points will update in the histogram display. When the analysis is made, keyframes get made in the RGB curves which equate to the level of noise reduction needed. These curves are also keyframeable. You can make adjustments to the curves and have them change overtime as your video changes. This gives you a tremendous amount of control in cleaning up your shots. If the automatic analysis is good, then you won’t need to adjust anything. But, you have the power if you want it.
The curves work like you would expect. The left side of the histogram is for dark areas of the image, and the right is for highlights. Moving a curve point higher in the curve will increase the amount of noise reduction and lowering the point will decrease it.
[Click for larger image]
The last set of controls aren’t really settings for the denoise functions that we have discussed. These controls are the Median Filter settings. You can use them with a denoise analysis, or just as a standard Median Filter. You activate the filter by lighting the Blue LED button. You have your choice of Standard or Advanced. Advanced gives you more precise filtering. The rest of the settings are pretty simple. You can choose to filter based on Luminance, RGB Vetctor or RGB Component. The Radius will adjust the region in pixels from the center and Iterations will adjust the number of times the effect is applied recursively. And you also have an Opacity slider to mix back to the original.

The Median Filter can give your video a very watercolor, painterly effect when applied heavily. The look is good, but give yourself plenty of time for rendering as this type of filtering is very processor intensive.
[Click for larger image]

I encourage you to Smoke’s Denoise and Degrain nodes on your footage and compare the results with plugins you may currently be using. If you find any interesting results, please feel free to post a comment about it below.


