Autodesk Smoke: 2D Histogram & 2D Transform Nodes
Learn how to use each node inside ConnectFX for Smoke 2013. In this post, we’ll take a closer look at the 2D Histogram & Transform Nodes.
This is the first in a series of posts that will explain each of the nodes inside ConnectFX for Smoke 2013. Over the next few months, about as long as the Pre-Release Trial will be going on, I’ll breakdown each of the tools regarding their UI, functionality and uses. Some Smoke nodes are simple, some more complex, and some you can find very creative uses for.
So let’s start at the beginning….
2D Histogram
What can you say about a Histogram? It’s a very simple tool, yet it can do so much by quickly and easily adjusting the low and high ends of your clips.
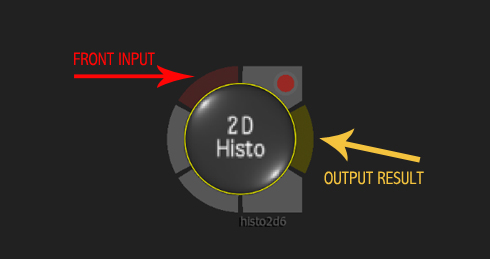
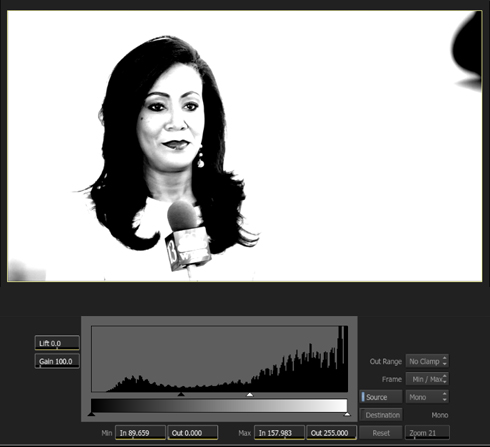
The Smoke 2013 2D Histogram node can show you how the pixels are distributed on your clip. The dark blacks of your image are shown on the left side and the bright whites are on the right. Midtones are everything in the middle.
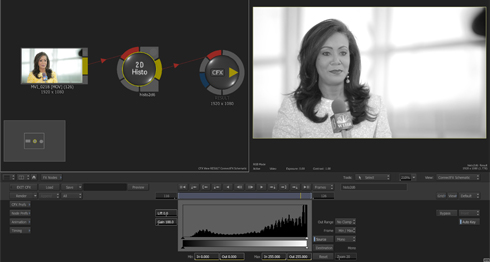
The interface is pretty standard for histograms. You can set overall Lift and Gain with the sliders in the upper left. This is processed before any other histogram adjustment. However, the real power and usefulness of the 2D Histogram is in the little triangle sliders. You can move the top arrows, and compress the tonal range of the image. Moving the black arrow in will increase the dark areas, making blacks blacker. The more you move towards the center, the more of your image will be compressed and detail lost. The same goes for the top white arrow. By moving it towards the center you are squeezing more of the tonal range and making more of the highlights whiter.
The bottom arrows(triangles) will set the Output levels of your image. You can raise the black levels making the blacks more gray, or lower the whites making them less bright and more grey. The numeric values at the bottom give you the actual values for the pixel ranges based on bit depth:
8bit=0-255, 10bit=0-4095, 16bit(fp)=0 to 1.
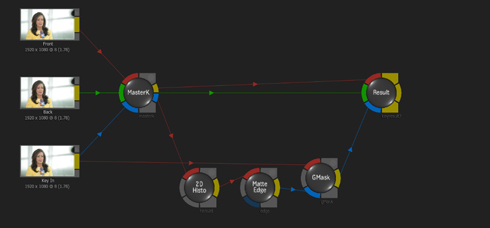
This compressing of the tonal range can be quite useful in pulling a matte from an image to avoid more rotoscoping than is needed. This is why you will find the 2D histogram as part of all of the (Chroma)Keyers inside Smoke. It’s great for ‘clipping’ some rogue pixels in your chroma-key either in the blacks or whites to make your mattes cleaner.
The side adjustments are for the users and allows for different ways to view the histogram. You can view it in traditional Mono, or RGB, as well as view the Source levels in contrast to the Destination or result levels after you have moved the sliders. You can also Zoom the display to examine where all of those pixels are hiding along the spectrum. And there is a RESET button to bring the node back to normal, although you can also right click and reset any node from the CFX schematic.
2D Transform
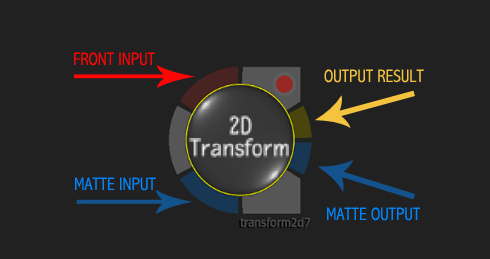
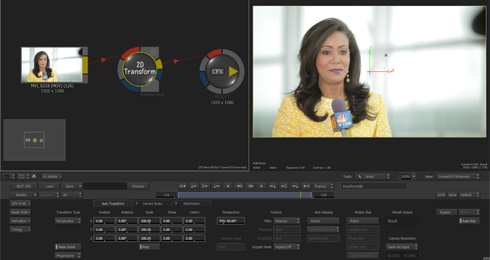
The 2D Transform node is a great tool. It is a basic X, Y, Scale tool for repositioning your clips in 2D space. There are 2 transform types:
- Pan & Scan, which is only X, Y and Scale
- Perspective which activates Rotation and POV scale.
Smoke defaults to the Perspective type, and honestly, I don’t know why you would ever need Pan and Scan, because you can do that in Perspective. There might be a speed increase in rendering, but you’d be hard pressed to see it in practice. Smoke artists used to use the RESIZE node for Pan and Scan in the past, but this is the tool to use now.
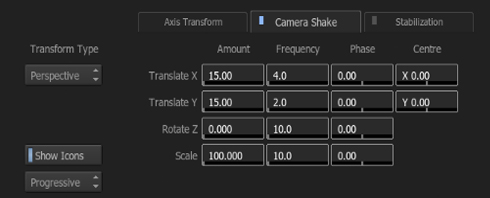
There are 3 tabs to work with. The AXIS tab will allow you to set keyframes for all of the various X,Y,Z, Scale, Shear values, and change the Axis Centre point. The next tab is Camera Shake. You can activate the Camera Shake by highlighting the blue led in the tab.
The settings will create a random movement along the X,Y,Z (rotation) and Scale of the image over the length of the CFX effect. The amount of movement in X, Y, Z(rotation) and Scale is measured in pixels and controlled by the sliders. These are keyframeable as well, so you can ramp the intensity of the shake. The Frequency sliders take a minute to wrap your head around. For the mathematicians and physicist, it’s easy… but for the rest of us it breakdowns like this. The higher the value in the Frequency field the slower the shake will be. You would think it would be faster as higher values usually means more, but in this case it’s the distance between each peak of the wave. Therefore, a larger number means more time between one wave and the next. Bottom-line… low numbers=fast, high numbers=slow when it comes to frequency. Phase will move the position of the frequency wave in time, giving you a subtle change in animation.
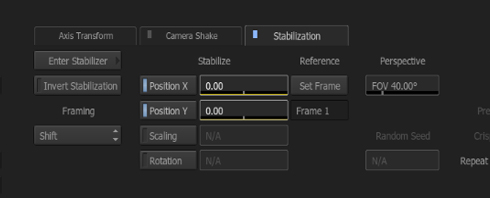
You also have a Stabilizer/Tracker in the 2D Transform Node like in many of the nodes in Smoke 2013. Once again, activate it with the blue LED on the tab. With the stabilizer you can track and stabilize a shot with 1 or 2 trackers and can track for rotation and scale. You also track in 1 2D transform node and then later on in your CFX schematic. After you’ve done some other effects, copy the node and use the Invert Stabilization button to bring your footage back to normal.
The order in which the transforms happen are Stabilize, then Shake, then Axis. So you can shake a shot, and while it’s shaking, further move it with the main Axis controls.
There is a camera perspective FOV control even though there is no physical camera, but you could use this to link an expression from an Action Camera in a more elaborate setup. You can change it here to create more extreme perspectives to your clip. The Seed value will change the random start value in the Camera Shake to allow you to tweak the look of your shake animation. The shake animation will always be the same when you play the effect, so change the seed value to make a fresh animation.
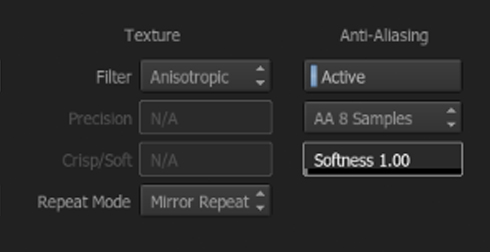
In the Texture settings you have various algorithms to adjust how your image is rendered based on the complexity of it’s pixels as it has been transformed. But more important is the option to set the image to Mirror, Tile, or Repeat Last. Mirror and Tile repeat are self-explanatory, Repeat Last will just take the edge pixels and repeat them, which will give you a pixel stretch look to the edges as the image moves from the frame.
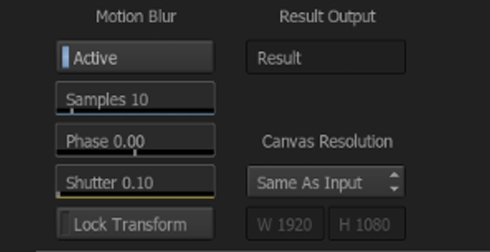
The great thing about the Smoke 2D transform node is that it has Motion Blur. This is something that the timeline AXIS effect does not. So if you need to move Text or an image with motion blur, then you need to use ConnectFX and 2D Transform over Timeline Axis. There is also the option with Motion Blur to lock the transform but keep the blur. So by locking the movement, you can add motion blur to a still object.
Another great and exploitable feature of Smoke’s 2D transform is the ability to change the canvas resolution. One reason to do this would be during stabilization, so that you don’t loose the edge information of your clip, in case you are going to invert the stabilization later on. Another reason is to use it with the repeat modes to create a larger tiled image and still maintain the resolution of the original image. This can be used with graphic elements as well to create large plates to use later in CFX with non-standard resolutions.
Stay tuned for more in this series as Premiumbeat breaks down Autodesk Smoke 2013, node by node.


