Get Ready to Film with the Sony A7 III Using These Settings
With newer camera models constantly entering the market, we’re seeing more cameras adopt a movie mode system, like the A7 III.
We’ve sailed straight past the anniversary release of the third iteration of the Sony A7’s line — the Sony A7 III — and it’s become apparent that, outside of the initial press release, we didn’t cover many elements of the camera in the same way we’ve cover others. Truthfully, I think that comes down to two factors: how many cameras came out last year and timing. Honestly, I don’t believe the A7 III came out at a mind-blowing time.
It was hot off the release of GH5s, and the Pocket 4K announcement came a few months after. I think aside from its focus features, full-frame sensor, and low-light performance, there wasn’t anything that made the camera stand out in the already-overpopulated small form factor market. I think when you’re choosing a mirrorless/DSLR for filmmaking, with anything that came out after 2017 (and in the $1,500-$2,500 price range), everything comes down to brand loyalty.
I recently acquired a Sony A7 III — solely for landscape photography. And while I had no intention of ever flipping the camera over to movie mode, I now have the option of using a 4K, S-Log, secondary camera, if I need one. Now, either I’m getting old (I’m 29), or camera menus are becoming increasingly harder to navigate. While I appreciate that there’s a constant increase in new features, and the more expensive the camera, there more additional settings, it’s quite the maze to navigate. To make things easier, here are the core elements you’re going to want to adjust to get the A7 III ready for filmmaking.
(These notes are geared toward narrative filmmaking, not vlogging. For vlog and travel videos, I recommend following Cody Blue’s A7 III guide.)
Record Settings
While we can record video files in any mode by hitting the record button on the back of the camera, we want to switch the dial to movie mode so we see an LCD overlay that relates to movie settings. First, we’re going to press Menu and jump to the second menu tab where we can adjust several video settings (Movie1). The first is the Exposure Mode. This is the in-camera method of changing the exposure modes as you would be rotating the dial on top of the A7 III. As we need to be in full manual control of the exposure, select Manual Exposure.
Underneath is our file formalities (File Format). To shoot at 4K, you need to select XACV S 4K. (This kind of selection is what I was talking about in the introduction. There’s no definite list of resolutions to select with their exact properties on display — just XACV S 4K, XAVC S HD, and AVCHD.)
Next is our Record Settings, which dictate the data rate and frames per second.
If you’re in a PAL region, you won’t be able to select 24fps or 120fps. You’ll only be able to choose between 25fps or 100fps. To activate the other options, you need to switch the camera to NTSC Mode, which you can find on page 2 of the setup menu (Setup2) under NTSC/PAL Selector. (If you’re wondering about the legitimacy of shooting with NTSC settings in a PAL region, you can read up here.) At 4K, we can only choose between 24fps or 30fps at either 60MB/s or 100MB/s. If you were to drop the film format to XAVC S HD, you could shoot through a variety of different frame rates and up to 120fps, but at 120fps, you’ll be shooting at 1080p.
Display Settings
As with any DSLR or mirrorless camera, I’d recommend some type of external monitor. As cameras get smaller, so do the LCD screens. At three inches, the A7 III is no exception. As such, we should clear up some of the display to make the feed cleaner. Also, it’s important to note that when you switch to movie mode, it looks as if crop guides appear on the image. They haven’t, it’s just that the LCD is set to display 4:3 imagery, and when you switch to movie mode, we move to 16:9, which cannot adequately fit on the LCD screen. Adding crop guides requires a further tool, which is something we cover below.
First, you want to punch the DISP Button several times until you only have the primary exposure settings showing, along with the histogram. This’ll provide the most viewing space, and you could even hit DISP again to turn the histogram off after getting the correct exposure. Alternatively, you could turn on Zebras, which are on the Camera Icon 2 menu on page 6 (Display/Auto Review1).
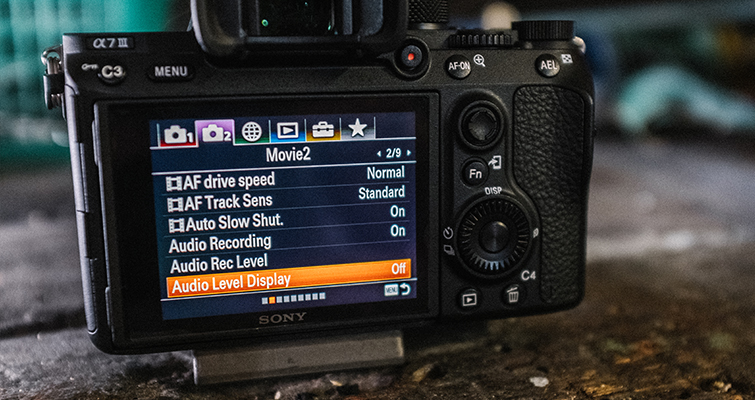
On Movie Page 2 (Movie2), we’re going to jump down to the audio level display and turn it off. This won’t turn the sound off, but it will remove the visualization. For some reason, they decided to place the audio levels almost a third into the image, instead of on or near the unused 4:3 area.
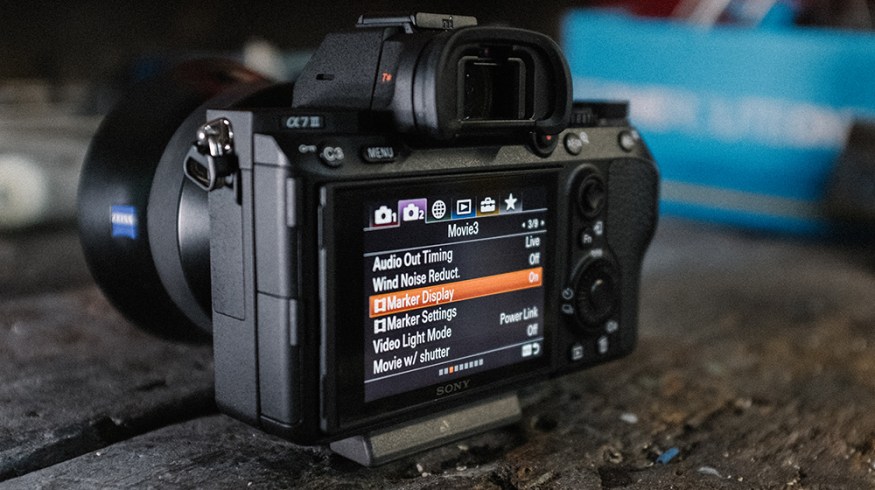
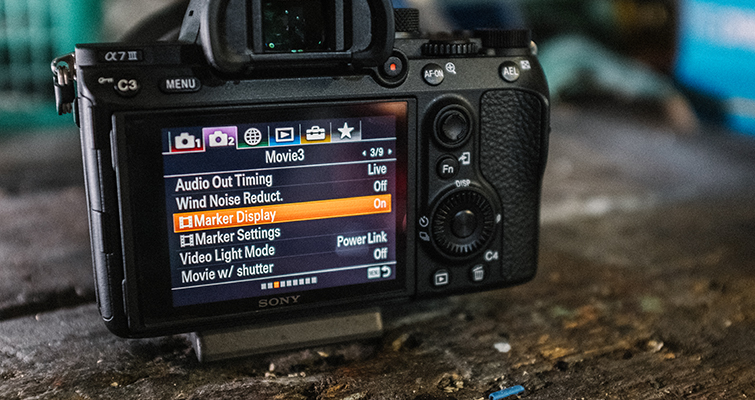
On Movie Page 3 (Movie3), we’re going to turn Marker Display ON, then jump down to Marker Settings. Here, we can turn on the 2.35:1 aspect ratio guide, for those who intend on cropping their footage or applying a letterbox in post.
For our final display feature, we’re going to turn on peaking. With such a small screen, we’re going to need help pulling focus. To do this, we’re going to head to page 13 (Focus Assist) of the Camera 1 menu, and at the very bottom, select Peaking Settings > Peaking Display > On. However, the default value can be quite heavy. Therefore, I suggest you also change the peaking level to low.
Color Settings
With the camera set up and ready, it’s up to you to change the recording settings as you see fit. For example, we need to adjust the color profile to accommodate post-production needs. However (as I said initially), the color profiles for movie mode are confusingly tucked away in a different location than the Creative Styles button for still modes. With the GH5, for example, you’d select CineD or VLog in the same menu as you’d select vivid or landscape. Not with the A7 III. To select one of the many cine profiles — Cine1-4, Slog2, Slog3, HLG1-3 — we need to go digging through the memories. (We’ll be covering which profile to use, depending on what you’re shooting, in a future article.)
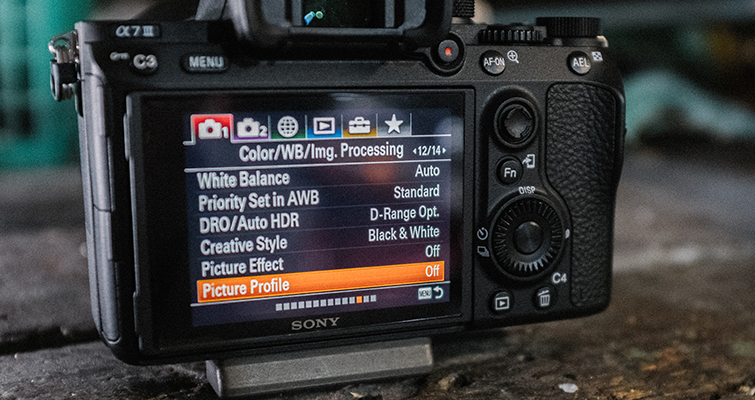
While on camera settings 1, head to page 12 (Color/WB/Img. Processing), and at the bottom of the menu select Picture Profile. You’ll see ten pre-built profiles that you can adjust.
- PP1: Example setting using [Movie] gamma
- PP2: Example setting using [Still] gamma
- PP3: Example setting of natural color tone using the [ITU709] gamma
- PP4: Example setting of a color tone faithful to the ITU709 standard
- PP5: Example setting using [Cine1] gamma
- PP6: Example setting using [Cine2] gamma
- PP7: Example setting using [S-Log2] gamma
- PP8: Example setting using [S-Log3] gamma and the [S-Gamut3.Cine] under [Color Mode].
- PP9: Example setting using [S-Log3] gamma and the [S-Gamut3] under [Color Mode].
- PP10: Example setting using [HLG2] gamma and the [BT.2020] under [Color Mode].
With these newer camera models — such as the Sigma FP and the Panasonic Lumix S1H — we’re seeing more cameras adopt a system that when you flick the camera to movie mode, the settings accommodate the formality of a cine camera. Of course, the A7 III is a stills camera first, but the movie settings are all over the place. So, follow these tips and hit the ground running.
Looking for more on video gear? Check out these articles.


