How to Speed Up or Reverse a Clip in Premiere Pro
Learn how to speed up video and how to reverse a clip in Premiere Pro to open up a new world of creative possibilities for your footage.
Once you learn how to speed up and reverse your footage in Premiere Pro, you can use these techniques for creative transitions and visual effects. I use these essential skills often in my own projects, like in this tutorial on creative ways to use whip pan transitions. In one example, I show how to create a fake knife throw and catch, with the blade landing only inches from the talent’s face. To make the illusion work, I combined two shots — one of my talent “throwing” the knife, the other of her “catching” the knife. Each shot uses a whip pan, which serves to mask the edit point and make it look like one continuous shot.
https://gph.is/2Kqpjr3
For timing and safety purposes, I shot the second (catch) shot in reverse. In Adobe Premiere Pro, I simply reversed the second clip and voilà, my talent could now catch a knife at high speed. To really punch up the intensity of the effect, I increased the speed of both clips.
https://gph.is/g/ZrRq1Vl
While the whip pan took all of the glory and credit for making this visual effect work, the Speed up and Reverse time-effects were the unsung heroes. Let’s take a closer look at how you can speed up and reverse a clip in Premiere Pro.
Where to Find the Clip Speed/Duration Controls
In this example, I have the two clips from my knife-throwing scene. As explained earlier, I want to reverse the second shot, then slightly speed up both.
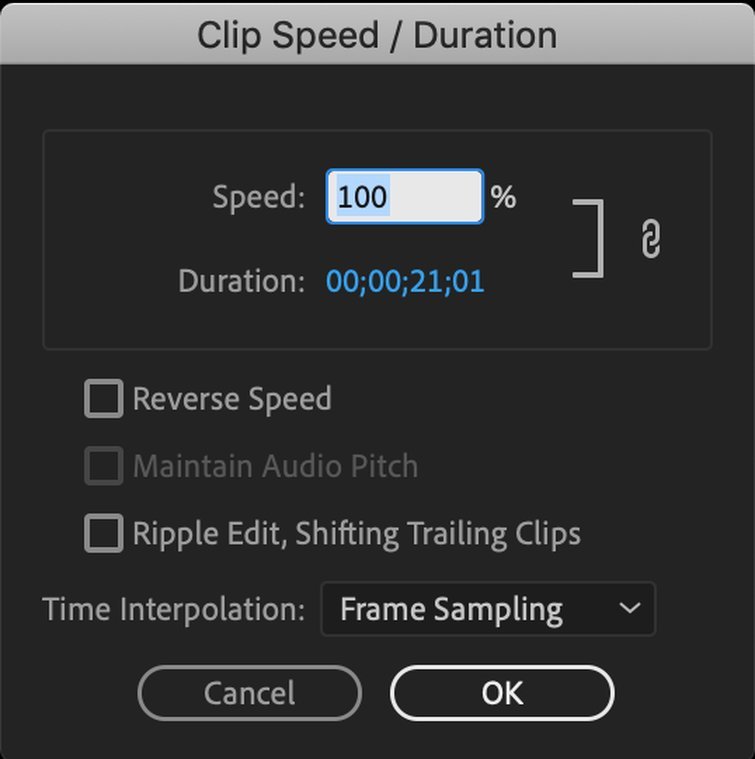
The Clip Speed/Duration panel is where all the magic happens. This hidden tool isn’t found under the Window menu, where all of the other control panels live. You have to look under the Clip menu to find this gem. A simple control+click on a clip will also do the job.
How to Reverse a Clip in Premiere Pro
- Select the clip in your timeline.
- Open Clip > Speed/Duration and select the Reverse Speed checkbox. Hit OK.
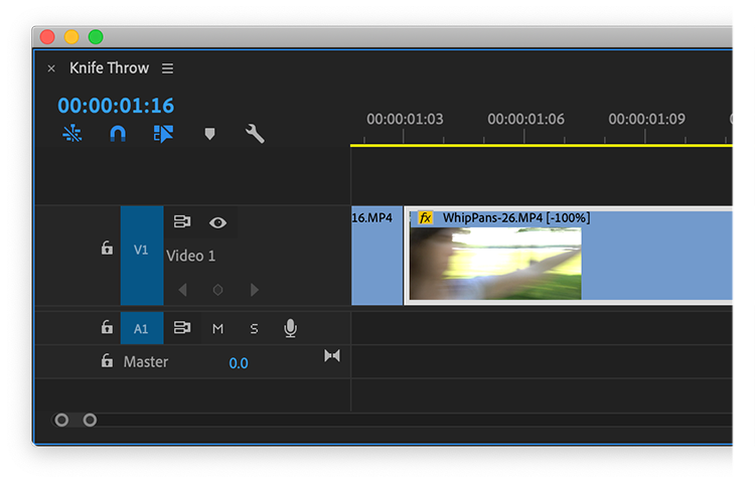
- The clip will show a -100% label on it, denoting both the speed and direction of the clip.
Let’s walk through it. I’ll select the second clip from above and and open up Clip > Speed/Duration. Now, I’ll simply press the Reverse Speed button. In the next section, we’ll discuss some of the other options you see in the the Clip Speed panel.
Once reversed, my clip will show a -100 percent label on it, denoting both the speed and direction of the clip.
How to Speed Up a Clip in Premiere Pro
- Select the clips you want to speed up.
- Open the Clip > Speed/Duration panel, or right click and select Speed / Duration.
- In the speed field, type in an increased speed. This will automatically adjust the duration of the clip, but you can unlink these controls and adjust the duration manually. When you’re done, hit OK.
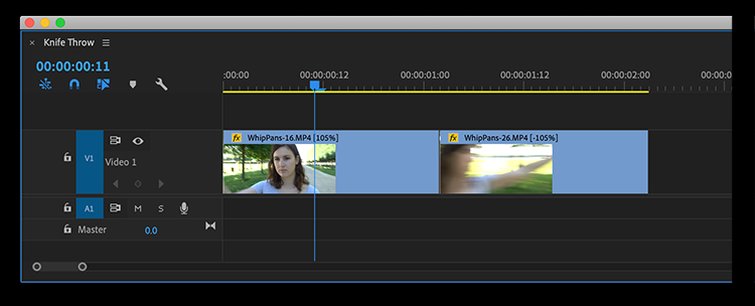
For this particular scene, I’ll select both clips, at the same time, and open Clip > Speed/Duration. Next, I’ll give both clips a slight bump in speed, adjusting the percentage to 105 percent. To automatically close those gaps, I’ll activate Ripple Edit.
When adjusting the speed of a video clip, you have a number of creative options because you can specify a specific percentage or duration. These two attributes are linked together by default, but can be disconnected, if need be. This is especially helpful if I want to use multiple clips — all at the same high speed — but at different, very specific durations.
I can apply Speed/Duration changes to multiple clips, at the same time, and even switch between three different Time Interpolation modes. Frame Sampling will repeat or delete frames as needed to fill in a sequence, Frame Blending will smooth out the motion between repeated frames, and Optical Flow will create new frames. These options are important if you’re slowing footage down, as it can start to stutter.
The Ripple Edit function will automatically close gaps after the effect is applied. And, once again, the new speed percentage will be reflected on the clip labels and tooltips on the timeline.
Rate Stretch Tool
You can also use the Rate Stretch Tool to change the speed and duration of clips in Premiere Pro, allowing users to manually speed up clips via a trim in the timeline. This tool is hidden away underneath the Ripple and Rolling edit tools. Use shortcut key R to activate.
Learn more tricks and techniques to use in Premiere Pro…
- The 3 Easiest Ways to Cut Clips in Adobe Premiere Pro CC
- How To Easily Fix Media Pending Error (After Render) in Adobe Premiere Pro
- Roundup: 5 Awesome Editing Effects in Adobe Premiere Pro
- How to Properly Pancake Timelines in Adobe Premiere Pro
- 6 New Features in Premiere Pro’s Essential Graphics Panel
Cover image via Kawin Ounprasertsuk


